Tuesday, July 15, 2014

No Business Like Snow Business Card

Hi everyone! I'm here to share another quick 3"x6" card I created using My Mind's Eyes Merry 6"x6" pad and the Inkadinkado Christmas Characters stamp set. I stamped the snowman on some lined cardstock from the paper pad and stamped the hat, scarf, red bird and carrot on scraps from the same pad and fussy cut out and adhered to the snowman image. I cut various sizes of rectangles and glued to the card along with the snowman image. I stamped the sentiment on a piece of cardstock and glued to the card. Easy peay :-)


If you have any questions please let me know. Thanks for stopping by, hope your Tuesday is great and enjoy creating!!!


Monday, July 14, 2014

Red, White and Beautiful Snowman

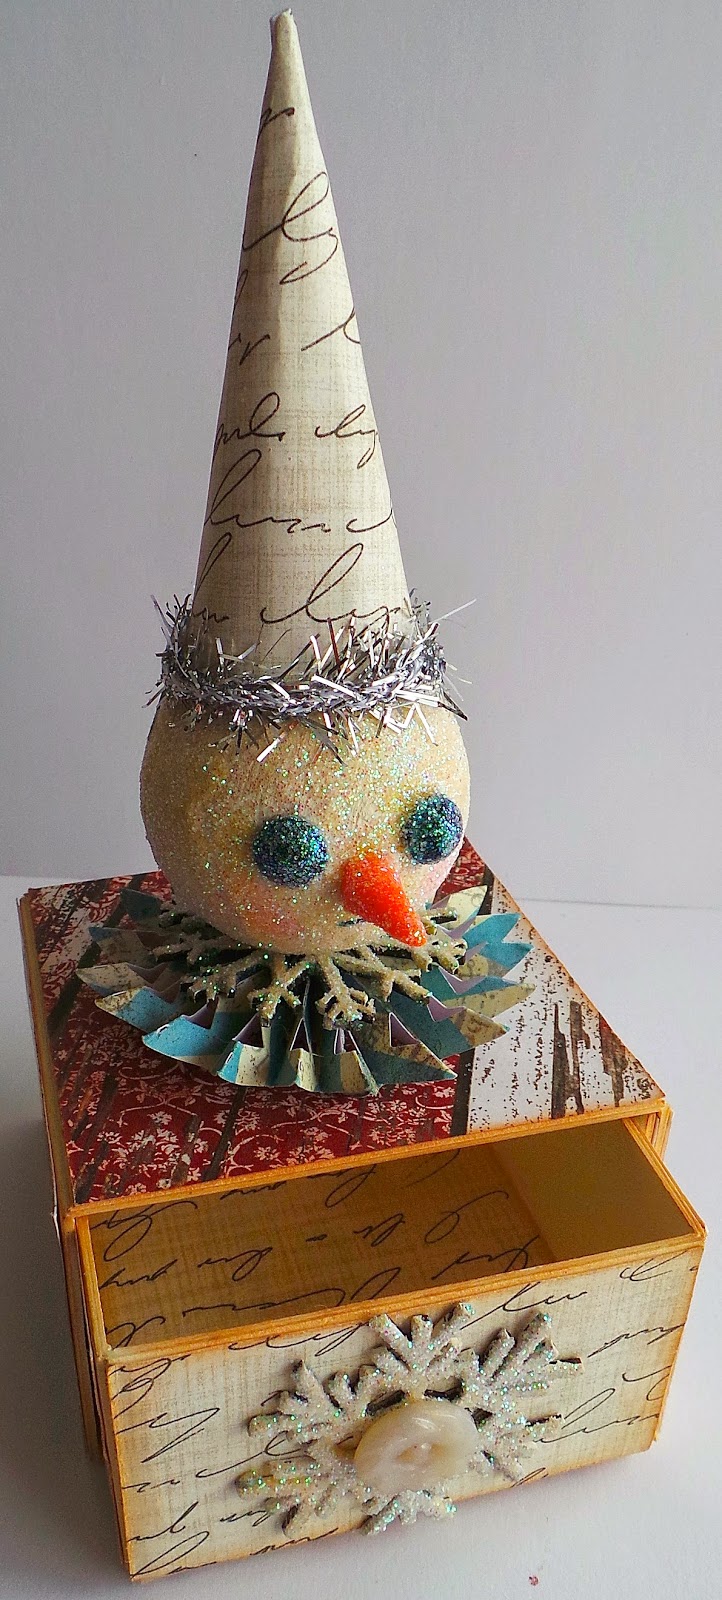
Hi everyone! I'm here to share my project for Eileen Hull's Art with Heart Challenge and this month's theme is Red, White and Beautiful. I didn't do the traditional 4th of July summery project but I decided to "practice" making snowmen. I've been asked to participate in a craft show in September (which I'm still trying to decide do I really want to do it) and I had bought a 4 ft kinda of silvery/looks like it has turned (vintage looking)  tinsel tree I bought at Hobby Lobby for 66% off, after Christmas, and with lights too. The tree reminds me of when I was little and would go to my great grandmother's house for Christmas. She had a big silver tinsel tree with the color wheel and I would sit in front of it and watch it change different colors. So cool! :-) I plan on making snowmen to add to the tree along with some of my other ornaments I have collected through the years.
I decided to try out Eileen Hull's candy drawer on this project. I started by cutting out the candy drawer from mattboard and then cut out the drawer again with scrapbook paper. I inked and adhered the scrapbook paper to the drawer. I then assembled and adhered the drawer together and let dry. I used a combination of Zip Dry glue and Mod Podge and cloths pin to hold it together until it dried.


The snowman head I gessoed, painted with white acrylic paint and once dried I lightly drawed out the placing of its eyes, nose and mouth. The mouth I painted on with black acrylic paint and  added pink for the cheeks. I shaped and then baked the "carrot nose" according to the direction on the Sculpey Clay packaging. Then I glued two Black Dew Drops and the carrot nose to create his face.  


I applied Antique Mod Podge to all of the snowman's head…nose and eyes too…and then glittered him up. Also I painted two Snowflakes Chipboard Diecuts white and added glitter to them too. 


I have drawn out my own pattern to created the hat for my snowman. I roll it up first to determine where I'm going to glue it and to make sure the size is right. Once I've got that right I glue together and then adhere the tinsel twine around the brim and then glue to the snowman's head.


I also cut out a medallion diecut, assemble and glue to the top of the candy drawer along with a snowflake diecut. Then I adhered the head on top of the snowflake. I also added a snowflake and button to the drawer to top it off. Now all I have to do is fill it up with goodies when Christmas rolls around and give it to that someone special. :-)


Supplies Used:

Sizzix: Eileen Hull's: Candy Drawer Diecut, Medallion Diecut
Paper Studio Scrapbook Paper
Smooth Foam 1 1/2" Ball
Gesso
White, Pink and Black Acyclic Paint
Antique Mod Podge
Button
Glitter
Orange Sculpey Clay
Robin's Nest: Black Dew Drops
Tim Holtz: Tinsel Twine
Chalk Ink 

If you have any questions about this project let me know. Please be sure to stop by Eileen Hull's Art with Heart Challenge and check out what everyone else has created and there is also time to still play along!
Thanks for stopping by, hope your Monday is wonderful and enjoy creating!!!


Saturday, July 12, 2014

Hope Your Birthday is a Hoot!!!

Hi everyone! I'm here to share a quick card that I created using my own personal owl I hand drawn and cut-out, die cuts  scraps of scrapbook paper, cardstock and a sentiment I printed off the computer. I finished off with sequins, dew drops and buttons.


I'm off for a motorcycle ride with my hubby. I hope you enjoy the card and if you have any questions let me know. Hope your Saturday is wonderful and enjoy creating!!!


Thursday, July 10, 2014

Christmas July Penguin Card

Hi everyone! I know you're thinking really??? Christmas cards in July??? You've got to be kidding me!!! Well, lets face it Christmas will be here before you know it and for once I would let to be ahead of the game so to speak instead of scrabbling around at the last minute trying to make something.  So I will be sharing a card and other craft related projects here and there this month. :-)
I used a 6"x6" paper pad from My Mind's Eye Merry Collection and Christmas Characters Stamp Set from Inkadinkado. I folded a 6"x6" piece of cardstock to create a 3"x6" base, stamped and fussy cut the penguin out, cut, layered  and adhered cardstock to the front of the card. Stamped and cut sentiment out and framed with cardstock and adhered to card. Easy peasy card  using only a 6"x6" pad and one stamp set. :-)


Thanks for stopping by, hope your Thursday is wonderful and enjoy creating!!!


Monday, July 7, 2014

Once in a While Card

Hi everyone! After taking a mini craft break this past week I'm back to share a quick card I created using Robin's Nest Wedding {in love} Collection.
The card was very simple and quick to put together. The base of the card is Silver on Cream Classic Swirl Cardstock and I added vellum over the top of the base to soften the look of the card. I cut the dancing couple from the Wedding Cut-Outs Cardstock which is two sided and cut a suit and shoes out from the  Dark Vanilla Silver Glitter Cardstock for the gentleman dancer.  I embossed the silver chipboard and framed with the backside of the Dark Vanilla Silver Glitter Cardstock, cut a banner and adhered all to the card along with lace and dew drops. I also used the "Once in a while" sentiments which is from the Wedding Cut-Outs Cardstock which I thought was the perfect saying to go along with the dancing couple.


I cut a frame for to the sentiment and added pop dots to add dimension and a medallion diecut to finish off the card. 


Robin's Nest: Silver on Cream Classic Swirl Cardstock, Dark Vanilla Silver Glitter Cardstock, Wedding Cut-Outs Cardstock, Irredescent Classic Glitter Swirl Vellum, Wedding Swirl Glitter Cardstock, Silver Glitter Chipboard, Dark Vanilla Dew Drops
Other supplies Used:
Lace
Sizzix- Brenda Walton: Medallion and Dancers Diecuts, Tim Holtz: French Script Embossing Folder
Chalk Ink
Sequin 


If you have any questions please let me know. Thanks for stopping by, hope your Monday is wonderful and enjoy creating!!!


Sunday, June 29, 2014

Artsy Stuff Folio~Part 2

Hi everyone! I'm here to share the inside of my finished folio with you. If you didn't see last Sunday's post of how I I created this folio you can find it here. I created it using the Paris Collection by the Robin's Nest which is 20% off this month. It is simply a gorgeous paper collection and I had some much fun creating this folio with it.


Since I have tons of scraps of paper, embellishments, print-outs, stamped images and stickers I decided I really needed to use up some of my stash thus the name, artsy stuff folio. :-) You can check out the rest of my post over at the Chattering Robin's blog to see how it came out.


Thanks for stopping by, hope your Sunday is awesome and enjoy creating!!!


Saturday, June 28, 2014

You Will Forever be My Always ATB

Hi everyone! Can you believe this month is almost over and July is just around the corner??? I keep asking myself where did June go??? I have had a crazy June to say the least, emergency room, a hospital stay and now a rash that my husband says is shingles…I say no way cause I don't hurt just itch. I have felt like I just don't have enough hours in the day to get everything accomplished that is on my to do list. Maybe July will be good to me…fingers crossed. :-)
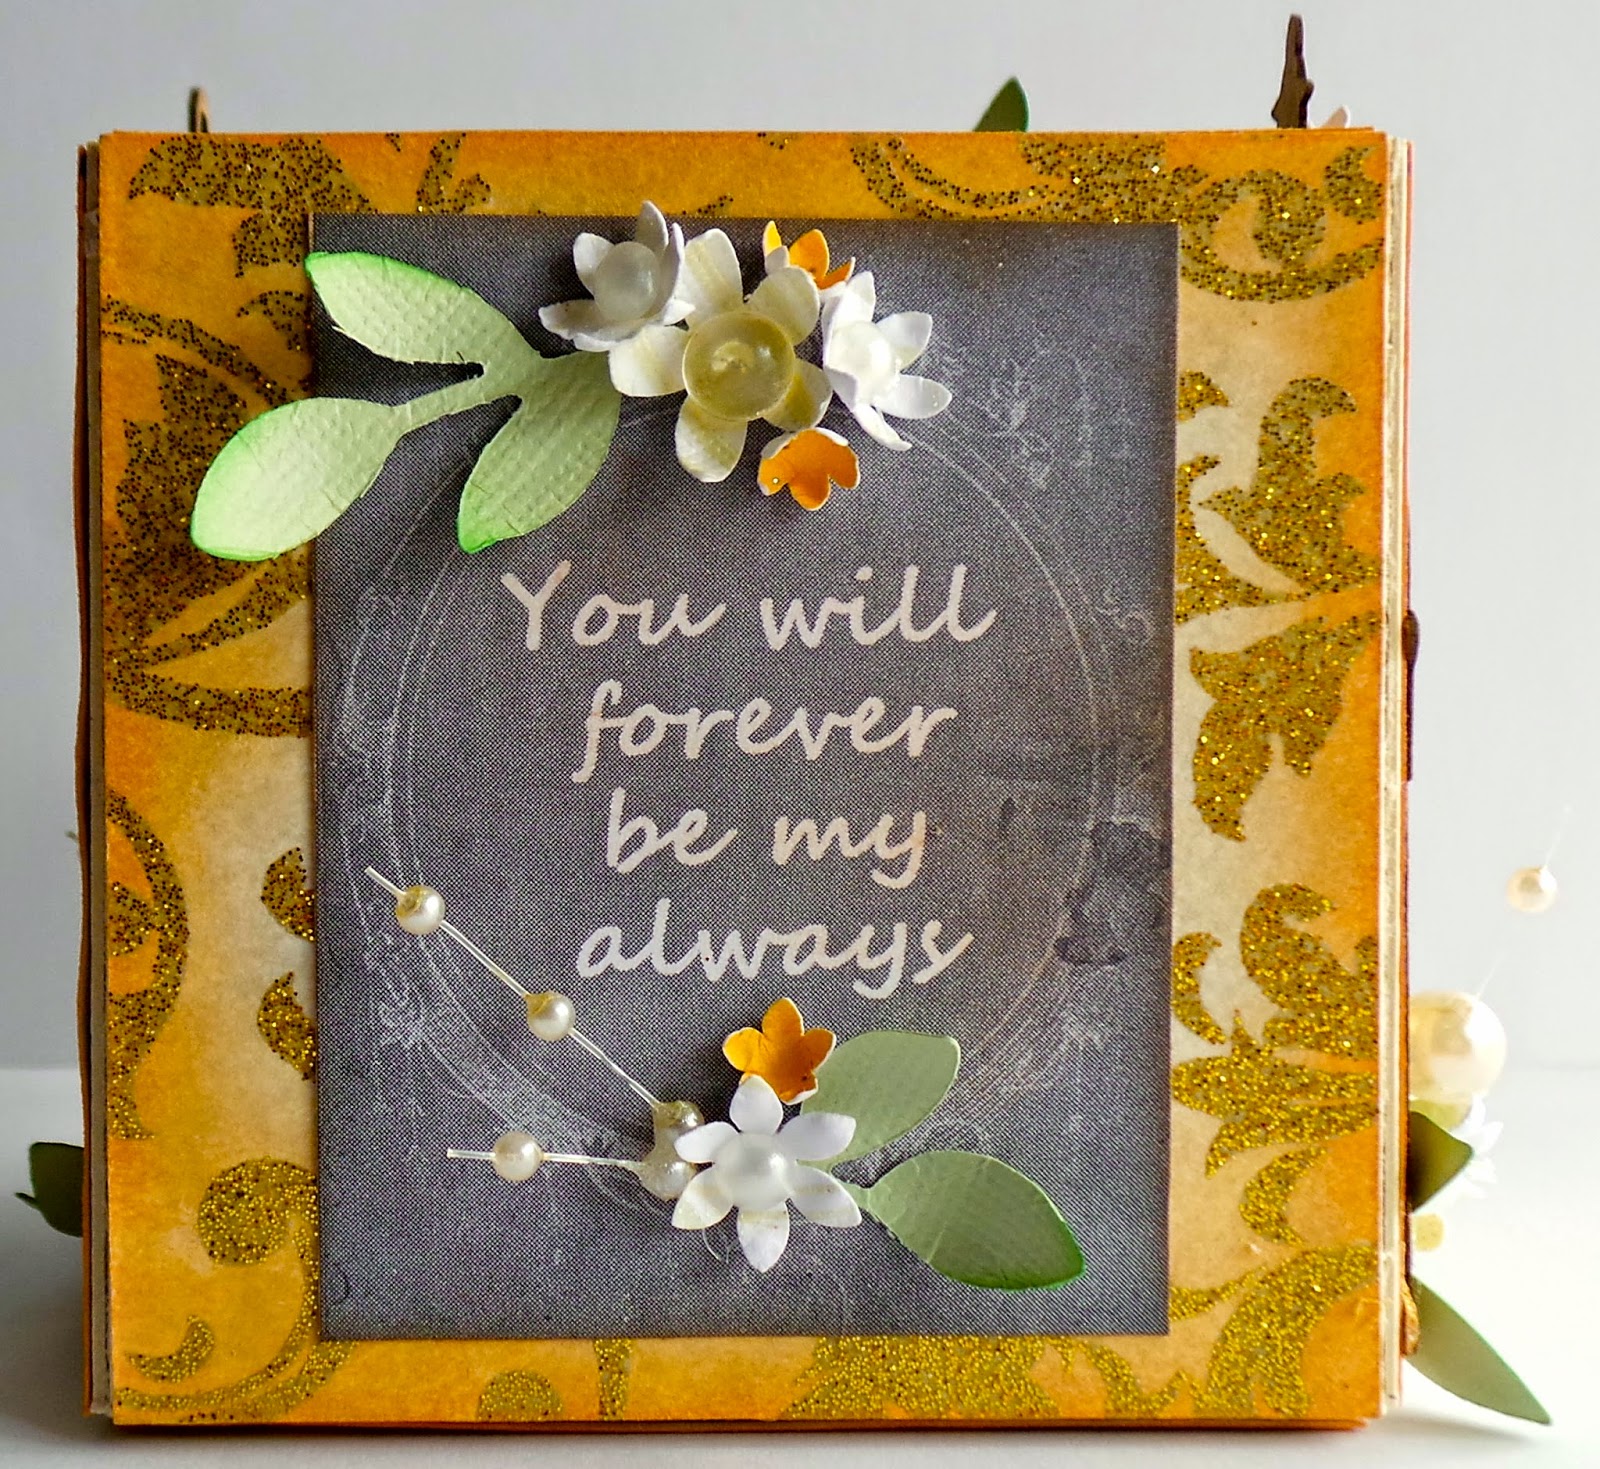
 I'm here to share a ATB I created using Eileen Hull's Scoreboards XL Die Box Square. I used from the Robin's Nest Wedding {in love} CollectionLight Ale Dew DropsPearl Dew Drops and Peach Glitter Cardstock to make an adorable block that could be used as a table decoration at a wedding.


I love the cut a parts that the Robin's Nest now has in the Wedding {in love} Collection. All I had to do was cut out one of the sayings and add leaves, flowers, that I shaped and dew drops.


I used a Copper Shimmer Mist to add color to both bird cages that are on the ATB.


This sentiment I especially love! I can honestly say this is truly how I feel about my husband.


The top view I decorated with diecuts, buttons, dew drops, pearl spray and flower.


In all this was a quick ATB to put together other than shaping flowers and leaves. :-)


Also I'm playing along with Eileen Hull's The Art with Heart June Challenge that is still going on for only two more days. So please be sure to stop by and check out what everyone else has created.


Supplies Used:

Sizzix: Eileen Hull-Scoreboards XL Die Box Square, Sizzlets-Little Leave 
Robin's Nest: Wedding {in love} Collection, Light Ale Dew Drops, Pearl Dew Drops, Peach Glitter Cardstock
Flower Punches
Gina's Design: Bird Cages
Pearl Sprays
Mint green Cardstock
Melon Chalk Ink
Copper Shimmer
Spellbinders Nestabilities: Splendid Circles

If you have any questions please let me know. Thanks for stopping by, hope your Saturday is wonderful and enjoy creating!!!