Friday, September 30, 2016

The Robin's Nest: Thinking of You Card

Hi everyone! It has been awhile since I've posted a project for the Robin's Nest but I am over on the Chattering Robin's blog today sharing a card I created. You can find more information about my project HERE.


Thanks for stopping by, hope your day is awesome and enjoy creating!


Saturday, September 24, 2016

Noel Card

Hi everyone! I am back with another quick Christmas card I created using the Lost and Found Christmas Collection from My Mind's Eye. The card base is 3"x6" and I cut a Scalloped Rectangle (from Spellbinders) out of gold glittered cardstock .


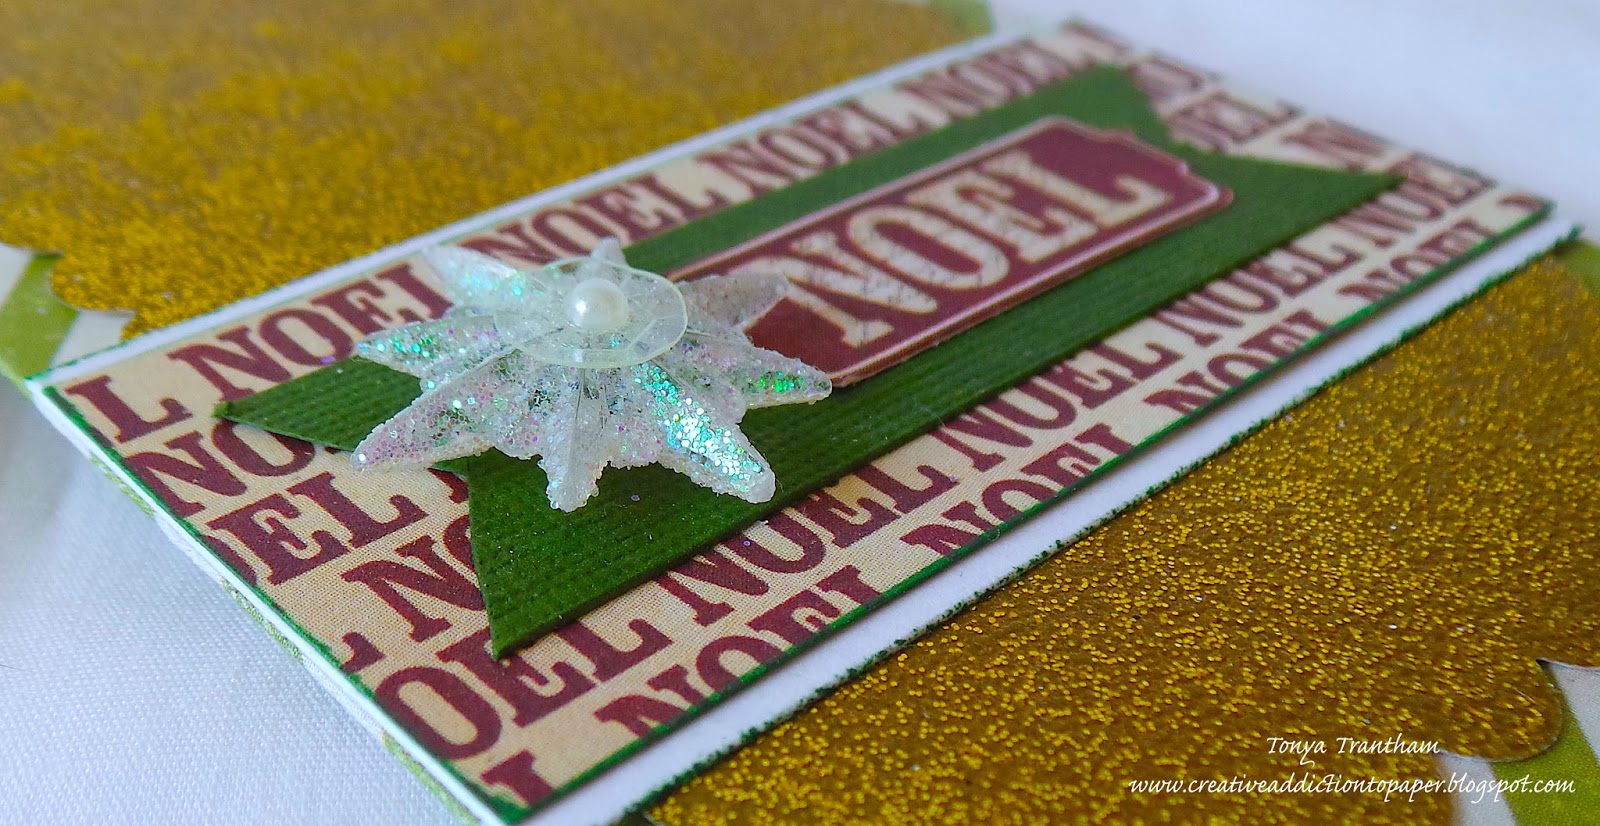
I adhered a strip of patterned cardstock, along with a banner and a Noel sentiment I cut out from the collection.


The miniature snowflake is actually an ornament that I cut the hanger off of it before adding to the banner. I finished it off with a sequin and a mini flatback pearl.
If you have any questions about this card or products I used please let me know.


Thanks for stopping by, hope your day is awesome and enjoy creating!


Wednesday, September 21, 2016

C is for Christmas Card

Hi everyone! Can you believe tomorrow is the first day of Autumn? Well, we are still having temperatures in the 90's and upper 80's so it definitely doesn't feel like Fall. It makes me want to go for a swim in my pool. B-) Anyways...I had shared three Christmas cards in July and never got around to share the other three so I am here to share one of the cards with you today. :-)
I folded cardstock from the Lost and Found Christmas Collection to create a 3"x6" card base. Next I cut gold cardstock to frame a Long Classic Scalloped diecut from Spellbinders that I cut from patterned cardstock.


I punched out a holly leaf and flowers to create a poinsettia and I finished off with a gold sequin.


The letter "C' I found on clearance at Hobby Lobby. I painted it an off white and once dry I added clear glitter and last but not least I cut from the paper collection a sentiment and framed it with a banner. As always if you have any questions please let me know.


Thanks for stopping by, hope your day is wonderful and enjoy creating!


Tuesday, September 20, 2016

Witch Candy Box

Hi everyone! Today I am here to share my Inspiration Team project this month for Eileen Hull. This month's theme is Halloween and Holidays and I decided to try and create a little witch from the Cookie Box diecut to hold candy in. 


First I cut the cookie box from Mat Board and assembled according to directions.  I used black mat board which is no longer available from Sizzix but you can paint or cover with cardstock.


For the hat I cut from Purple Crackle Glitter Cardstock a Cone diecut ( and assembled) a Scalloped Circle and a 1 1/2"x4" piece of Halloween Stripe Glitter Cardstock (I used the lime green side of the cardstock) for the face.


I centered the cone in the middle of the scalloped circle die  and adhered to the scalloped circle. I cut a two inch wide piece of black tulle and tied around the cone to create a band. Next I cut out several Romance Flowers diecuts from Orange Crackle Glitter Cardstock and lightly wet, crinkled and let dry before putting together. I added a Dew Drop to the center of a few of the flowers.


I cut a Spring Leave diecut from the Moss Green Glitter Cardstock, lightly wet, shaped and let dry. I used the Twist and Style Craft Tool to create some "twigs" and then I adhered everything to the brim of the hat.


Next I cut several 1/4" strips of Black Bats Glitter Cardstock, crinkled and adhered to either side of the witch's face. 


For the face I used white sequins, Men's Dew Drops, a green gem for the eyes and nose. The mouth I punched out a small scalloped circle and then used a circle to punch out a small section that looks like teeth.


There you have it my little witch candy holder. If you have any questions about this project please let me know.


For more inspiration be sure to hop on over to Eileen's blog and check out the other team members projects which can be found HERE and HERE.


Thanks for stopping by, hope your day is wonderful and enjoy creating!


Tuesday, September 13, 2016

Tsunami Rose Designs: Christmas List Cards

Hi everyone! Today over on the Tsunami Rose Designs blog I have three cards I created using the Christmas List and Big Elements #10 Christmas Pack printables. For a closer look at these cards you can find the post HERE.


For more inspiration from the design Team check out Tsunami Rose Designs blog, join the Facebook group HERE or if you need to buy printables hop on over to the Tsunami Rose Designs Etsy Shop.
As always if you have any questions please let me know.


Thanks for stopping by, hope your Tuesday is wonderful and enjoy creating!