Tuesday, April 24, 2018

Spring is in the Air Gift Box Party Favor

Hi everyone! This month's theme for Eileen Hull's Inspiration Team we had to create a DIY project for a party, bridal/baby shower or any type of get together. I decided to create a project that could be used for a women's retreat/conference or as a party favor for a women's luncheon. I created a decorative box to hold a small notebook, pen and finger nail file. The notebook and pen comes in handy for note taking. 


I cut two pockets from the Stamp and Photo Storage Diecut. Since I wanted the box to be wider I used the Make it 3D Diecut and cut three sides. All of these diecuts where cut from a heavy kraft cardstock. I embossed the two pockets with the Honeycomb Embossing Folder and I lightly inked over both embossed images with a brown chalk ink. 


I didn't cut the flaps of the pocket off but adhered those over the Make it 3D sides to make the box sturdier. I glued patterned cardstock to the inside before completely putting together. Around the outer sides of the box I adhered patterned cardstock.


Next I cut four of the middle size Heart and Soul Flowers Diecuts from patterned cardstock, shaped and glued together. I added a vintage flower doily that I had found at the Country Living Fair to the center a long with a button. I cut two sprigs of leaves from the Spring Leaves Diecuts, shaped and adhered to the back of the flower.


 I adhered flat-back pearls around both side of the box before adding the flower to the corner of the box.


I added a few flowers from my stash, along with pearl and tulle sprays and a cording bow to finish off the box. 


For more party and shower ideas from Eileen's Inspiration Team you can find those posts HERE, HERE and HERE. If you have any questions about this project please let me know.

Also I would like to submit this project for the following challenges:
Word Art Wednesday Anything Goes: Challenge #330-#331
Dies R Us Challenge: #95 Springtime
Simon Says: Flower Power


 Thanks for stopping by, hope your Tuesday is awesome and enjoy creating!


Wednesday, March 28, 2018

Five and Dime Mini Album

Hi everyone! I'm back with a fun little album I created with toilet paper rolls, Eileen Hull's Book Binding Diecut and Amyjdelightful's Small Town Feel Printable. I was selected to be a "Project Girl" for Amy this month on her instagram page which you can find HERE.


I gathered up an assortment of cardstock, leftover scraps, four of 1.75" Expander Discs and a pair of scissors and began fussy cutting all of the images out from the printable.


Before I embellished I flattened, added patterned cardstock to each TP roll and used the Book Binding Diecut  before adding pockets and tuck spots to the pages.


I cut a Medallion Diecut out and adhered the 25 cent printable to the center.


The paper bow I received in a swap so I added a flower to the center before embellishing the page.


 I cut some of the tags with the Bookplate, Hinges and Label Diecuts. and added printables and tabs.


On the backside of the tags I adhered some of the printables to create mini pockets to hold tags.


As always if you have any questions regarding this project please let me know.


I would also like to submit this project for the following challenges:

Mini Album Makers Challenge: March Mini
Word Art Wednesday: Challenge #328-#329


Thanks for stopping by, hope your Wednesday is wonderful and enjoy creating!


Tuesday, March 27, 2018

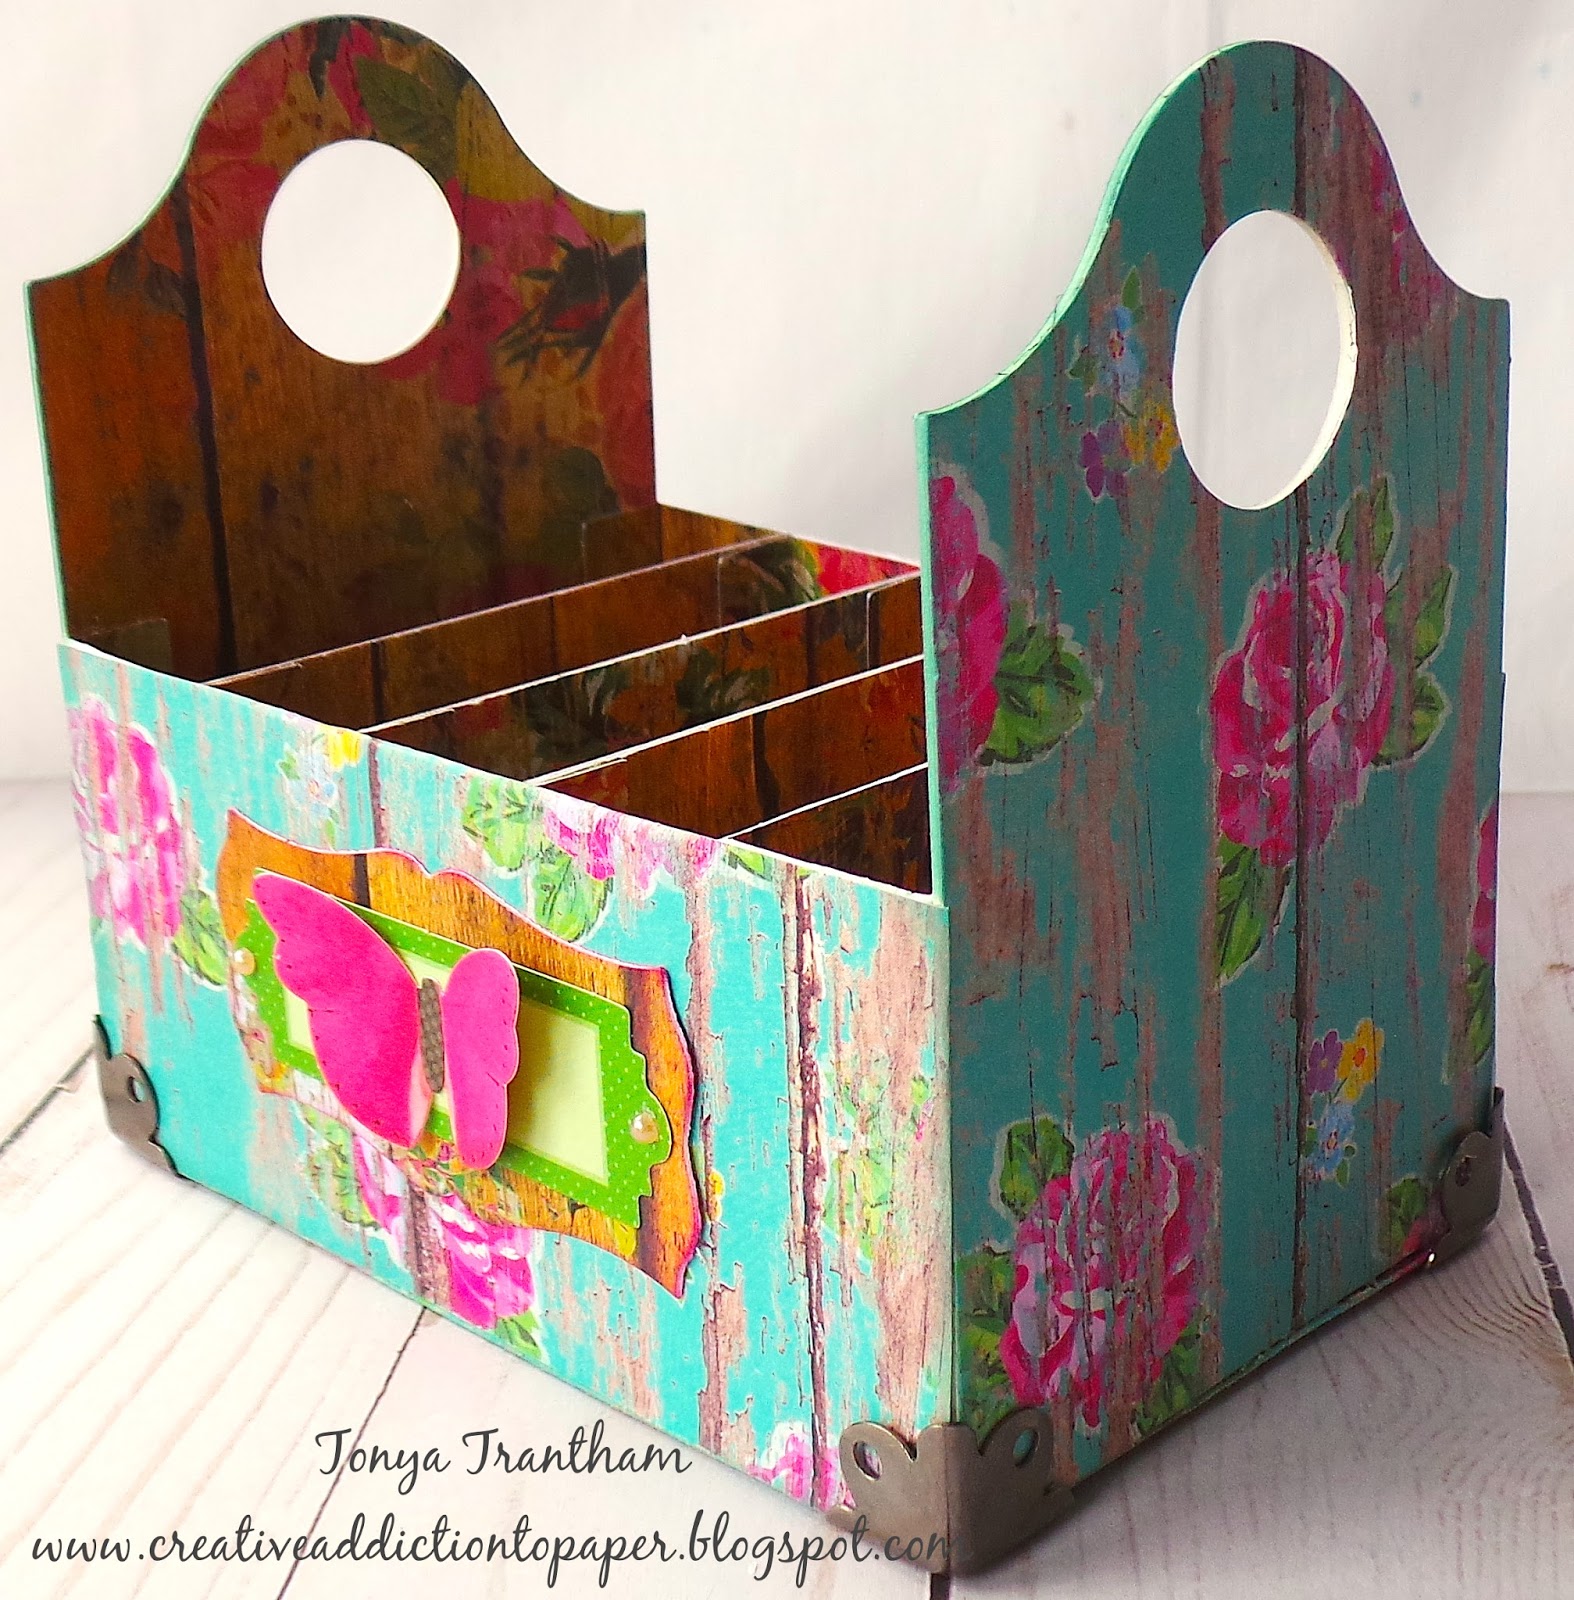
Vintage Floral Caddy Organizer

Hi everyone! This has been one busy month and I'm just now finishing and able to share my project this month for Eileen Hull's Inspiration Team! The team has been sharing some creative organizing tutorials using Eileen's diecuts. You can find the past posts for the month HERE, HERE and HERE.


For my project I decided I wanted to create something that could hold all the little booklets of journaling cards that I had accumulated. I added Adhesive Sheets to Mat Board and applied patterned cardstock to the mat board prior to cutting five pockets and two sides from Caddy Bag Diecut.


I adhered all the pockets to each other and the last pocket that would be glued to the side I "flipped" so it would mirror the other side. I covered a piece of mat board with patterned cardstock to fit underneath the bottom of the caddy. This makes it more sturdy.


I covered both sides of the pockets with patterned cardstock, added some decorative diecuts and box corners and it's finished!


I've added some of my journaling cards, couple of pencils and jumbo paper clips and I am ready to create! As always if you have questions about this projects please let me know.


I would also like to submit this project for the following challenges:
Word Art Wednesday: Challenge #326-#327


 Thanks for stopping by, hope your Tuesday is awesome and enjoy creating!


Saturday, March 10, 2018

Canvas Corp: Spring "Snow" Globe

Hi everyone! Today I want to share a musical snow globe that I have altered for the Canvas Corp blog. I found the globe sitting in my husband's study window, all the water evaporated and the base and the "winter scene" bleached from the sun. I thought this would be fun to give the globe new life by altering and creating a Spring scene inside. For the complete blog post you can find more photos and the how to's HERE.


Thanks for stopping by, hope your Saturday is awesome and enjoy creating!


Friday, March 9, 2018

Hey Friend Tag

Hi everyone! I wanted to share a fun tag I created using a wide assortment of mediums...embossing folder, diecuts, inks, punches, etc. You can say I pretty much used everything but the kitchen sink. 😃 


I started with a 6.25"x3.125" Tag as the base and I embossed with the tag with Tile Embossing Folder. I used the following ColorBox Blends: Sunshine, Melon, Wildberry and Tutu which can be found HERE and HERE which I lightly inked each color over the tag.


I used the Crate Paper Bloom Collection to cut banners and Friend Diecut (Floral Arch and Words Diecuts) before cutting out the friend die I applied an Adhesive Sheet to the back of the cardstock and once the word was cut out I peeled the backing off and added to the tag. Since I couldn't find a "Hey" stamp I printed that from the computer and adhered it and a sequin to the sentiment.I cut the smaller Wreath Diecut out, added a little green ink here and there for color and adhered to the tag. The vintage ladies I purchased from Lisa's Altered Art on etsy. You can find this image HERE. I printed and fussy cut the select image out and added to the tag.


From my stash of lace and pom pom trim I adhered those to the bottom of the tag. Next I punched out two leaf sprigs, inked and shaped before digging into my collection of paper flowers which I adhered to the corner of the tag. I finished off the front with a wad of thread.


On the back of the tag I covered with patterned cardstock and added Ric Rac trim and seam binding.


I cut an assortment of diecuts from the Bookplate, Hinges and Label Diecuts and adhered to the tag. I left the back of the tag plain for journaling or adding a small photo. 


As always if you have any questions about this project please let me know.
Also I would like to submit this project for the following Challenges:

Word Art Wednesday Challenge: #324-#325
Simon Says: Wednesday Challenge


Thanks for stopping by, hope your Friday is awesome and enjoy creating!


Thursday, March 1, 2018

Happy Moments Tag

Hi everyone and Happy first day of March! I am here to share a quick project I created using leftover Tattered Angels Glimmer and Simply Sheer Mists from another project that will be hopefully shared soon. 😉 


This is a great way to use up mists from previous projects. All I did was place the tag onto the glass tray and let the tag soak up the leftover sprays. The following Glimmer and Simply Sheer mists I used are: Rum Punch, Peony, Soft Peach and Gold. I made sure both side were placed in the mist and then I let dry. 


I used Crate Paper's Bloom Paper Collection on this tag and the image of the girl and chicks I purchased a few years ago but I'm not sure the name of the company or the collection?


I added the happy moments cardstock off center along with bits of lace and ribbon to dress up the little girl and chicks.


The back of the tag more cardstock from the same collection was added and of course a tag wouldn't be complete without a doily.


Before cutting the flower arch and flower from the Floral Arch and Words Diecuts I cut a piece of Adhesive Sheet big enough to cover the pieces of cardstocks and then I ran through the diecut machine. All you have to do is peel the backing off and place on your project...easy peasy! I finished off with the other chick diecuts and a small amount of pom pom trim.


 As always if you have any questions please let me know. Also I would like to submit this project for the following challenges:
Simon Says: In My Garden
Word Art Wednesday: Challenge #324-#325


Thanks for stopping by, hope your Thursday is awesome and enjoy creating!


Wednesday, February 21, 2018

Little Birdie Crafts: Floral Heart Pocket

Hi everyone! Today over on the Little Birdie Crafts blog I I have a heart pocket I created using an assortment of products from Little Birdie. For all the details you can find my blog post HERE.


Thanks for stopping by, hope your Tuesday is awesome and enjoy creating!