Thursday, April 11, 2013

Daisy Day Blog Hop: Everything is Coming Up Daisies Altered File Folder

Hi everyone! I'm so glad you have taken the time to stopped by and check out The Robin's Nest Design Team Daisy Days Blog Hop that is happening today. 
First off I would like to thank all the wonderful folks over at the Robin's Nest for providing the Daisy theme prize pack that is worth $15 that I will be awarding to one lucky person. All you have to do is leave a comment on my blog and your name will be placed in the drawing. Also hop on over to the other design team member's blogs and leave a comment too because you will have a chance to win a prize pack from each of them also and there is a chance to win a $25 store credit to The Robin's Nest store. Now how awesome is that?!?!? Just think so many chances to win and you could win several times too! :-) Well, the winning does't end there because I will personally be giving away a pack of goodies. Scrapbook paper, embellishments and a "bare" mini album to decorate with the goodies you receive.
Ok, now I would like to share with with you an altered file folder mini album I created. It was very quick and easy to make. 


Here are the supplies used:


Distressed Honeycomb Cardstock
Daisy Stripe Teal
Calamity Jane Glitter Roses
Robin's Egg Blue Classic Glitter Cardstock
Spa Journey
Bird Sticker
Angel Sticker
Fresh Mowed Grass Dew Drops
Lakeside Dew Drops
Stampin Up Seam Binding Pear Pizzazz
Beige Lace
Burlap
Tan Felt
Buttons
Prima Flowers
Chocolate Cardstock
Industrial Chic Metal Accent
Sizzix Dies used: Embossing Folder Winter Set (Snowballs), Banner Layered Oval Scallop, Tim Holtz Alterations Scallops, Stampin Up Tasteful Trims, Flowers-Daisies #2, Stampin Up Scallop Squares Duo. 


First you need a 8 1/2 x 11 inch file folder and just follow the direction below for folding. 

 I cut two 7 inch pieces of seam binding which I adhered one of the pieces to the top of the inside of the pocket. Two folds over I cut a slit in what I would call the spine of the folder. Run the seam binding through the cut and glue down. This will be covered with card stock.
Then I used two sheets of Spa Journey to decorate the outside of my little file folder mini. I measured and glued each section down. 


The daisies were made with the Sizzix diecut flowers-daisies #2 . For the larger and smaller daisies I used  four daisies a piece which I spritzed lightly with water so I could shape and then I let them dry. Then I glued them all together and added  a dew drop to the center of each of them. 
The little bird's nest that I created for the front of the folder I borrowed from Melissa Phillips LilyBean's Paperie blog. You can click on the link and Melissa gives very detailed directions on how to make one. I think it is just super cute :-)


The inside of the folder I used Daisy Stripe Teal, which is double sided, flowers on one side and stripes on the other side. 


Ephemera Vintage Garden is where I found these cute printable robin and nest and best part it is free. I wound up using them as pockets to hold some mini tags.
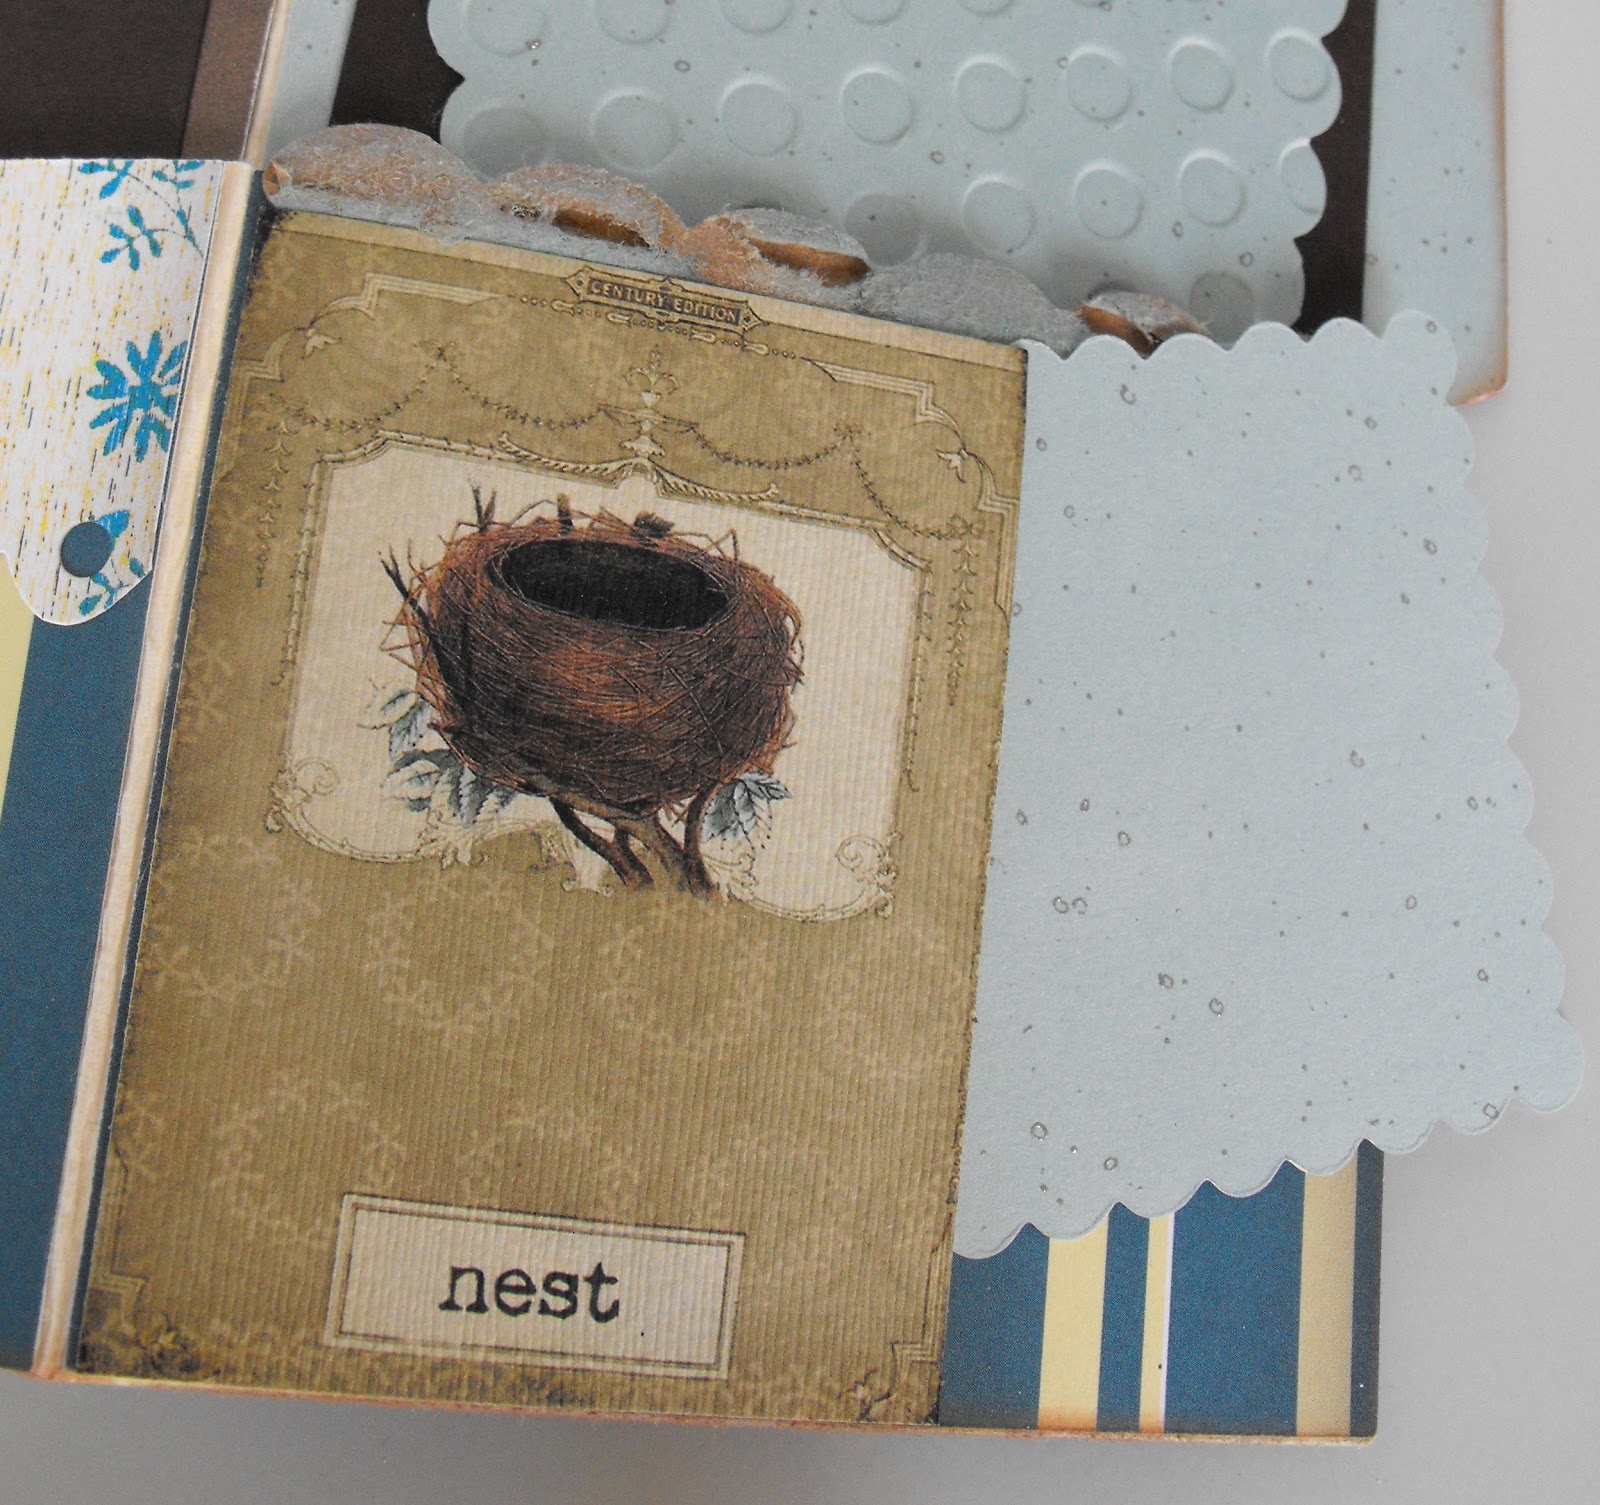


I absolutely love the swirls and the soft colors of this card stock!!! 


There you have it...a super simple file folder that is quick and easy to make. :-)
Thanks for stopping by and please remember to hop on over to the other design team members and leave a comment ( leave one on mine too :-)) for a chance to win one of those daisy prize packages. Also if you aren't a follower of my blog please follow. I will be giving away a goodie package myself to one lucky person that is a follower and leaves a comment too. Good luck and enjoy creating!!!


Sunday, March 24, 2013

Robin's Nest: Happy Everything Altered Toilet Paper Roll Treat Holders

Hi everyone! It has been one whirlwind of a month for me. I got married on the 13th and I guess with all the running and trying to get everything ready I wore myself down. Thus I wound up with a stomach virus the day after I got married and when we got back in town I got a terrible head cold. I am just now starting to feel better and getting back into the swing of things.
This month on the Robin's Nest store they have their Crackle Glitter cardstock and Neon Dew Drops on sale for 20% off. Also the Robin's Nest is teaming up with Epiphany Crafts this month. I got to to try the Scalloped Circle punch out on all the projects I created.
When I first seen the Crackle Glitter cardstock my mind was thinking on all the possible things I could create for Spring and Easter . Also I wanted to create something that could hold treats or some goodies in it too. I came up with this cute little toilet paper roll treat holder which was so easy and quick to make. Then I started envisioning different holidays I could create using toilet paper rolls and I came up with a USA/4th of July and a Fall/Thanksgiving theme also.

Robin's Nest Supplies Used:
Blue Glitter Crackle Cardstock
Orange Glitter Crackle Cardstock
Pink Glitter Crackle Cardstock
Purple Glitter Crackle Cardstock
Neon Mini Dew Drops
Chocolate Brown Classic Glitter Cardstock
Ochre Classic Glitter Cardstock
Lavender Glitter Classic Cardstock
Red Glitter Sorbet Cardstock
Chipboard Leaves
Eggs Glitter Swirls
Alpha Sticker Letters
Bird Stickers
Other Supplies Used:
Sizzix SU Bigz XL Tasteful Trim
Lace
Prima Flowers
Buttons
Hemp Cord
Mod Podge
Gesso
Taffy Folk Art Paint
Epiphany Crafts:
Scallop Punch and Bubble Caps Clear Scalloped Circle 25

First off you will need three empty toilet paper rolls for these projects. I painted the inside of each of the rolls and let them dry. I used Mod Podge and coated the inside generously and then I used a big binder clip and pinched the bottom of the tube closed with it. Let the roll dry real well before you remove the binder clip.


Now I'm are ready to decorate. Measure the TP roll and cut a piece of Pink Glitter Crackle cardstock to cover and then Mod Podge to roll. I then cut a 2 inch strip of lime green polk a dot tissue paper and then folded in half to give me a 1 inch strip. I glued one strip at a time to the inside of the roll and cut to make fringe. I did this four times to make it look full and fluffy. Then I cut various sizes of cardstock and adhere to the top. I added a butterfly image to the front and then I used one of the Epiphany Crafts Clear Scalloped Circle 25 and stuck over the butterfly for added interest.

Now I added fringe to the bottom of the tube. I used the same steps as above but only added two rows of fringe. I used a piece of the Purple Glitter Crackle cardstock and Sizzix Tasteful Trim die to cut out the oval looking trim which I glued over the edge of the tissue fridge I had created at the bottom of the TP roll. Then I added the cute Neon Mini Dew Drops to the center of each oval. I punch small holes on each side of the roll and threaded lace through the whole and tied off.


Second TP roll I followed prep instruction as listed above. I used Orange Glitter Crackle cardstock to cover the outside of the roll and cut a strip of Ochre Glitter cardstock and the Chocolate Brown Glitter cardstock I used my Tasteful Trim die again and cut out another piece of oval trim. I used the Orange Neon Mini Dew Drops to decorate the center of each of the oval trim. I then took the Chipboard leaves and crumpled them with my hand and then inked the edges to give it a distressed look, shaped and glued to the corner of the roll. I added a few Prima flowers and buttons to the centers and then topped each off with Neon Mini Dew Drops. In the bottom corner I used a acorn sticker strip from the Bird Stickers and cut a "v" out of it to make a banner. Punched a scallop image with the Epiphany Craft punch and add a "T" alpha sticker over the acorn sticker. I punch small holes in each side of the roll and thread hemp cord and tie off.  


The last TP roll I used the same prep directions as above and glued the Blue Glitter Crackle cardstock around the tube. The Tasteful Trim die I cut a scalloped trim from the Red Glitter Sorbet cardstock and then adhered blue Neon Mini Dew Drops to each scalloped circle. I cut trim, lace and scrap of cardstock and then glued around the roll. I fussy cut a vintage 4th of July image out and attached to the corner.


For the handle I actually used some Christmas Trim a Tree rusty stars trim I had picked up for another craft project. I Mod Podge, let dry, punched small holes on each side  of tube and attached. Then I added Neon Mini blue Dew Drops to the center to each star.
The USA charm I created I used a bottle cap which I first painted with Gesso and let dry. Then paint with Taffy Folk Art paint. Let dry. First I punched a whole in the rim of the bottle cap and then I used the backside of the Blue Glitter Crackle cardstock which is a solid blue and punched out a scalloped circle, added bits of scraps of patterned cardstock and the typed USA to the top of the scallop. Then I put the Clear Scalloped Circle over the top of that and then I adhered it inside of the bottle cap. I snipped a star from the Trim a Tree trim and threaded it through the hole. Twisted the leftover wire to keep it from fall off and then curled and added a neon dew drop.  I used Tim Holtz Mini Paper Rosettes die and cut a rosette out in white cardstock and adhered to the corner of the roll and then glued the bottle cap on top of that. The bottle cap I had a lot of fun creating and I plan on making more in the future. I think that they would make some great charms. :-)  


Well there you have it!!! Toilet paper roll treat holders that are quick to make and super cute! I just want to remind you to stop on over at the Chattering Robin's blog and see what everyone else is creating and remember that there is 20% off on the Crackle cardstock and Neon Mini Dew Drops in the Robin's Nest store.


Again thanks for stopping by and I hope this inspires you to create something fun for yourself and remember to enjoying creating!!! :-)


Wednesday, March 20, 2013

Crafty Card Gallery: So Precious Baby Card

Hi everyone and thanks for stopping by!!! I'm the guest designer over on the Crafty Card Gallery this week and I would like to share a quick and easy card I created for today's post.
I used the Papertrey Onesie Diecut to make this super cute card. You will have to cut two of the onesies, emboss one of the onesies and the other measure about an inch down and fold, glue the one inch fold to the back of the embossed card and then ink edges and  embellishment. See super simply!!!


Supplies used:

Papertrey Onesie die
Sizzix Textured Impressions Winter Embossing Folder
Mint green cardstock
Trim
Rosette with a Robin's Nest Dew Drop in the middle
Printed "So Precious" from computer
Scrapbook paper scraps
Cat's Eye Ink

Again thanks for stopping by be sure to go and check out The Crafty Card Gallery when you get a chance to see what all the other crafty women and men are up to.
Remember enjoying creating!!!


Monday, March 18, 2013

Crafty Card Gallery: Springtime Friend Card

Hi everyone! I'm super excited to be the guest designer this week over at the Crafty Card Gallery. I don't know about you but I am sooooo ready for Spring to get here and my card that I created reflects  just that.


Supplies Used:
Bazzill cardstock
My Mind's Eye Bramble Rose scrapbook paper 
Ric Rac
Sizzix Bigz XL Tasteful Trim Diecut
The Paper Studio Embossing Folder
Stampin Up A Little Something Friend Stamp
The Robin's Nest Dew Drop
The Paper Studio Cardstock and Embossing Folder
Color Box Cat's Eyes Shabby Pink Ink

When you get a chance please stop on by the Crafty Card Gallery blog and see what creativity is going on over there.
 Stop back by on Wednesday, March 20th to check out my other card I created  and thanks for stopping by!!! Enjoying creating!

Tuesday, March 5, 2013

A February Altered Rolodex

Hi everyone! This is a quick post I would like to share with you. I created this little Rolodex...plus one for me too...for the Vintage Swappers group I'm in on Swap-bot. I absolutely love creating these little works of art. They are quick...well if you have the Sizzix Rolodex die like I do they are quick...and don't take up a lot of space either.


I used some scraps of My Mind's Eye cardstock for the base of my rolo.


I had received in a past swap a sheet of Valentine's Day wrapping paper which I cut the little girl with a heart image out. I also received old buttons, lace and felt hearts from a swap too. The Robin's Nest Dew Drops are from my own personal stash. 


The backs of the card I used one of the free calendars from Crafty Secrets and the tab punch is from Stampin Up. 
Well off to do some more cleaning and crafting...also only one more week and I'll be Mrs. Trantham :-)
Thanks for stopping by and enjoying creating!!!


Sunday, February 24, 2013

The Robin's Nest: Altered Mini Sewing Box Matchbox

Hi everyone!!! What a crazy month it has been!!! I have been trying to get another craft room ready in my soon to be hubby's house. Packing up stuff to take to Goodwill, pulling staples out of the wall, scraping stickers off of the walls and doors and pulling glow in the dark stars off of the ceiling...can you tell the room belonged to one of his daughters??? ;-) I have paint and laminate flooring bought but I still have to "putty up" the tiny holes in the wall, wipe the walls down and rip the carpet up. Oh so much to do but once it is all done it will be well worth it. :-)
First off I would like to share with you there is a 20% off sale going on in the Robin's Nest store on all Tear shaped Dew Drops and we have also teamed up with Mod Podge this month which I will be using Antique Matt Mod Podge on my project that I will be sharing with you.


When I need to sew on a button or stitch up a hem I always seemed to be searching for needle and thread so I decided that for this month project I wanted to create something to store  my needles and thread in.
Below is some of the supplies I used to create my little notions box.

Robin's Nest Supplies Used:
Tear Shape Dew Drops
Texture-Linen
Robin's Nest Straw Velvet Ribbons**
Calamity Jane Glitter Diagonal Cardstock
Distressed Honeycomb Cardstock
Seashore Glitter Cardstock
Moss Green Glitter
Lakeside Dew Drops
Fresh Mowed Grass Dew Drops
Vintage Angel Sticker
Other Supplies Used:
Prima Flowers
Seam Binding
Tim Holtz Label Pulls
Amercana Blue Spa Paint
Stain
Ink
Buttons
Lace


First off I emptied a 250 count matchbox and then painted the inside with Americana Spa Blue.


Then I lightly spritzed the inside and outside of the tray with walnut ink and then with a paper towel I rubbed and blended it in, let it dry and then measure and cut a piece of Calamity Jane Glitter Diagonal Cardstock to fit the inside of the bottom of the tray.


I then cut two pieces of Seashore Glitter Cardstock for the front and back of the tray. I inked all pieces of cardstock and then mod podged to the tray. I let dry and then punch holes in the tray, add label pull, brads and notions label.   


For the outside cover of the matchbox I measured, cut, folded Calamity Jane Glitter Diagonal Cardstock around the box, inked edges of paper and then after the ink dried I mod podge it to the box.


I then cut a piece of Seashore Glitter Cardstock and folded like the diagram that is below. I inked the edges and used a scallop punch on the folded 1/2 inch end.

 
I adhered a 10 inch piece of seam binding to the middle of the matchbox cover and then mod podge the 2 1/2 inch and 1/4 inch cardstock that I folded on top of the cover. Once that dried I cut a smaller piece of scrapbook paper, mod podge to the top of the 2 1/2 flap. Let that dry and then I used the gate sticker from the   Vintage Angel Sticker sheet and place on top of that and mod podge over the top and the 1/2 inch scalloped flat too.
 
 
I used Texture-Linen,  Robin's Nest Straw Velvet Ribbons** and Distressed Honeycomb Cardstock to create all the flowers on the front flap except I did use two Prima flowers. Below is an example of how to make the linen flower.


First I cut a small strip off of one of the squares of linen, twist it and glue one of the ends. Start rolling it into a circle and then apply glue to back of it.


I used the Robin's Nest Straw Velvet Ribbons** to create the dark and light blue flowers. It was really simple to make. First off you sew thread through the bottom edge of the ribbon. Once you have it as long as you want pull the thread to gather it and then tie off. Then shape it the way you want it to look and glue and add dew drops.


Now for the inside flap...I adhered the other 10 inches of seam binding to the inside flap and then cover it with a piece of matching scrapbook paper. I attached on the opposite side a sheet of needles.
 

Side view of my altered matchbox. Love how the tear shape dew drops colors coordinates so well with all the cardstock I used.


The cream colored mini flowers I used Distressed Honeycomb Cardstock which I used one of my flower punches to punch out a few. I used a glimmer mist to wet them, then placed them on a piece of sponge and used a stylus to shape them. Then I let them dry and wha-laaa instant cute flowers. :-)


I decided that I wanted to foof up my spools of thread. I used a small circle punch and punched out several circles from the Moss Green Glitter cardstock and glued to the top of each spool and then I decorated with dew drops, buttons and flowers.


Now my little sewing box is finished and if I need to sew on a button everything is all in one place and ready to go.
I hope this has inspired you to create your own sewing box or if you don't sew...maybe create a little drawer to hold all your scrapbook embellishments...the possibilities are endless. :-)
Remember to stop by the Robin's Nest  store and check out the tear shape dew drops that are on sale and while you are there go ahead and pick up some cardstock and embellishments too. 
Thanks for stopping by and as always enjoying creating!!!


Wednesday, February 6, 2013

Lovey Dovey Rolodex

Hi everyone! I want to share a quick project I created for a swap I'm in on Swap-bot for Betty aka sewcrazy and of course I created one for myself. The supplies I used for this cute little rolo are My Mind's Eye, K and Company, some paper scraps, Stampin' Up A Little Somethin' stamp set (Lovey Dovey stamp), buttons, The Robin's Nest Dew Drops and I used the Sizzix Rolodex die.


The owl is something I came up with on my own. I used a onesie pattern that I cut from a Paper Trey die cut. I cut the arms off of the pattern and used a jar that traced to rounded the bottom of the pattern. The leg opening of the onesie I used a smaller jar that I traced and cut to make the ears. The wings and the beak is a heart...I cut the heart into two pieces to make the wings...and the tummy I used a punch.


I know I definitely want to make some more of these owls whether as cards or I might try my hand at making some little owl pin cushions. Whoooo knows ;-)
Thanks for stopping by, have a wonderful day and most of all enjoy creating!!!