Friday, December 30, 2016

Snowflake Egg Carton

Hi there! How was  everyone's Christmas? I had a nice time. My son and daughter in law came in and we exchanged presents on Christmas Eve. Then on Christmas Day we went to my mother in law's at 10:00AM did the gift exchange with her and my step daughters and their husbands and then at 12:30 ran to my parents to do the same thing again plus we had dinner. As I said it was nice but after two days of nonstop "partying" I was ready to get back into my normal routine and get back to crafting.                
Well, anyway, I wanted to share the second half of a project for a swap I was in. The first half of the swap I altered a paper bag and you can find that post HERE.


I painted a six count egg carton that I had purchased at Hobby Lobby in Folk Art Faded Jade acrylic paint and sealed with Antique Mod Podge. I cut a snowflake patterned cardstock from the Prima Sweet Peppermint collection which I adhered to the top of the lid. Next I cut a Snowflake Rosette from Merry & Bright Collection and put together according to the direction. I added a gold circle, a small snowflake ornament, sequin and Dew Drop to the center of the snowflake diecut. 


I adhered seam binding and ribbon above the "clasp" to dress it up.


 The inside I cut a piece of patterned cardstock to fit the inside of the lid and the fun part...filling it with GOODIES!!!


I added candy, handmade planner clips, bits and pieces of ribbons, buttons, etc. that my swap partner Lisa can eat while crafting. 😄


I also added a Santa pen that I found at the Target Dollar Spot to the package. Isn't it so adorable? As always if you have questions about this project please let me know.
Well, there you have it...my last post of 2016. For the 2017 year I have written down some goals of what I want to accomplish (fingers crossed) 😊. This past year was a very crazy, sad, topsy turvy year to say the least and my crafting mojo went on vacation. So here's to a better and more creative 2017!  


Thanks for stopping by, hope your Friday is awesome and enjoy creating!


Thursday, December 22, 2016

Christmas Time is Near

Hi everyone! Are you ready for Christmas? Me? I am almost there...I still have presents to wrap and a couple of pies to make and I will finally be able to sit back and relax for a moment. Then it will be back to getting projects ready for CHA in January.
Well, I wanted to share a bag I altered. I created this for a swap I was in with my sweet friend Lisa. I first started with a 6.25"x9.25" kraft paper bag. I used the following cardstock collections to decorate the front and back of the bag: Prima-Sweet Peppermint, Sizzix: Brenda Walton-Merry & Bright and Crate Paper-Bundled Up. I used a scalloped edge punch to create the pocket which I glued to the bag along with a doily and two strips of cardstock. I then cut the Reindeer from Gold Glitter cardstock and adhered to the corner of the pocket. I cut verbiage and numbers from the Merry & Bright collection. The number are from the Billboard Alphabet Diecut. Once everything was cut it was added to the front of the bag.


The back of the bag I adhered cardstock, pom poms and gold trim...the trim was a last year find at Target after Christmas for 90% off! I love a great bargain!


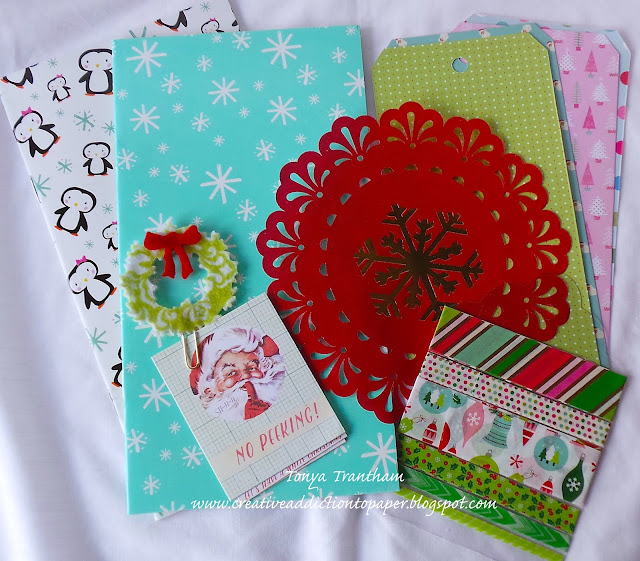
Next I gathered goodies to fill the bag. The little notebooks I found at Target in the Dollar Spot but they where originally 6"x6". I cut those down so they will fit into a Traveler's Notebook. Also I cut a tag from a Sizzix diecut packaging and wrapped washi tape samples onto it.


I filled up the bag with Tags I cut from the Merry & Bright Collection. The wreath paper clip I will share how to make those in a later post 😉
I hope you like this little bag I altered and if you have any questions please let me know.


 I would like to submit this project for the following challenge:


Thanks for stopping by, hope your Wednesday is awesome and enjoy creating!


Wednesday, December 14, 2016

Angel Rolodex Cards and Mail Art


Hi everyone! I am here to share a really quick project I had created for a swap I was in with a fellow Instagramer Linda. 


We had decided to do an altered Rolodex swap...well in my case I have a Rolodex diecut so I cut my cards from cardstock/scrapbook paper. :-)


I used Christmas Clipart Printables Ephemera Set 11 from Tsunami Rose Designs etsy shop.


I fussy cut the images out and added diecuts/punches, sequins, flat back pearls and a little Stickles to each rolodex card.


I also printed the little girl onto a piece of sticker paper and created my first piece of mail art. I added washi tape and stickers to finish off my envelope. As always if you have any questions please let me know.
Also I would like to submit these rolodex cards for the following challenge:


Thanks for stopping by, hope your Wednesday is awesome and enjoy creating!


Saturday, December 10, 2016

Tsunami Rose Designs: Santa Traveler's Notebook

Hi everyone! I am here to share my project this month for Tsunami Rose Designs! I went with another traveler's notebook since it looks like I am hooked on these. :-D
I started with a notebook divider that I had purchased from the Target Dollar Spot which I cut, rounded the corners and folded to a 7 1/2"x4" cover for my notebook.


I cut 10 pages slightly smaller than the cover and punched holes in the spine and stitched together.


I used the following Tsunami Rose Designs collections: Clipart Christmas - Printable Ephemera Set # 10 Christmas #1 and Christmas Clipart - Printable Ephemera Set # 11 Christmas - # 2. Each collection has 30 pages for a total of 60 pages of vintage Christmas fun! And the best part is they are only $2.50 per collection!


I printed and cut out a variety of printables from both collections.


Which I adhered to the pages, added pockets and tuck spots to hold journaling cards.


I thought it would be fun to use snowflake diecuts and add those to the doilies.


The cover I used a variety of scraps of cardstock, gold trim, a doily and a snowflake diecut along with the Santa printable to create a fun and whimsical feel. I also and a few red gems to the holly leaves and Stickles to Santa's bread to finish off my traveler's notebook.


It is one FAT little traveler's notebook and I so love how it turned out! As always if you have questions please let me know.


Be sure to hop over to the Tsunami Rose Designs etsy shop and pick up these printables or if you are looking for a something different there is several themes available and the best part they are only $2.50! If you are needing inspiration stop by Tsunami Rose Designs blog and see what the talented design team has created and join the Tsunami Rose Design Fan Group on Facebook too!


Thanks for stopping by, hope your Saturday is awesome and enjoy creating!