Saturday, September 7, 2019

Easy Fresh Eggs Wooden Sign

Hi everyone! I am back today with a super easy project I created for Momenta! I have longed for one of those Farm house signs that is popular but I sure didn't want to pay $30 or more. Plus I needed it to fit into an odd space above my stove hood in my kitchen.


I had my dad cut a piece of scrap wood 8"x21 1/2" and I sanded over the board once it was cut to smooth the edges. I started by painting one coat of  White Stencil Paint and once dry I decided it definitely needed another coat of paint since it has a "streaky" look. In total I applied three coats of paint before I was satisfied. 


I used the Black Alphabet Stickers for the lettering of the sign. I picked out "FRESH EGGS' verbiage and all I had to do was make sure I placed the letters in a straight line.


 Once the letters were lined up I removed the backing one letter at a time and stuck to the sign. It couldn't have been any easier. Easy Peasy! If you aren't following Momenta you can find them on these following social media sites!

Facebook
Instagram
twitter
Pinterest


Supplies

Paint Brush
Wooden Sign

(Products listed above are Affiliated Links for your convenience)


Thanks for stopping by, hope your Saturday is awesome and enjoy creating!


Wednesday, September 4, 2019

Blooms and Birds Tag

 Hi everyone! I am back this week with a tag that I created for ColorBox but never got to share.


For this tag I place it into the Mosaic Gems 3D Embossing Folder and ran through the Diecut MachineI then inked the glass tray with the following Dyestress Blendable Dye Inks: Mint, Citronella and Moss added water to each ink and randomly painted the tag completely with a Paint Brush.


Once the tag dried I inked an Art Dauber with Mint Dyestress Blendable Dye Ink and lightly inked over the embossed areas of the tag.


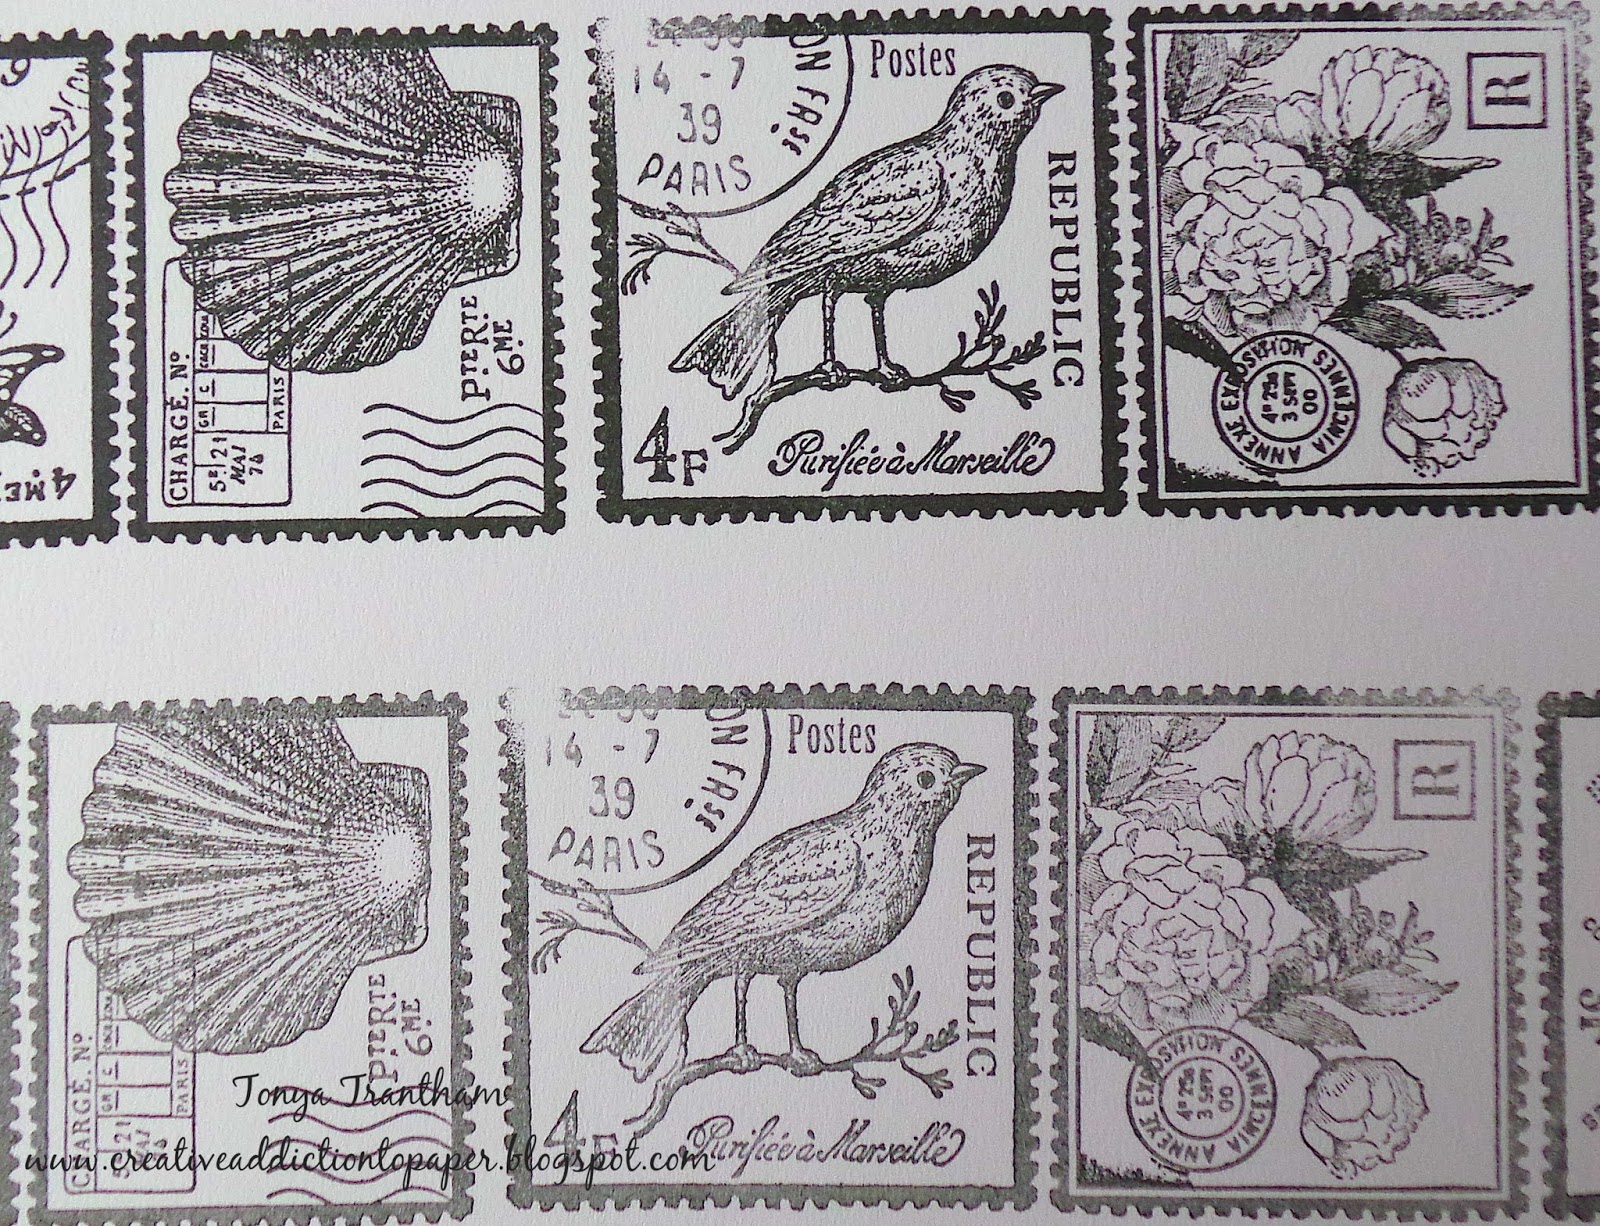
I inked the Faux Postal Rollagraph with Wicked Black Archival Dye Ink and rolled onto a piece of White Chipboard. I cut the bird and floral stamps out with a Paper Cutter.


I inked a glass tray and watercolored the bird stamp with the following Dyestress Blendable Dye Inks: Moonstone whole bird body, Caribbean tail feathers and chest, Palomino tree branches, Moss-leaves and Tomato-beak and legs. Next I inked the glass tray and watercolored the floral stamp with the following Dyestress Blendable Dye Inks: Princess-flowers and Moss-leaves. I placed Crinoline Fabric on top of the Journaling Card, Flowers and Leaves Diecuts and cut out two sets of flower diecuts. For the flowers I inked the glass tray and watercolored seven flowers with the following Dyestress Blendable Dye Inks: Princess, Posy and Mulberry and let dry. I inked the Leafy Border Molding Mat with Wicked Black Archival Dye Ink and applied onto a piece of Watercolor Paper and cut leaves out with ScissorsI cleaned off the glass tray and inked and watercolored the leaf with the following Dyestress Blendable Dye Inks: Moss and Citronella and while still wet shaped the leaf and let dry.


I adhered the bird stamp image to the tag with a small portion slightly off the tag and I added foam pop dots to back of floral stamp image and placed a small portion slightly off on the other side of the tag.


I added a drop of adhesive to the center of six flowers, placed on top of each other, pinched all together in the center and shaped. 


I added sequin and a pearl to center of flower and a leaf to the back and adhered to the  postal stamp images. I added a smaller flower with sequin and pearl to the bird stamp image along with several loops of thread. I finished the tag by adhering scraps of pom pom trim, lace and pearls to bottom corner of tag and a button on top of trim. I also cut two 8 inch pieces of white seam binding and tied in a bow at the top of tag. As always if you have any questions about this project please let me know.


Supplies

ColorBox: Art Daubers
ColorBox: Moss Dyestress Blendable Dye Ink
ColorBox: Tomato Dyestress Blendable Dye Ink
ColorBox: Princess Dyestress Blendable Dye Ink
ColorBox: Posy Dyestress Blendable Dye Ink
ColorBox: Mulberry Dyestress Blendable Dye Ink
ColorBox: Faux Postal Rollagraph 
Tag
Glass Tray
Sizzix/Courtney Chilson: Mosaic Gems 3D Embossing Folder
Crinoline Fabric
Pom Pom Trim
Lace
Pearls
Thread
Sequins
Seam Binding

(Products listed above are Affiliated Links for your convenience)


Thanks for stopping by, hope your Wednesday is awesome and enjoy creating!


Saturday, August 24, 2019

Bird and Flowers Altered Bird House


Hi everyone! I am back with another project and this time I altered a birdhouse that I had bought at Target in the One Spot on clearance. It was a Halloween theme birdhouse but I had in mind to do something different with it and this is what I came up with.


I started by tracing the sides and roof onto a piece of paper, I cut out each piece to create a pattern. I then traced the patterns onto watercolor paper and cut each piece out.


I inked the glass tray with Papaya Cream Pigment Ink from the Mermaid Paintbox Collection, added water to the ink and painted all four Watercolor Paper walls and let dry.


I inked an Art Dauber with Papaya Cream Pigment Ink from the Mermaid Paintbox Collection and inked the edges of all the walls. I inked the Ornate Border Molding Mat with Berry Pigment Ink from the Mermaid Paintbox Collection and stamped each of the four walls and once dry adhered each wall to the wooden birdhouse.


I cut four pieces of watercolor paper to fit the roof. And with a scallop edge punch, I punched one side of the watercolor paper, cut another piece of watercolor paper and folded in half. Then I punched both sides with the scallop edge punch. I also punched a Circle from a scrap of watercolor paper. Next I inked a glass tray with Rose Gold Pigment Ink from the Mermaid Paintbox Collection and added water, placed all the roof and circle pieces into the ink mixture and once I got the desired effect I wanted I removed and let dry.


I inked the Simple Dot Rollagraph with Espresso Pigment Ink from the Taos Petal Point Collection and inked all roof pieces. 


I adhered all roof pieces to the wooden birdhouse roof. I also added gems to each scalloped edge of roof and adhered the inked circle punch to front of the birdhouse. I added gems underneath the roof on the front of birdhouse, cut and adhered the lace to the front and back of the roof edge.


I placed the bird and wing diecuts from the Birds and Butterflies Diecuts on top of the Handwritten Creative Card and run through the diecut machine. I cut two of each out of the bird and wing. I reversed the Handwritten Creative Card so bird diecuts could be glued together.


Next I inked art daubers with Gulfstream and Coastal Pigment Inks from the Mermaid Paintbox Collection and inked the bird and both wings diecuts. I placed the wings to each side of bird and adhered the bird to roof. I finished by adhering the bow, pearl sprays, flowers and leaves to bird. As always if you have any questions about this project please let me know.


Supplies

ColorBox: Mermaid Paintbox Collection- Papaya Cream, Berry, Rose Gold, Gulfstream, Coastal and Ice Glacier Pigment Inks
ColorBox: Taos Petal Point Collection: Espresso Pigment Ink
ColorBox: Art Daubers
ColorBox: Simple Dots Rollagraph
Wooden Birdhouse
Scallop Edge Punch
Glass Tray
Beacon Adhesive: Zip Dry Adhesive
Pencil
Ribbon
Pearl Sprays
Paper Flowers and Leaves
Lace
Black Gem
Sizzix/Eileen Hull: Birds and Butterflies Diecuts

(Products listed above are Affiliated Links for your convenience)


Thanks for stopping by, hope your Saturday is wonderful and enjoy creating!


Thursday, August 22, 2019

From this Day Forward Wedding Tag

Hi everyone! I'm back with a tag I created in honor of my son and daughter in law's wedding anniversary that is today. I had these photos laying around and I thought why not create something with them and this is what I came up with.


I started by placing a Size #10 Tag (upper half) in the Floral Tapestry Embossing Folder and placed  between two cutting plates and run through the Diecut Machine. I removed and place lower half of tag in the Floral Tapestry Embossing Folder and completed the same steps. I inked two Art Daubers with Leaf and Frog Blends 2 Inks and inked over the leaves and vines of the embossed areas on the tag. Next I inked three Art Daubers with TutuWildberry and Melon Blends 2 Ink and inked over the flowers of the embossed areas on the tag.


I placed the Geometrics Art Screen on top of tag, loaded two art daubers with Tutu and Melon and randomly ink areas of art screen and once I achieved the desired effect I removed the art screen. I inked the glass tray with Coconut Blends 2 Ink, added water to ink, loaded a Paint Brush with ink mixture and splattered the tag.


I cut two photos to fit the tag. I adhered the first photo slightly off the side of tag. The second photo I cut a piece of textured white cardstock slightly larger than the photo an inked an art dauber with Melon Blends 2 Ink and inked the edges of cardstock and then adhered the photo to the mat. I added Foam Pop Dots to back of photo and placed slightly off other side of tag.


I placed a scrap of white cardstock on top of the Journaling Cards, Flowers and a piece of Crinoline Fabric on top of the Leaves Diecuts and run through the diecut machine. I shaped two flowers diecuts with a Stylus and adhered together and added two sequins and a gem to center of the flower.


Next I inked an art dauber with Frog Blends 2 Ink and inked the fabric leaf. Once dry I adhered to back of flower and added to the bottom of the photo.


I looped several threads to create two messy bows and adhered one under the flower diecut and other under the smaller photo along with a few pearl sprays.


 I finished the tag by cutting two nine inch pieces of seam binding and tying into a bow at the top of tag. As always if you have questions about this project please let me know.


Supplies

ColorBox/Eileen Hull: Tutu Blends 2 Ink
ColorBox/Eileen Hull: Wildberry Blends 2 Ink
ColorBox/Eileen Hull: Melon Blends 2 Ink
ColorBox/Eileen Hull: Leaf Blends 2 Ink
ColorBox/Eileen Hull: Frog Blends 2 Ink
ColorBox/Eileen Hull: Coconut Blends 2 Ink
ColorBox: Art Daubers
Sizzix/Brenda Walton: Floral Tapestry Embossing Folder
Glass Tray 
Seam Binding
Pearl Sprays
Sequins
Gem
Tag: Size #10
Thread
Beacon Adhesive: Zip Dry Adhesive
Crinoline Fabric

(Products listed above are Affiliated Links for your convenience)


Thanks for stopping by, hope your Thursday is great and enjoy creating!


Friday, August 16, 2019

Pull Yourself Together Card

Hi everyone! I am back with another quick and easy card I created! As I had mentioned in a previous blog post ColorBox closed their doors July 31st and I still have a few projects that I created using their product...I know I am slow getting them posted...sorry there is only so much of me to go around in a day but I am getting there. 😕


I started by inking a glass tray with the following Dyestress Blendable Dye Inks: Salmon and Bumble Bee inks, added water, loaded a paint brush and randomly added the ink mixture to the Tiny Dots Creative Card front and then I let dry. I placed the Swirl Dot Art Screen on top of card, inked an Art Dauber with Tomato Dyestress Blendable Dye Ink and rubbed over the art screen. Once I achieved the desired effect I was after I removed the art screen.


I placed the Scallop Square Cutting Template on top of a piece of Watercolor Paper, placed between cutting plates and run through the Diecut Machine.I inked the glass tray with Bumble Bee Dyestress Blendable Dye Ink, added water and placed the scallop square diecut in the ink mixture and once the diecut was completely covered I removed and let dry. I placed the Pull Yourself Together sentiment from the Buttercup Clear Stamps onto the MISTI Stamping Tool, inked with Wicked Black Archival Dye Ink and stamped onto the scallop square diecut. Next I inked an art dauber with Princess Dyestress Blendable Dye Ink and inked the edges of scallop square diecut and adhered to the card base. 


I placed a piece of watercolor paper on top of the Intricate Flowers Border Diecut, placed between cutting plates and run through the diecut machine. I inked art daubers with the following Dyestress Blendable Dye Inks: Fruit Punch, Princess and Inchworm and inked the intricate flowers border diecut and glued to the lower half of the card base. I inked the Mandala Heart Wood Stamp with Wicked Black Archival Dye Ink and stamped onto a piece of watercolor paper.Then inked a glass tray with Princess Dyestress Blendable Dye Ink, added water and painted the stamped Mandala Heart image and let dry. I fussy cut the heart image out with scissors, added Foam Pop Dots to the back and placed on the card. I then inked two art daubers with Tomato  and Posy Dyestress Blendable Dye Inks and inked the lower half of the heart image.


Next I placed the heart stamp from the Thankful Clear Stamps onto the MISTI Stamping Tool and inked with Posy Dyestress Blendable Dye Ink and stamped onto a piece of watercolor paper. I fussy cut the heart image out with scissors and adhered to the larger heart.I finished by adding tulle and thread behind the larger heart. As always if you have any questions about this project please let me know.


Supplies

ColorBox: Art Daubers
ColorBox: Mandala Heart Wood Stamp
ColorBox: Buttercup Clear Stamps 
Firefly: Cutting Templates-Scallop Square
Momenta: Cutting Templates-Intricate Flowers Border Diecut
Glass Tray
Tulle
Thread
Beacon Adhesive: Zip Dry Adhesive

(Products listed above are Affiliated Links for your convenience)


Thanks for stopping by, hope your Friday is awesome and enjoy creating!