Sunday, October 26, 2014

The Robin's Nest: Snow Flurry Tray

Hi everyone! I'm here to share a project I created for the Robin's Nest. This year has flown by and can you believe that Christmas is only two months away!?!?!? Most of the time I have over half of my shopping finished and a few presents already made but not this year. Gulp! Well, since the Robin's Nest Alter Art design team is cross promoting with Walnut Hollow and one of my choices was the 10"x12" rectangular tray I decided to altered it into something Christmas/Winter related and this is what I came up with.


For more details and photos please hop on over to the Chattering Robin's blog!

Thanks for stopping by, hope your Sunday is wonderful and enjoy creating!


Monday, October 20, 2014

Chester & the Boneyard Band

Hi everyone! I'm back to share another quick Halloween card I created. The base of the card is a folded 6"x6" piece of purple cardstock and then I adhered layers of cardstock/scrapbook paper to along with a paper doilie which I sprayed with Tattered Angels Chalkboard Mantis glimmer mist.


The vineyard band cut apart is from Echo Park 's Chillingsworth Manor collection. I distressed the edges, inked and added pop dots before I adhered to the card. I made tulle bows which I glued behind the card along black twine, pom poms and flowers.


I finished off the card with some green ric rac, buttons, sequin and Dew Drop. There you have it another easy peasy card. :-) If you have any questions please let me know. 
Also I am submitting this card for the Orange and Black/Halloween theme challenge over at the Paper Wings Production blog.


Thanks for stopping by, hope your Monday is fabulous and enjoy creating!


Saturday, October 18, 2014

Crafty Card Gallery: Clyde's Pumpkin Patch

Hi everyone! I'm here to share my card I created for the Crafty Card Gallery. The theme for the month of October we had to either use pumpkin/jack o'lanterns or chocolate. 
This is what I came up with for my card. The base is a folded 6"x6" piece of purple cardstock. I cut and layered patterned cardstock/scrapbook paper which I adhered to the base of the card.


The Clyde's Pumpkin Patch image is cut from Echo Park's Chillingsworth Manor  Poster  and Tickets sheet of cardstock. I distressed the edges and then inked. Then added pop dots to the back to give it some "height". 


I cut three thin strips of orange tulle and made mini bows out of them. I adhered behind the image along with some black and white polka dot flowers and some mini lime green balls picks that I had bought at Christmas but never used. I also added sequins, dew drops and black lace.


I finished off the card with ric rac and buttons. I'm really pleased with how the card turned out and was very easy to make.
Also I am submitting  this card for the orange and black or Halloween themed challenge over at Paper Wings Production blog.


If you have any questions please let me know. Thanks for stopping by, hope your Saturday is awesome and enjoy creating!


Friday, October 17, 2014

I Believe in You

Hi there! I'm back to share another quick 3"x5 1/2" card I created using some of my leftover scraps of cardstock and scrapbook paper, along with some die cuts from K & Company, button, sequin and dew drop. Also the sentiment is from Unity Stamps.


Another easy peasy card that didn't take very long to create! :-)


If you have any questions please let me know. Thanks for stopping by, hope your day is great and enjoy creating!


Thursday, October 16, 2014

The Baby's Debut

Hi everyone! I'm here to share a very quick project I created using more of my scraps of cardstock and scrapbook paper. Like the Hello Friend card that I shared a few days ago the base is 3"x5 1/2". I added scraps which I inked the edges and adhered to the top of the card. This digital image is one in several on a collage sheet I purchased a few years ago on etsy. I was going to include the link but the shop is no longer open. I adhered the image to the card along with a clear sequin and a Pearl Dew Drop. Pretty easy huh? :-)


Also I wanted to share that my step daughter is pregnant which will be my hubby's first grandchild and mine too…unless you want to count the dogs as grandkids that my son and his girlfriends has. ;-) 
I'm not sure if I'm going to use this as a card or as a page in a baby junk journal. We will see as time draws near.


If you have any questions please let me know. Thanks for stopping by, hope your Thursday is awesome and enjoy creating!


Monday, October 13, 2014

Hello Friend

Hi everyone! I'm here to share a quick card I created using some left over scraps that I had laying around. The card base measures 3"x5 1/2" folded. I cut eleven strips of cardstock and scrapbook paper in various sizes and inked  all edges to fit on the base of the card. I glued the ends of two of the strips of cardstock, the height and width of the card base, then proceeded to "weave" the strips of paper and once finished glue all ends down on the base of the card.


The wooden hello blurb I had found it in the clearance section at Michael's. I loved the fact that it was only 10¢. I just love a good bargain. :-) I sprayed the blurb with Tattered Angels Dazzling Diamonds Glimmer Mist. I printed the "friend" on cardstock, cut into a banner, inked edges and adhered underneath the hello blurb. I finished it off with a sequin and Dew drop.


I love how you can see the cardstock through the hello blurb!  If you have any questions about this card please let me know.


Thanks for stopping by, hope your Monday is wonderful and enjoy creating!


Saturday, October 4, 2014

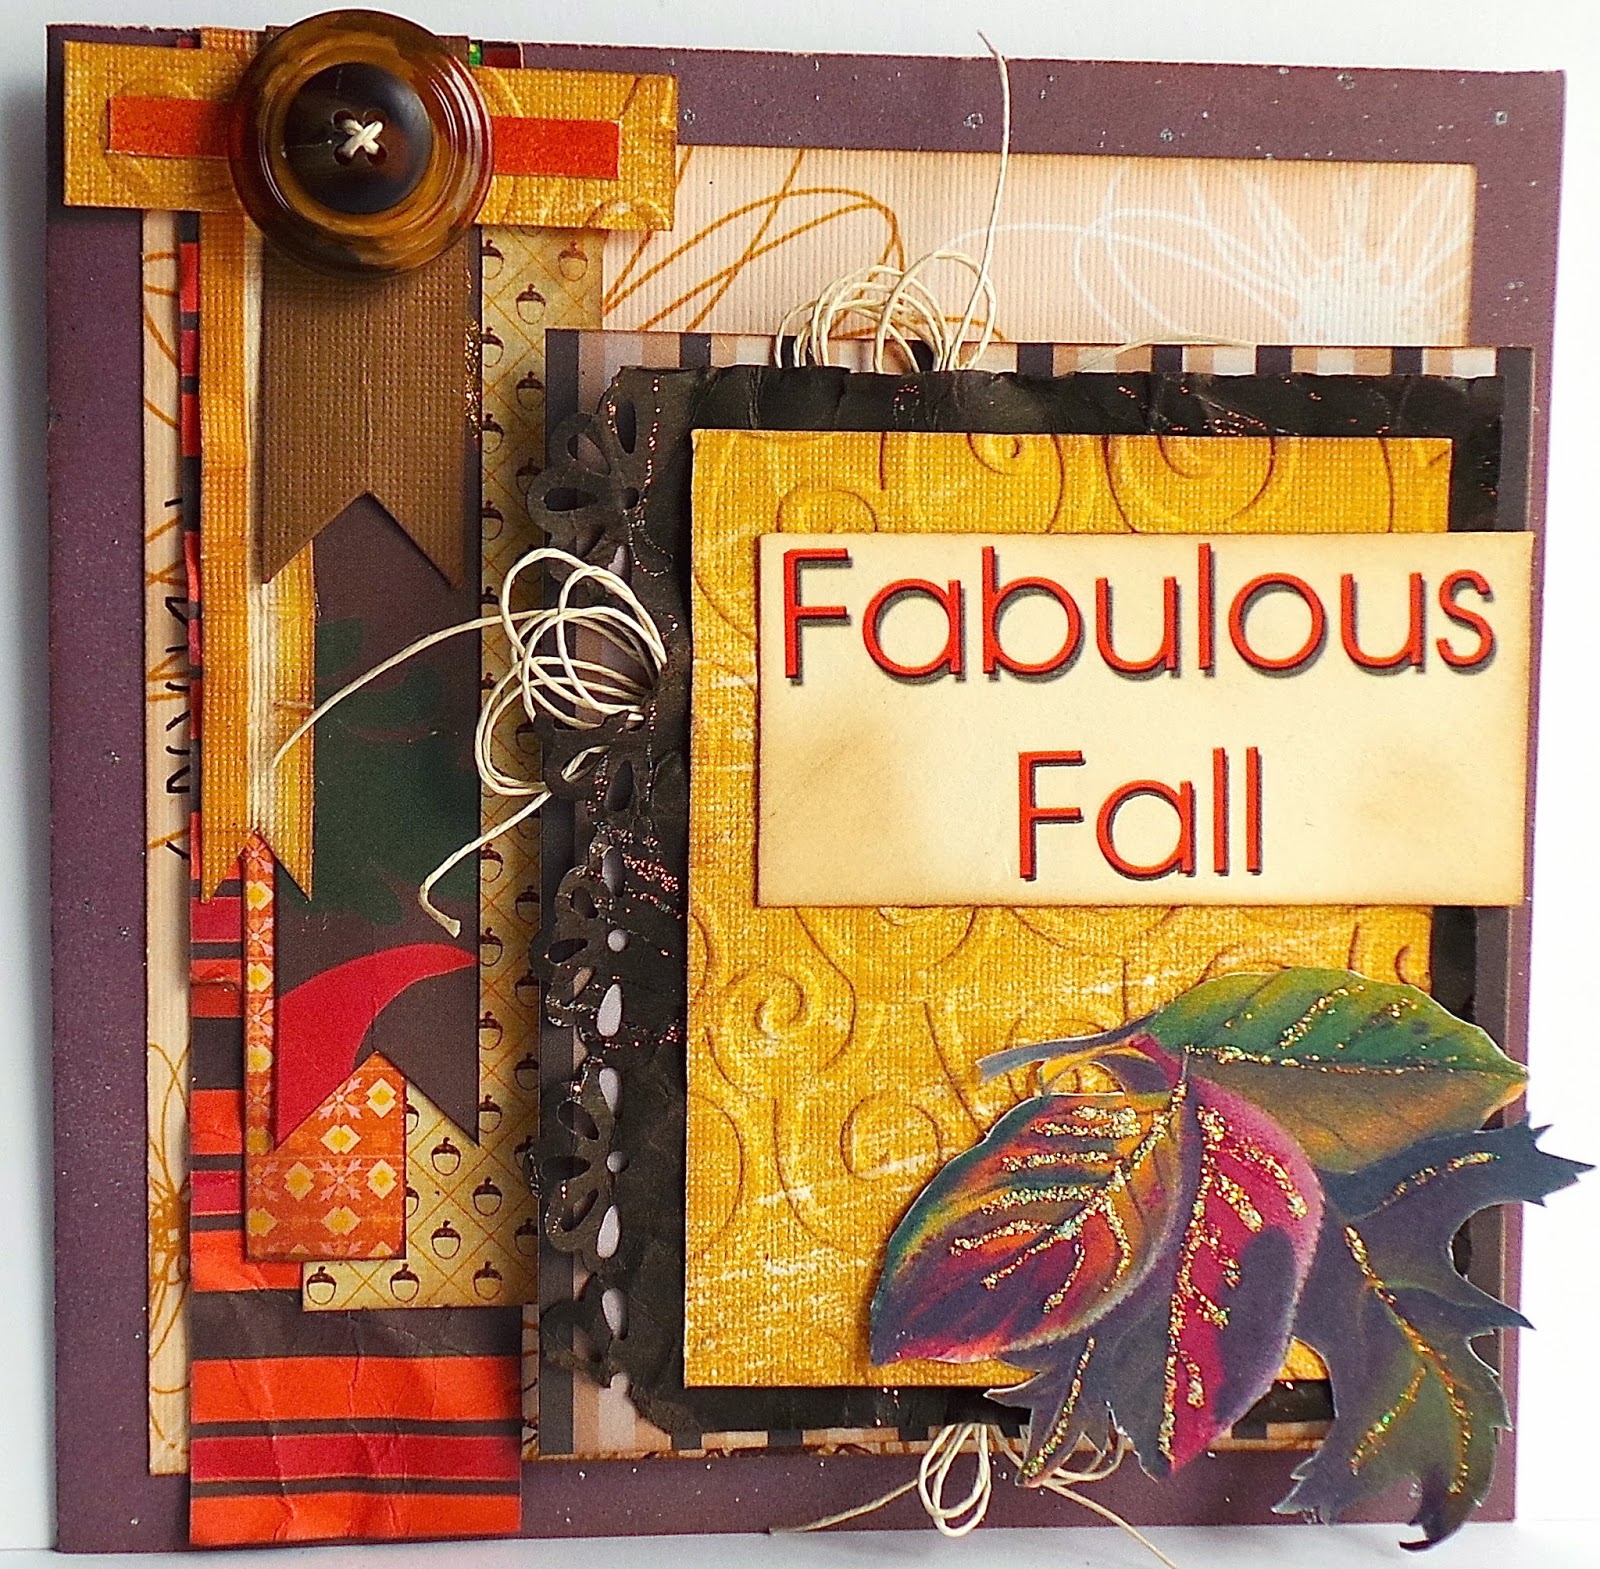
Fabulous Fall

Hi everyone and Happy World Card Making Day! I'm here to share a quick card I created using mostly Robin's Nest product. I started by cutting a 6"X12" piece of Wineberry Glitter Cardstock  and folded to make a 6"X6" card base. Cut a piece of Honeycomb Daisy Glitter Cardstock to 5 1/4"X 5 1/4" and adhere to the base of the card. Next cut eight banners in various sizes and adhere to the side of the card. Top off with two buttons and some hemp twine. Cut the following pieces of  cardstock by: 4 1/2"X4 3/8", 4"X4 1/8" (crumple and use edge punch on one side) and 3"X3 3/4" (Emboss with the Swirl embossing folder). Ink all edges, adhere together and add pop dots before gluing to card. Make three sets of hemp bows and adhere to the underneath side of the mats. Fussy cut digis leaves out, add a touch of Stickles and glue to the card. Use a piece small cream colored cardstock and add rub-on and glue to card.


If you have any questions please let me know.


Supply List:
Robin's Nest: Leaf Glitter Cardstock, Fall Rub-Ons, Witch Accessories Cardstock, Honeycomb Daisy Glitter Cardstock, Boo Words Glitter Cardstock, Love Me Cardstock, Wineberry Glitter Cardstock
Other Supplies: Stickles, Hemp Twine, Buttons, Various cardstock/Scrapbook paper scraps, Martha Stewart Decorative Edge Punch, Tan Chalk Ink, Cuttlebug: Swirl Embossing Folder, Pop Dots, Altered Pages: Fall Splendor Collage Sheet

Thanks for stopping by, hope your Saturday is awesome and enjoy creating!