
Hi everyone and happy first day of Spring! I want to share a mini Spring junk journal that I created with all my leftover from my past projects that I created for ColorBox. No need to throw the extras away just add them to another project and that is what I done. 😀
Before I get started in telling how and what I used on each page...four page total...I cut and bound each page with I laid each page on top of the Movers and Shapers Book Binding Diecut with Base Tray (retired) and ran through the Diecut Machine.

The cover/page one is cut from Matboard using the Books and Pages, Trinket Box and Frame Diecut and embossed with the Waffle Embossing Folder (retired). I inked the glass tray with Tutu Blends Ink, add water to ink, load paint brush and painted the front of the frame/cover and let dry. I lightly inked over and around the edges of the cover with Blush Metallic Pigment Ink.
I inked two Art Daubers, one with Canary and one with Apricot Inks from the Enchantment Petal Point Inks and ink two matboard flowers with one of each inks. I let both flowers dry. I placed the leaf sprig stamp from the Thankful Clear Stamp Set onto the MISTI Stamping Tool and inked with Mint Ink from the Enchantment Petal Point Inks and stamp onto a piece of Textured White Cardstock. I fussy cut the stamped image out. Next I placed a brad in the center of both flowers and add leaf sprigs to back of flower before adhering to the cover.

The inside cover I inked an Art Dauber with Rose Premium Dye Ink, inked a butterfly punch and once dry I adhered to the inside cover. I also added a gem to butterfly.
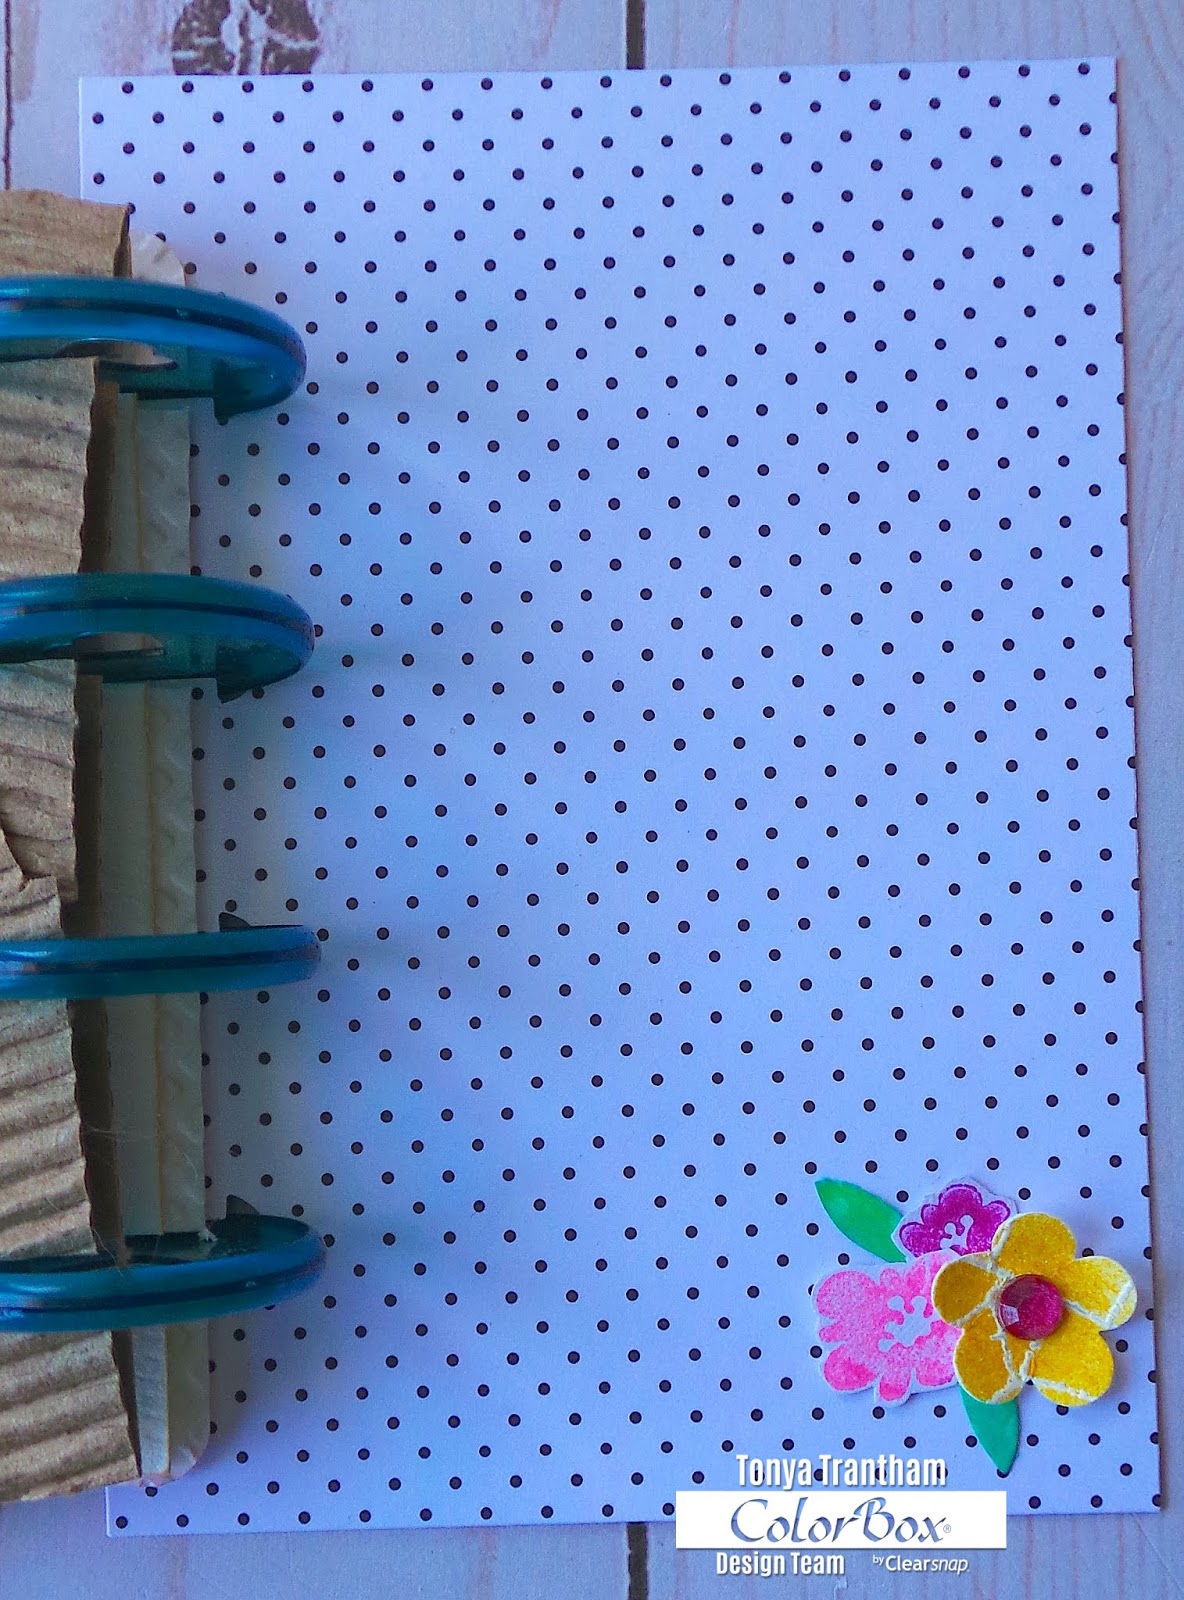
The front of page two I inked the Crackle Background Rollagraph (I couldn't find a link for the rollagraph but found a link for the moulding mat which is the same design just not on a roller) with Top Boss Embossing Stamp Pad and went over the Watercolor Paper page.I applied White Embossing Powder and set with Heat Tool. Once the embossed area was cool to the touch I loaded three Art Daubers with the following inks: Dandelion Premium Dye, Glacier Lake Archival and Rosebud Classic Pigment Inks and randomly inked over the whole page.
I placed the flower stamps from the Thankful Clear Stamps onto the MISTI Stamping Tool and inked two of the flowers with Peony and one flower with Pink Inks from the Enchantment Petal Point Inks and stamped onto a piece of textured white cardstock and fussy cut both out. I punched a leaf sprig from textured white cardstock and inked the leaves with Mint Ink from the Enchantment Petal Point Inks. I then adhered a leaf and peony colored flower to the bottom corner of page two.

The back side of page two I inked the Butterfly Words Stamp with Glacier Lake Archival Ink and stamp onto a piece of texture white cardstock, fussy cut the stamped image out and adhered to backside of page two. I added a bit of trim and a button to butterfly.
The front of page three I adhered a circle and strip of patterned cardstock to coffee sleeve. I lightly watercolored a flower diecut with Tutu Blends Ink and while still damp, shaped with my hand and let dry. I added a brad to center of flower and two leaves before adhering to page.

The back side of page three I placed textured white cardstock on top of the Long Classic Scalloped Rectangles Diecut and inked an Art Dauber with Sky Blue Ink from Enchantment Petal Point Inks and ink edges of diecut and I adhered to the back of page three. I added a button to the top of the diecut.

For the pull out tag I inked the Tulip Watering Can Stamp with Wicked Black Archival Dye Ink and stamp onto a piece of watercolor paper. I inked the glass tray with Shamrock, Citronella and Heather Dyestress Blendable Dye Inks and added water to each ink and paint the tulips and leaves on the watering can. Next I fussy cut the watering can image out and adhered to tag and add clear glitter glue to image. Once dry I placed the tag inside coffee sleeve.

On page four I used a left over piece of the Tiny Dots Creative Card and adhered leftover stamped flowers, leaves and flower punches to corner of page. I added a gem to the center of one flower.
I added four Discs to each of the pages.
SUPPLIES USED:
ColorBox/Eileen Hull: Tutu Blends Ink
ColorBox: Blush Metallic Pigment Ink
ColorBox:Art Daubers
ColorBox: Enchantment Petal Point Inks
ColorBox:Thankful Clear Stamp Set
ColorBox: Rose Premium Dye Ink
ColorBox: Crackle Background Rollagraph
ColorBox: Top Boss Embossing Stamp Pad
ColorBox: White Embossing Powder
ColorBox: Dandelion Premium Dye Ink
ColorBox: Glacier Lake Archival Ink
ColorBox: Rosebud Classic Pigment Ink
ColorBox/Teresa Collins: Butterfly Words Stamp
ColorBox: Wicked Black Archival Dye Ink
ColorBox: Heather Dyestress Blendable Dye Ink
ColorBox: Shamrock Dyestress Blendable Dye Ink
ColorBox: Citronella Dyestress Blendable Dye Inks
ColorBox: Tulip Watering Can Rubber Stamp
ColorBox: Tiny Dots Creative Card
Sizzix/Eileen Hull: Movers and Shapers Book Binding Diecut
Sizzix/Eileen Hull: Books and Pages, Trinket Box and Frame Diecut
Sizzix: Diecut Machine
Sizzix: Matboard
Spellbinders: Long Classic Scalloped Rectangle Deicuts
Various Punches and Chipboard Diecuts
Button
Lace/Trim
Beacon Adhesive: Zip Dry Adhesive
Gems
Brads
Coffee Cup Sleeve
Tag

As always if you have any questions about this project please let me know.
I would like to also submit this project for the following challenges:

Thanks for stopping by, hope your Wednesday is wonderful and enjoy creating!

Super fun mini junk journal! This is so cute in its tiny size, Tonya. Love the spring images you added into it. Thanks so much for sharing your amazing make with us at Simon Says Stamp Monday Challenge! hugs, Maura
ReplyDeleteThanks so much Maura! <3
DeleteThis is such an inventive album Tonya, I love the way you have used the Eileen's Trinket Box die cut for the cover and bound it all in this unique way. A real treasure to see inside. Thanks so much for sharing over at Mini Album Makers.
ReplyDeleteCreative Wishes Tracey (DT)
Thank you Tracey! <3
DeleteYou really have created a journal to celebrate the arrival of Spring! Great use of Eileen's Trinket Box die for your covers and coffee sleeves. Thank you for sharing your album with us at Mini Album Makers this month. Jennie
ReplyDeleteThanks Jennie! <3
Delete