Thanks for stopping by, hope your Tuesday is awesome and enjoy creating!
Wednesday, February 21, 2018
Little Birdie Crafts: Floral Heart Pocket
Hi everyone! Today over on the Little Birdie Crafts blog I I have a heart pocket I created using an assortment of products from Little Birdie. For all the details you can find my blog post HERE.
Monday, February 5, 2018
Love You Valentine Card
Hi everyone! With Valentine's Day right around the corner I am here to share a 6"x6" card I created using Eileen Hull's newest diecut Book and Pages, Trinket Box and Frame and some of her older diecuts Romance Flower, Stitchy Flowers and Leaf and Spring Leaves dies.
I started by cutting and folding a piece of Coral and Ivory Big Rev Cardstock to create a 6"x6" base for my card.
I cut out several flowers from the Stitchy Flowers and Leaf and Spring Leaves dies on white cardstock. On a glass tray I spritzed an assortment of Simply Sheer and Glimmer Mists: Soft Peach, Rosey, Classy Green, Silk and Moss (retired),added a little water and laid the flowers and leaves down to absorb the colors. Once I was happy with the results I removed and placed them on a tray to dry.
I used the Love Notes stamp set from Crate Paper to stamp the "love you valentine" sentiment on a piece of cardstock and added off center of the banner to finish off the card.
If you need more inspiration hop on over to Eileen Hull's blog and check out what the team is up to. You can find her blog HERE.
As always if you have any question please let me know.
I started by cutting and folding a piece of Coral and Ivory Big Rev Cardstock to create a 6"x6" base for my card.
I cut the frame from the Book and Pages, Trinket Box and Frame which is cut from Mat Board and embossed with the Sweet Blooms Textured Impressions Embossing Folder. I spritzed with Rosey Simply Sheer Mist, let dry and lightly inked over the edges and embossing with an aloe chalk ink. I cut a floral patterned cardstock slightly larger than the oval on the frame and adhered to the base of the card before adding the frame close to the edge of the card. I also added three banners before adhering the frame down.
I cut out several flowers from the Stitchy Flowers and Leaf and Spring Leaves dies on white cardstock. On a glass tray I spritzed an assortment of Simply Sheer and Glimmer Mists: Soft Peach, Rosey, Classy Green, Silk and Moss (retired),added a little water and laid the flowers and leaves down to absorb the colors. Once I was happy with the results I removed and placed them on a tray to dry.
I shaped all the flowers and leaves and adhered to the corner of the card. I added a brad to the larger flower, a Dew Drop to the medium size one and the small flowers I added sequins and then I applied Stickles over each floral center.
I bunched up gold thread and gold ribbon and adhered under the flowers along with felt hearts from my stash and to pearlized needles.
I used the Love Notes stamp set from Crate Paper to stamp the "love you valentine" sentiment on a piece of cardstock and added off center of the banner to finish off the card.
If you need more inspiration hop on over to Eileen Hull's blog and check out what the team is up to. You can find her blog HERE.
As always if you have any question please let me know.
Also I would like to submit this card for the following challenge:
Word Art Wednesday: Anything Goes-Challenge #320-#321
Thanks for stopping by, hope your Monday is awesome and enjoy creating!
Monday, January 29, 2018
Beach Disc Junk Journal
Hi everyone! I am here to share my Inspiration Team project I created this month for Eileen Hull. The weather has been so cold in my neck of the woods that my project has a warm weather beach theme to it.
I love the Book Binding Movers and Shapers Magnetic Diecut! There is so many possible uses for it! My journal has a total of 35 pages, plus the front and back covers. So this is one packed journal and the best part I can take it with me on my vacation already assembled. No, taking a load of cardstock, embellishments, etc. which nine times out of ten I won't fool with that much because...well...you know..I'm on vacation. 😎
I added a business card (Chick A Fil is a favorite place to eat at) and sacks/bags to the journal too.
I love the fact that you can move pages around or add or even take out completely.
I also made pages from a pamphlet I had picked up.
I used a hotel note pad for some pages in my journal too.
I threw in some paint chips in a beach theme.
The map I wanted to include was too large so I cut it down and folded and used a paper clip to keep it from flopping around.
Coffee sleeves work well as pockets to hold tags or receipts.
I added a drink coaster from my favorite restaurant to the journal.
I saved this bag from an order I received. I folded it over to create a flap, added some ric rac and a clip to keep ephemera safe.
There you have it! One junk journal ready to go to the beach with me...hopefully this year...all I'll need is an ink pen, Insta Printer and a small stash of embellishments and I am ready!
Be sure to check out these posts from Eileen's team: HERE, HERE and HERE. As always if you have any questions about this project please let me know.
Thanks for stopping by, hope your Monday is awesome and enjoy creating!
I decided to gather up all of my beach theme cardstock, stickers, embellishments and things I had put back from my trips to the beach along with the Book Binding Movers and Shapers Magnetic Diecut, Base Tray, burlap covered matboard, Book and Pages, Trinket Box and Frame Diecut and Medium Discs to create this journal.
I got so carried away that I didn't photograph a before photo of the cover which I cut from burlap covered matboard using the Book and Pages, Trinket Box and Frame Diecut. I backed the cover with a patterned cardstock and inked the edges. I fussy cut sand dollars from scrapbook paper and adhered to the bottom corner of the opening of the cover along with a button and added a pearl and gem to the center of each sand dollar. I adhered gems around the oval of the opening. A side note use a heavy duty adhesive to hold the gems in place. I used Zip Dry Adhesive at first but wasn't holding so I reapplied Fabri-Tac and that seems to be holding them in place.
I love the Book Binding Movers and Shapers Magnetic Diecut! There is so many possible uses for it! My journal has a total of 35 pages, plus the front and back covers. So this is one packed journal and the best part I can take it with me on my vacation already assembled. No, taking a load of cardstock, embellishments, etc. which nine times out of ten I won't fool with that much because...well...you know..I'm on vacation. 😎
I added a business card (Chick A Fil is a favorite place to eat at) and sacks/bags to the journal too.
I love the fact that you can move pages around or add or even take out completely.
I also made pages from a pamphlet I had picked up.
I used a hotel note pad for some pages in my journal too.
I threw in some paint chips in a beach theme.
The map I wanted to include was too large so I cut it down and folded and used a paper clip to keep it from flopping around.
I added a drink coaster from my favorite restaurant to the journal.
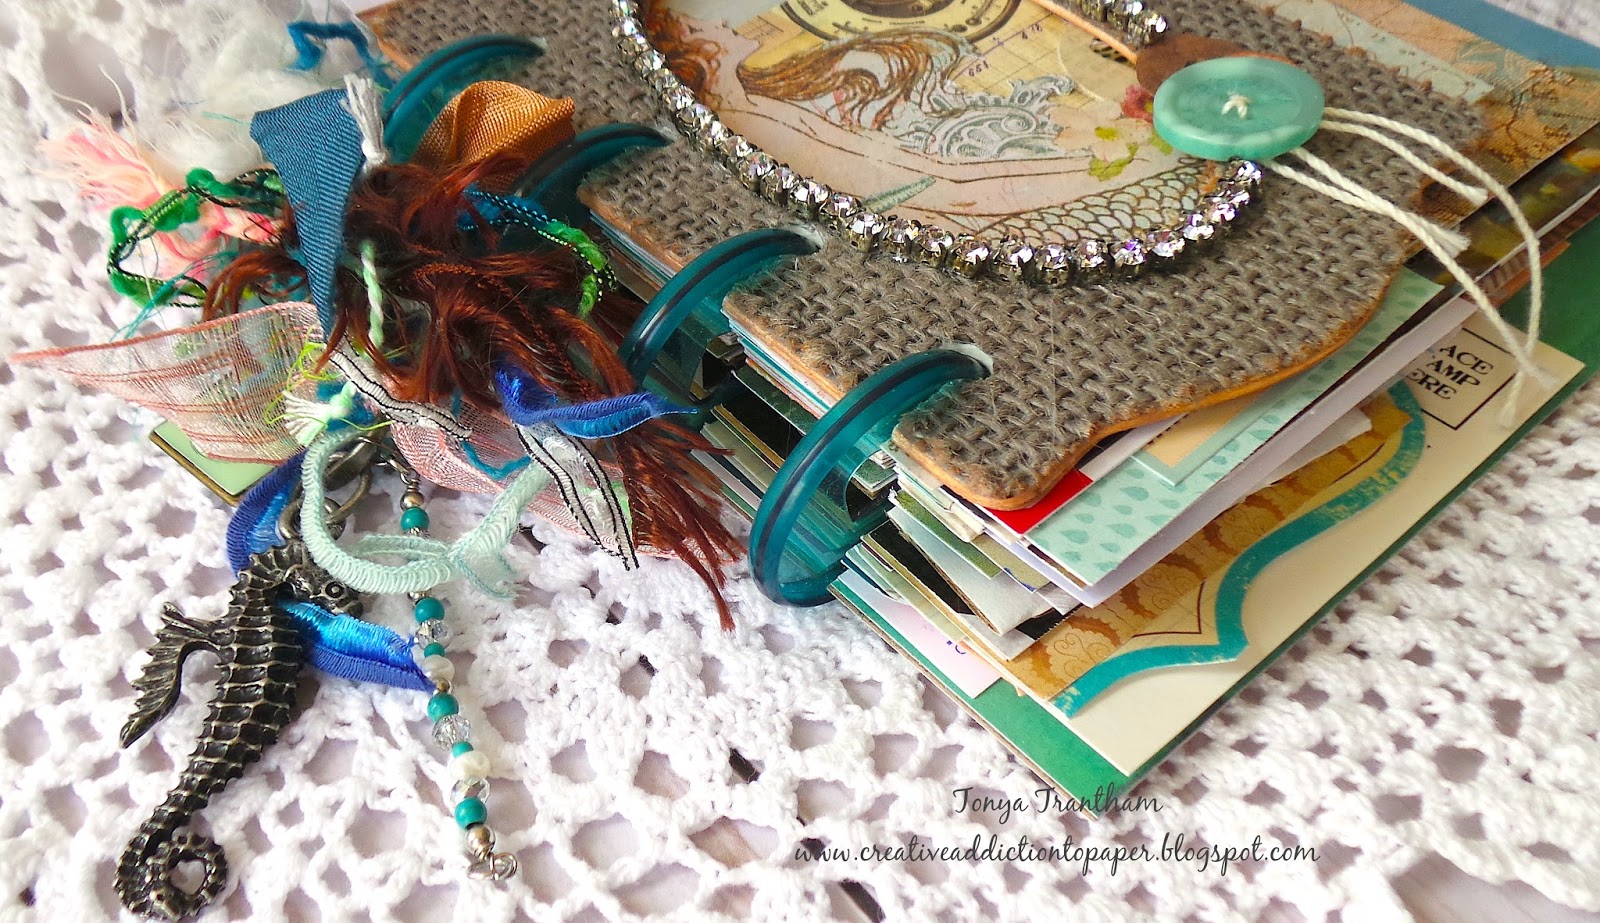
Since the discs have a small heart in the center of each one I added an assortment of fiber, seam binding, ribbon and charms to the top disc on the journal.
Be sure to check out these posts from Eileen's team: HERE, HERE and HERE. As always if you have any questions about this project please let me know.
Also I would like to submit this project for the following challenges:
Word Art Wednesday Anything Goes: Challenge #318-#319
Mini Album Makers Challenge: January Challenge
Thanks for stopping by, hope your Monday is awesome and enjoy creating!
Wednesday, January 24, 2018
Valentine's Day Candy Jar
Hi everyone! I am back with a very quick and easy project that I created for Valentine's Day!
I purchase these cups of Oui yogurt and the cups are made of glass. I love the shape and thought wouldn't these make great gifts if I could dress them up in some way?
Well, I started by peeling the labels off, giving the jar a good washing and rubbing Goof Off to get the sticky residue off the glass.
I cut several flowers and leaves from the Stitchy Flowers and Leaf Diecuts on White Cardstock.
I spritzed the following glimmer and simply sheer mists onto a glass plate: Gold, Moss (retired), Soft Peach, Rosy and Classy Green.
I added a little water to the mists and watercolored the flowers and leaves and let dry.
I cut strips of white and soft blue cheese cloth...Hobby Lobby now has cheese cloth in different colors...and tied around the lip of the jar. I added a bit of adhesive to hold the cheese cloth in place. I cut a two inch strip of lace and bunched up an assortment of different colored thread and adhered to where I tied off the cheese cloth.
I used a stylus and shaped the flower pedals and leaf and adhered together.
I used pliers to snip off the shank off the back of a button so it would lay flat when I glued it to the center of the flower.
I adhered the flower to the jar and waaaa laaaaa finished!!! Now all I have to do is add candy!

Which I did! 😊 Once the candy is eaten a battery operated candle can be added to the jar for a nice decorative touch.
As always if you have any questions about this project please let me know.
Also I would like submit this for the following challenge:
Word Art Wednesday Anything Goes: Challenge #318-#319
Thanks for stopping by, hope your Wednesday is awesome and enjoy creating!
Saturday, January 20, 2018
Canvas Corp: Be Yourself Canvas
Hi everyone! Sorry if I have been MIA but I have been cranking out projects for Creativation/CHA which I can't share until a later date but now I am able to share my first project of the year with y'all!
Each year Canvas Corp crew members are asked to create a 4X4 canvas and this is what I came up with.
I spritzed the 4x4 Canvas with the following Glimmer and Simply Sheer Mists: Bahama Blue, Verdigris and Baby Blue...if you haven't figured out these are some of my favorite colors to work with. 😊 Once it was dry I gathered up an assortment of Canvas Corp and 7 Gypsies cardstocks and started fussy cutting and punching out before I got down to layering everything onto the canvas.
I cut out from the following scraps of cardstocks I had laying on my desk: Architextures Old Window and Architextures Stenciled Crates cardstocks, roughed up the edges of the cardstock, added a piece of a doily and inked all before adhering to the canvas base.
The banners I cut from the Architextures Market Signs cardstock and the sentiment is from the 7Gypsies Gypsy Moments: Pose and Reflections cardstock. I inked all of the edges and cut the sentiment a part before adhering to the canvas.
From the 7Gyspies cardstock scraps I had laying around I distressed the edges of cardstock, inked and adhered around the edges of the canvas.
The front of the canvas still looked a little bare so I punched out flowers and leaves from my Canvas Corp cardstock, shaped and added gems and flat back pearls to the flowers.
This was definitely a fun project to create. If you have any questions about this project please let me know.
Also I would like to submit this for the following challenge:
Word Art Wednesday: Anything Goes-Challenge #318-#319
Thanks for stopping by, hope your Saturday is awesome and enjoy creating!
Labels:
4x4 Canvas,
7 Gypsies,
Beacon Adhesives,
Canvas Corp,
Cardstock,
DIY,
flowers,
Fussy cutting,
Gems,
glimmer mist,
handmade,
Punches,
Scrapbook paper,
Simply Sheer Mist,
Tattered Angels,
Vintage
Subscribe to:
Posts (Atom)