Showing posts with label Paper flowers. Show all posts

Tuesday, May 5, 2020

Hot Pink Floral Extended Mini Book Case

Hi everyone! I wanted to share a project I created using Eileen Hull's newest Tiny Book Case Diecut with a fun added "twist"!


After applying an Adhesive Sheets to both sided of a piece of Chipboard I added patterned cardstock to each side, placed the diecut on top and run through the Diecut Machine. As in the photo below you can see where I cut an extra set of "flaps". 


I adhered the "extra set" of flaps to the front of the case.


I also glued the bottom halves and the lid together.


I cut strips of patterned cardstock the same size as the outside and inside of the case and adhered to give it a cleaner look. 


I cut cording and tied to the closure and added a button, sequin and gem to the center of the closure.


I added an assortment of flowers and leaves, handmade and store bought, to the top of the lid along with lace, cheese cloth, thread bows and pearl sprays.


There you have it! I absolutely LOVE this bookcase diecut and how versatile this diecut is! 


For more inspiration stop by Eileen's blog to see the latest projects from the rest of team! You can find the latest blog post HERE. As always if you have any questions about this project please let me know.


 Supplies

Eileen Hull/Sizzix: Tiny Book Case Diecut
Beacon Adhesive: Zip Dry Adhesive
Lace
Cheese Cloth
Thread
Flowers
Pearl Sprays
Sequins
Elastic Cording
Button

(Products listed above are Affiliated Links for your convenience)

DISCLAIMERS

This blog is compensated to provide opinion on products, services, websites, and various other topics. Even though the owner(s) of this blog receives compensation for our posts or advertisements. I always give my honest opinions, findings, beliefs, or experiences on those topics or products. The views and opinions expressed on this blog are purely my own. Any product claim, statistic, quote or other representation about a product or service should be verified with each manufacturer, provider, or party in question.This blog contains affiliate links, clicking and shopping through these links helps to support and run Tonya Trantham Designs - Creative Addiction to Paper Blog at no additional cost to you. Today's features are Eileen Hull, Sizzix and Scrapbook.com Products. 


Thanks for stopping by, hope your Tuesday is great and enjoy creating!


Tuesday, February 18, 2020

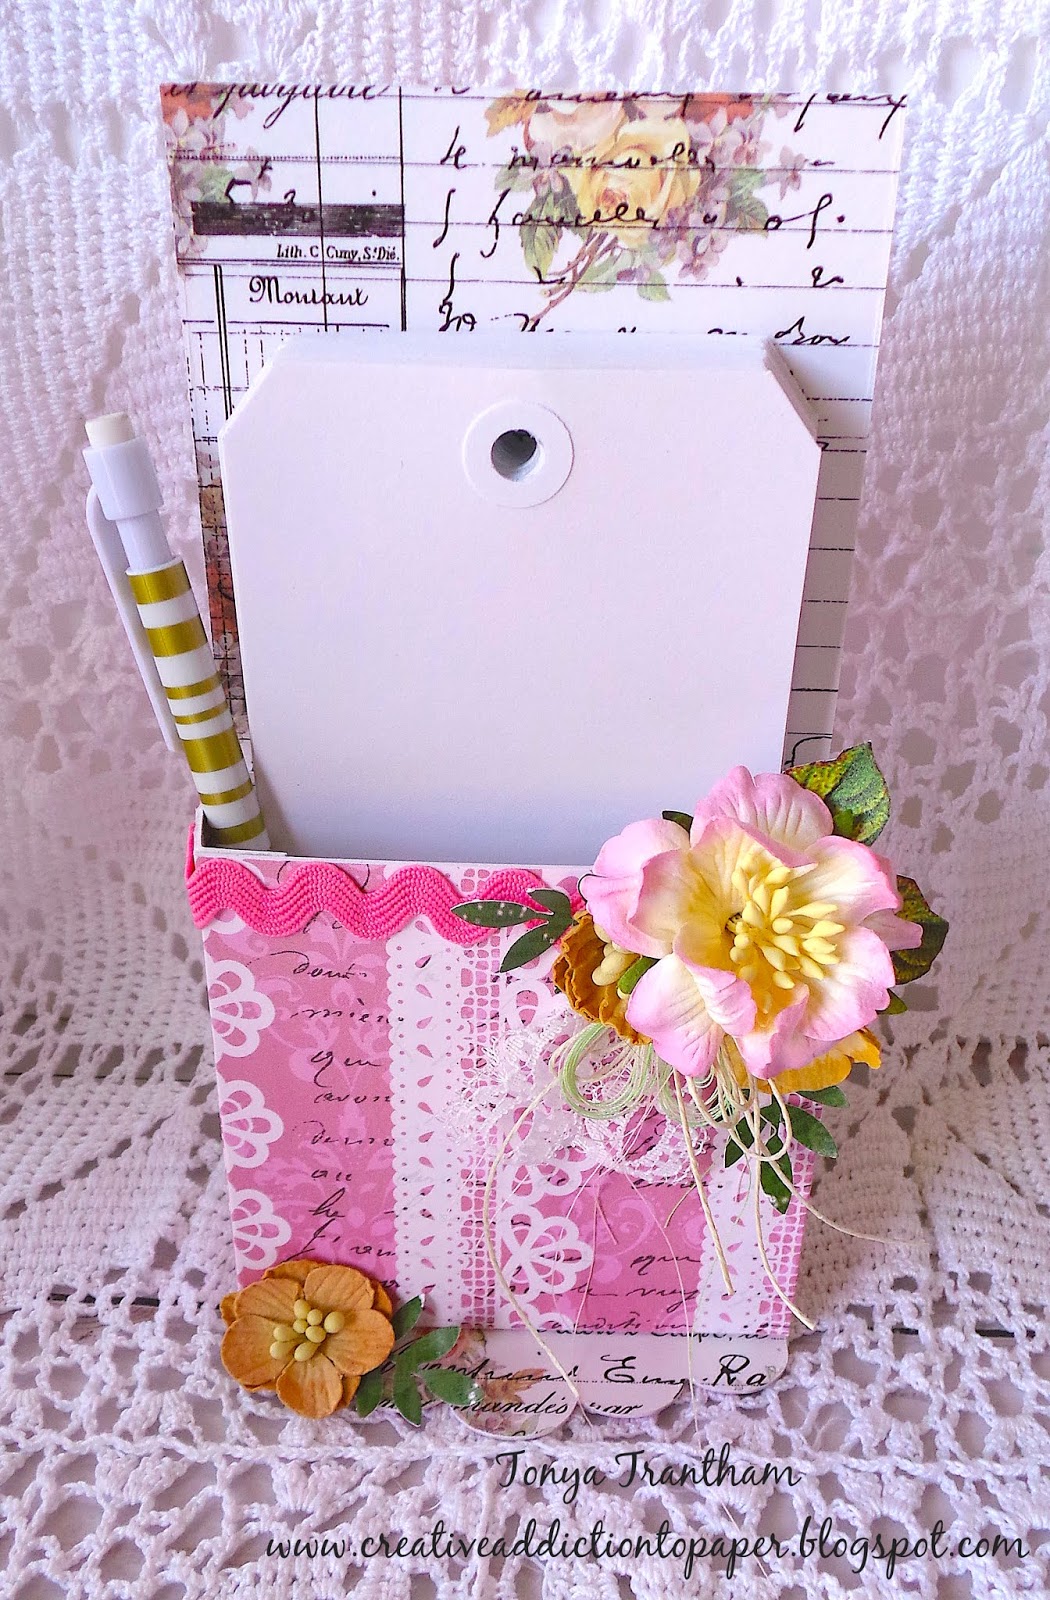
Whispers of Love Note Pad Holder

Hi everyone! I'm back this week with a fun little notepad holder I created with Eileen Hull's newest Gift Box with Scallop Edges and Label Diecut and part of her oldie but goodie Trinket Box and Frame Book and Pages Diecut.


I started by applying Adhesive Sheets to both sides of the Mat Board and placed the cardstock from Whispering Love Paper Pad on top of the matboard. I cut one side and two of the larger scalloped edges from the Gift Box with Scallop Edges and Label Diecut. I cut one square with the small flap off with a Paper Cutter and folded both small flaps. This will create the bottom of the box.


I completed the same steps for applying adhesive sheets to mat board and cardstock and cut two hinges from the Trinket Box and Frame Book and Pages Diecut. I cut a little off of the top of each one and one of the folded edges and then folded each side.


I adhered both hinges to each side of the box.


I cut a piece of patterned cardstock to fit the bottom of the box and adhered to the small flaps. The two scalloped edges I adhered to the bottom of the box. 


I adhered Ric Rac, added flowers from my stash and fussy cut a couple of leaves from the Whispering Love Paper Pad and glued to the back of the larger flower.


I punched out a few leaf sprigs and shaped and added to the smaller flowers. I tied a bow in cording and another bow in thread and added along with a little piece of lace to finish off the holder.


Instead of adding a note pad I think I will use it for the time being to hold my set of tags. As always if you have questions about this project please let me know.


If you haven't checked out Eileen's Inspiration Team latest projects you can find those HERE and HERE.

  
Supplies

Beacon Adhesive: Zip Dry Adhesive
Thread
Cording 
Paper Flowers
Scissors
Leaf Sprig Punch
Ric Rac
Lace

(Products listed above are Affiliated Links for your convenience)

DISCLAIMERS

This blog is compensated to provide opinion on products, services, websites, and various other topics. Even though the owner(s) of this blog receives compensation for our posts or advertisements. I always give my honest opinions, findings, beliefs, or experiences on those topics or products. The views and opinions expressed on this blog are purely my own. Any product claim, statistic, quote or other representation about a product or service should be verified with each manufacturer, provider, or party in question.This blog contains affiliate links, clicking and shopping through these links helps to support and run Tonya Trantham Designs - Creative Addiction to Paper Blog at no additional cost to you. Today's features are Eileen Hull and Sizzix Products. 


Thanks for stopping by, hope your Tuesday is wonderful and enjoy creating!


Wednesday, November 29, 2017

Little Birdie Crafts: Altered Snowman Box

Hi everyone! I am super excited to share that I have been asked to be a part of the Little Birdie Crafts design team! I'm so in love with all the beautiful flowers, trims and paints the company has to offer...plus there is so much more! You can find the website HERE.


For my first project I decided to alter a cell phone box that I had lying around...actually I have several boxes laying around...and create a retro style Christmas themed gift box. For the full tutorial you can find my blog post HERE


 Thanks for stopping by hope your day is awesome and enjoy creating!


Sunday, January 15, 2017

Whimsical Heart Pocket

Hi everyone! I took a mini break from blogging and I am now back to share a project that I had actually started this past spring and then put away. I had actually cut several of these Heart Pockets Diecuts out but I hope to finish them in-between all of the other projects I have going. 😊


For this project it is best to use a double sided patterned cardstock since both sides will be seen. I put it together according to the direction with Beacon Adhesive Zip Dry glue. I added mini pom pom trim around the heart.


I cut seaming binding and adhered to the each side of the heart and then added a hot pink trim to dress up the back.


Next I added an assortment of flowers, jeweled buttons and pearl sprays to the top corner of the heart along with a bow created from seam binding.


 I added a frozen Charlotte charm and some crocheted flowers to the pocket before hanging it from a shelf. What a fun little project!
As always if you have any questions about this project please let me know.


 Also I would like to submit this project for the following challenge:


Thanks for stopping by, hope your Sunday is awesome and enjoy creating!


Thursday, November 10, 2016

Beacon Adhesive: Sweet Flower Chest

Hi everyone! I am sharing a sneak peek of my project that is featured over on Beacon Adhesive's blog today. For more info and photos you can find the my blog post HERE


Thanks for stopping by, hope your Thursday is awesome and enjoy creating!


Monday, May 2, 2016

Jane Austen and Tea

Hi everyone! Last month was a sparse month as for as projects and blogging went  I started the next phase of remodeling of the laundry room/den and kitchen. My parents have been coming over four days out of the week each week which I am very thankful for...it has been slow going but without them it would definitely be a snails pace as far as what has been accomplished so far. Ceiling have been scraped of popcorn and painted up to where the den ends and the kitchen begins as well as walls primed and today we start painting the walls with an actually color...YEAH!!! 
Well, enough about remodeling and on with this little teacup I created. I started with Teacup diecut and cut it from Anna Griffin's Garden Party Stack and assembled according to the directions.


 I adhered a wade of tissue paper inside of the teacup. I purchased the Jane image from Art Tea Life by One Crab Apple on Etsy. I printed and fussy cut her out and adhered to the tissue paper inside of the cup. I cut a strip of dark green tulle and tied off every two inches...it beats trying to sewing it...and then I started bunching it up inside the teacup and gluing to the tissue paper as I went.


I used the leaves out of the Secret Garden and the Hydrangea (no longer available) diecuts. I cut those out and shaped. I used my Martha Stewart punch for the little leaf sprigs which I shaped also. I added flowers from my stash along with pearl sprays, sequins, Dew Drops, trim around the base and I bunched up a paper doily to finish off Miss Jane and her cup of tea.

Also I would like to submit this little teacup for: 


I have a couple more of these teacups cut out waiting to be put together and decorated...yes, I have a thing for teacups...and will be sharing these with you when I get the chance. :-)
If you have any questions about this project please let me know. 
Thanks for stopping by, hope your Monday is awesome and enjoy creating!


Tuesday, March 15, 2016

Sizzix's New Product Share and Art with Heart Mini Easter Album

Hi everyone! Easter is right around the corner and I am sharing this little shaker mini album I created for this month's challenge over on Eileen Hull's blog using Paper Leather, Ink Sheets, Luggage Tag and the Rosebuds embossing folder from the Rosebuds and Seed Packet Set


You can find past inspiration teams projects HERE and HERE using the Paper Leather and Ink Sheets. Also check out these videos HERE and HERE which gives tips and ideas on how to use to use both of these products.
If you have checked out the links I provided you can see there are so many different things you can create with these!!!


For my project I cut out five of the luggage tags from Matboard and then cut each one apart at the fold.


I inked all edges of the diecuts with Picked Raspberry Distress Stain. From the packaging that the Luggage Tag came in I cut two pieces of plastic a little bit bigger than the"windows" of the diecut. I adhered to one side of two of the windows and put aside to let the glue dry very well since I don't want sequins and beads to get stuck to the edges.


I cut two of the "window" tags from the pink paper leather, a gold ink sheet and then embossed each one with the Rosebud embossing folder. 


I also embossed both of the window inserts the same way and I used a hole punch and punched a hole in the top of each one.


I adhered four of the window tags together along one of the tags that I had glued the plastic to create a window. Once dry I added a variety of sequins, seed beads and a couple Spring like buttons and adhered the other tag with the plastic to create a shaker tag. 


I adhered the paper leather to each side of the shaker tag.


I added flowers, button and pearl sprays to the front of the shaker tag.


I covered two of the tags with some gorgeous Karen Foster Easter cardstock and the inserts from the window tags I embellished with a bunny diecut that I had received in a swap. All I had to do was add a mini white pom pom for a tail to finish it off.


I tied all of the tags together with seam binding. I kept embellishments to a minimum since I plan on adding photos either from my Instax printer or from my phone. The two little dangly tags are from swaps too and I thought where a perfect addition. I love how the ink sheets made the paper leather have a "old and gilded" look which compliments the other elements in this mini.
Be sure to hop on over to Eileen's blog to see what the other inspiration team members are up to and if you have any questions about this project please let me know.


Supplies Used:
Sizzix: Paper LeatherInk SheetsMatboard, Eileen Hull: Luggage Tag and Rosebuds and Seed Packet Set, Packaging from the diecut
Sequins, Buttons, Paper Flowers, Dew Drops, Cardstock, Seam Binding, Beacon Adhesive, Picked Raspberry Distress Stain, Dew Drops

Thanks for stopping by, hope your Tuesday is awesome and enjoy creating!