Showing posts with label Swaps. Show all posts

Tuesday, May 28, 2019

Wings and Things Notebook Planner

Hi everyone! I hope everyone had a wonderful long Memorial Day weekend! I did! I got to spend time with my son, daughter in law and grandson...I even got to watch Baby O while his mom and dad went out for the evening...that was fun. 😊 
Well, I would like to share my latest project with you all. Since I am in a swap on instagram I thought I would combined the swap with my project I created for Eileen Hull this month. 


I started by applying Eileen's newest product, Easy Cut Adhesive (Eileen's etsy shop is out at the moment but I went a head and tagged her shop which can be found HERE) to the Chipboard and then I picked cardstock for both the outside and inside covers from Crate Paper Chasing Dreams Paper Pad. I peeled the backing from the adhesive sheet and placed the cardstock on the cover. I did the same for the inside cover too. I then placed on top of the  Notebook Diecut and ran through the Diecut Machine. I cut the notebook in half at the "center fold" and then folded both of the small "flaps" down. I cut a two inch wide by five inch long piece of chipboard and then adhered the small flaps to either side of the 2"x5" of chipboard. I wanted to add more journals to the notebook and this was the perfect solution to extending the spine.


I cut and adhered a smaller piece of chipboard to fit between the flaps on the spine. 


I measured in 1/2 inch increments and marked the holes at the top and bottom of the spine.


I punched the holes in the top and bottom of the spine with a Crop-A-Dile. I cut cardstock and Easy Cut Adhesive to fit the spine. I applied the adhesive sheet to the cardstock and then placed on the spine. I punched over the holes again.


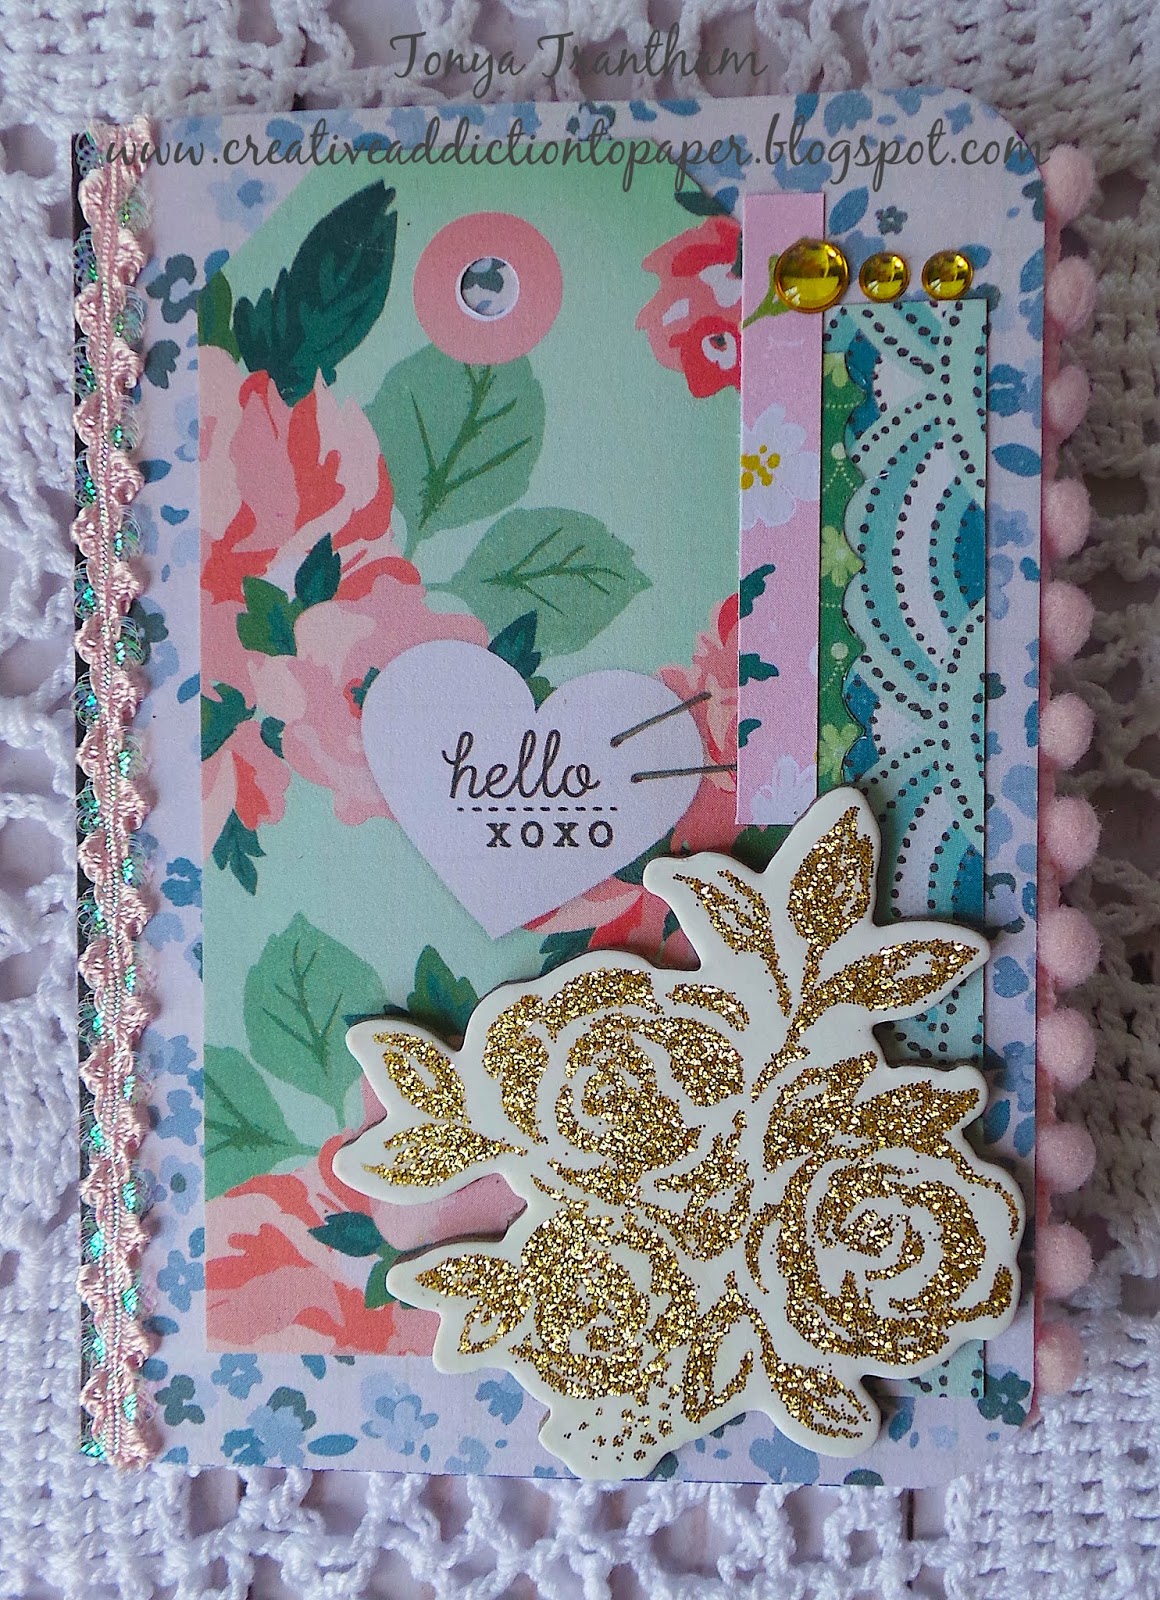
I decorated the cover with some past Crate Paper chipboard/embellishemnt pieces and fussy cut butterflies and leaves from one of the paper pads (retired).


Before adding elastic cording I added eyelets to the holes of the spine. I also added a mini envelope to the back cover. I only glued two of the sides down so notes and tags could be added behind the envelope.


I created a folder from a file folder and used an assortment of cardstock and stickers (Crate Paper) to decorate the cover.


I adhered pom pom trim to the inside edge and added sticky notes just in case my swap partner needs to jot down something.


This little notebook has blank pages in it and I thought it would be perfect to either draw or even do memory keeping in it. I decorated the cover with more cardstock and stickers.


The last two notebooks I bought in a pack of three at the Dollar Tree (you can find these notebooks in packs of two at Walmart). The size of these notebooks are 3.25"x4.5".


Like the other notebook and folder I decorated both sides with patterned cardstock, stickers, trim and chipboard/diecuts.


I slid all the notebooks and folder underneath the elastic cording.


I love how the pom pom trim looks from the side of the notebook planner! 😍 Also be sure to hop on over to Eileen Hull's blog and see what the Inspiration Team has been up to! You can find the posts for this month HERE and HERE.


As always if you have any questions about this project please let me know. 
I would also like to submit this project for the following challenge:

Word Art Wednesday: Anything Goes #388-#389


SUPPLIES:

Sizzix/Eileen Hull: Notebook Diecut
Sizzix: Diecut Machine
Hole Punch/Crop-A-Dile
Beacon Adhesive: Zip Dry Adhesive
Thread
Gems
Pom Pom Trim
Ric RacTrim

(Products listed above are Affiliated Links for your convenience)


Thanks for stopping by, hope your Tuesday is wonderful and enjoy creating!


Monday, July 31, 2017

Micro Paisley and Pink Planner and Goodies

Hi everyone! I am back with a quick post about a micro planner I created for a swap I was in. I used Eileen Hull's Passport Diecut to create this micro planner for my swap partner Nancy. The swap was a color crush swap and we had to put together a collection of items in our swap partner's favorite colors and Nancy's favorite colors are soft pink and sage green...I had problems finding sage green items. 😞


I created the micro planner from fabric and fusible webbing. If you missed my how to post on how I made the Fabric Travel journal with the Journal Diecut you can find that post HERE.


I added pockets to the inside covers using lace and I added two micro notebooks, a micro scrapbook that I created from 4"x6" journaling cards and a place to hold sticky notes. This gave Nancy plenty of goodies to have a hand when she is on the go. 😀


I found this fun pen and butterfly charm on clearance at Hobby Lobby. It sure added the right touches to finish off the micro planner.


I also put together an assortment of goodies to use with the planner or use in other craft projects.


I had a few canvas make up bags that I bought from Target with the intent of decorating and giving as gifts at Christmas time...which didn't happen. So I decorated one of those to give Nancy more storage for her craft supplies.


I cut fabric flowers from the Stitchy Flowers & Leaf Dieuts, frayed the edges of the flowers and added a button along with cording and lace and adhered to the corner of the bag. 


Here are some of the goodies I included inside of the bag. If you have any questions about this project please let me know.


I would also like to submit this project for the following challenge:
Word Art Wednesday: Challenge #292-#293


Thanks for stopping by, hope your Monday is awesome and enjoy creating!


Wednesday, December 14, 2016

Angel Rolodex Cards and Mail Art


Hi everyone! I am here to share a really quick project I had created for a swap I was in with a fellow Instagramer Linda. 


We had decided to do an altered Rolodex swap...well in my case I have a Rolodex diecut so I cut my cards from cardstock/scrapbook paper. :-)


I used Christmas Clipart Printables Ephemera Set 11 from Tsunami Rose Designs etsy shop.


I fussy cut the images out and added diecuts/punches, sequins, flat back pearls and a little Stickles to each rolodex card.


I also printed the little girl onto a piece of sticker paper and created my first piece of mail art. I added washi tape and stickers to finish off my envelope. As always if you have any questions please let me know.
Also I would like to submit these rolodex cards for the following challenge:


Thanks for stopping by, hope your Wednesday is awesome and enjoy creating!


Tuesday, April 21, 2015

Travel Journal

Hi everyone! I'm here to share a few photos and a quick video of a travel journal I created for a swap I am in over on Junk Journal Junkies Facebook Group. Lori aka Just a Girl From the Bay from YouTube hosted this swap. If you get a chance please stop by her YouTube channel and check out some of her journals she has created...let me say they are stunning!!!


For this swap we had to use a 6"x9" clasp envelope as the base for our journal. It also had to have pockets, tuck spots and tags. I kept the inside pretty simple so whoever winds up with my journal will have plenty of room to add photos and places to journal. 


A close up of the flap.


The spine looked so naked that I added ribbon and fiber to it.


Here is a quick flip through video showing the inside. If you have any questions please let me know.


Thanks for stopping by, hope your day is wonderful and enjoy creating!


Monday, February 10, 2014

Love Paper Sack Mini Album

Hi everyone!!! I have been sooooo busy creating cards, swaps and design team projects and I just haven't got around to blogging but I'm now back to share one of my projects I created for a swap I was in on Facebook. We had to altered a 300 count matchbox into a Valentine's Day theme and add handmade goodies inside of it. Well, I'm going to share the mini album I created using five 4"x6" paper sacks. I did cut the tops down a little so the mini would fit into the matchbox. I used Baker's twine to bind it together.


I used bits and pieces of leftover cardstock, scrapbook paper, lace, stickers and images to put this adorable mini together.


I also put together a package of die cuts, stickers, ribbon and dew drops so my swap partner, Norma, could add more to the pages if she wanted to.


Also I shared this mini and matchbox on Maya Roads Facebook page for a challenge they had going on…there is a chance to win a prize package. I have my fingers and toes crossed that I win something. :-)
Come back Tuesday (treat holder) and Wednesday (matchbox)  to see what I created.
Thanks for stopping by, hope your Monday is awesome and enjoy creating!!!