Hi everyone! I want to share a sneak peek of one of the Christmas cards I created for Spellbinders. For details on this card and the other two cards I made you can find the blog post HERE.
Showing posts with label Santa. Show all posts
Thursday, July 24, 2025
Simon Hurley's North Pole Friends Cards
Thanks for stopping by, I hope your Thursday is great and enjoy creating!
Sunday, December 8, 2024
Extra Large Santa Tag
Hi everyone! I want to share a sneak peek of a quick and easy extra large tag I created for Christmas. You can find the blog post HERE.
Thanks for stopping by, hope your Sunday is great and enjoy creating!
Labels:
Beacon Adhesives,
Cardstock,
Christmas Tag,
Creative Paper Addiction,
DIY,
Embellishments,
handmade,
Happy Holidays,
Paper Crafts,
Santa,
Scrapbook paper,
Sizzix,
Thinlits,
Vintage,
Zip Dry
Saturday, December 7, 2024
Recycled Little Debbie Notebook Journal
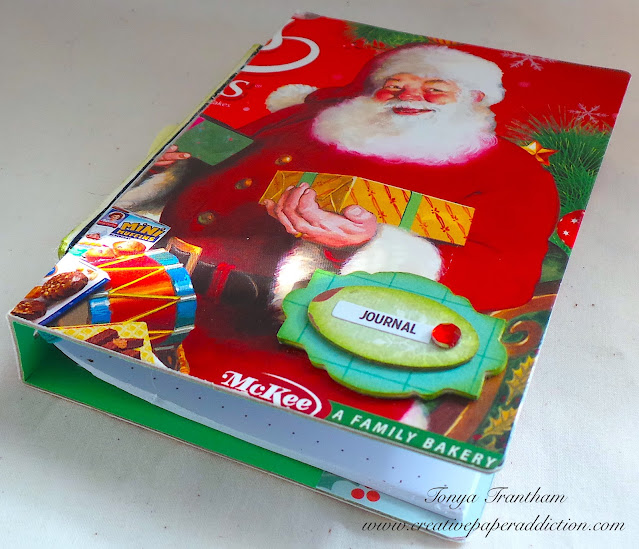
Hi everyone! I want to share a sneak peek of a journal I created. I used an empty Little Debbie Christmas Tree Cake box and the Notebook Diecut by Eileen Hull to create this. You can find the blog post HERE.
Thanks for stopping by, hope your Saturday is wonderful and enjoy creating!
Labels:
#mysizzixmakingstory,
Beacon Adhesives,
Christmas,
Creative Paper Addiction,
DIY,
handmade,
Happy Holidays,
Journal,
Little Debbie,
Mini Album,
Notebook Diecut,
Recycle,
Santa,
Upcycle,
Zip Dry
Tuesday, September 17, 2024
Santa Matchbox Using the Stacking Drawer Diecut
Hi everyone! I want to share a sneak peek of a project I created using the Stacking Drawer Diecut by Eileen Hull. You can find the blog post link HERE.
Thanks for stopping by, hope your Tuesday is wonderful and enjoy creating!
Labels:
#mysizzixmakingstory,
Beacon Adhesives,
Cardstock,
Christmas,
Creative Paper Addiction,
Diecut,
DIY,
Eileen Hull,
Gift Ideas,
handmade,
Santa,
Scrapbook paper,
Sizzix,
Stacking Drawer,
Thinlits,
Zip Dry
Friday, December 8, 2023
Mini December Tags
Hi everyone! I created a couple mini tags for Christmas and I share the details over on my main blog. You can find the post HERE.
Friday, December 1, 2023
Let's Make a Santa Treat Box
Hi everyone! It's the first day of December and with Christmas only weeks away I want to share this treat box I created using the Slotted Treat Box by Eileen Hull. You can find the how to's HERE.
Thanks for stopping by, hope your Friday is great and enjoy creating!
Tuesday, December 24, 2019
Christmas Planner Pages Before the Pen
Hi everyone! Tomorrow is the big day! Are you ready for Christmas? I am barely. 😉 But I did have time to work in my travelers notebook for this weeks before the pen planner pages using an assortments of stamps from Blank Page Muse. For all the details and how to's you can find my Blank Page Muse blog post HERE.
Supplies
Blank Page Muse: Mini Mandala Snowflakes Art Rubber Stamps
Blank Page Muse: Country Vintage Christmas Stamp Sheet by Pam Bray
Blank Page Muse: Angel Art Classic Style Flourishes Harp Medallion Stamp Sheet
Blank Page Muse: Steampunk'd Christmas Holiday Stamp Sheet
Blank Page Muse: Small Fancy Holiday Ornament Rubber Stamp
Various Inks
Beacon Adhesive: Zip Dry Adhesive
Red Flatback Pearls
Yellow Glossy Dot
Clear Glitter Glue
Circle Punch
(Products listed above are Affiliated Links for your convenience)
DISCLAIMERS
This blog is compensated to provide opinion on products, services, websites, and various other topics. Even though the owner(s) of this blog receives compensation for our posts or advertisements. I always give my honest opinions, findings, beliefs, or experiences on those topics or products. The views and opinions expressed on this blog are purely my own. Any product claim, statistic, quote or other representation about a product or service should be verified with each manufacturer, provider, or party in question.This blog contains affiliate links, clicking and shopping through these links helps to support and run Tonya Trantham Designs - Creative Addiction to Paper Blog at no additional cost to you. Today's feature is Blank Page Muse Products.
Thursday, December 20, 2018
Santa Pockets
Hi everyone! I'm back with some quick projects I created for a swap I was in on Instagram. Florence aka LiveLifeandCreate hosted this swap and we were supposed to send a Christmas card, something flat worth around $3 and decorate the envelope for three partners. Well, I didn't make anything flat as you can see.😁
I decided I would make these Flower Pockets by Eileen Hull. Instead of using Mat Board (which I am running low on) I used chipboard which I covered with Adhesive Sheets before adding the cardstock and running through the Diecut Machine.
I used The Paper Studio Jingle all the Way Paper Pad to cover the pockets. I cut the Heart and Soul Flower Dies from Crinoline, layered and added a button and brad before adhering to the to the corner of the pocket. I added gold cording, a mini pinecone and Holiday Greens Dies (pine needles and holly) underneath the flower.
The second pocket I created as the first one but I used a store bought paper flower, a gem with button and a couple of berries from a greenery spray. For both pockets I added packages washi tape, a mini Christmas ornament and a Christmas card.
If you have any questions about these projects please let me know and I would like to also submit these for the following challenge:
Word Art Wednesday Anything Goes: #366-#367
Thanks for stopping by, hope your Thursday is wonderful and enjoy creating!
Labels:
Beacon Adhesives,
Buttons,
Cardstock,
Christmas,
Crinoline Fabric,
Diecuts,
DIY,
Eileen Hull,
Gift Ideas,
handmade,
Hobby Lobby,
Holly,
Instagram,
Santa,
Scrapbook paper,
Sizzix,
Tim Holtz
Friday, September 21, 2018
ClearSnap, Paper House and Michael's: Mini Santa Journal
Hi everyone! This month ClearSnap, Paper House and Michael's have teamed up! We were challenged to use only products that you would find in Michael's Store. Though this paper pad isn't a Christmas theme I came up with a mini Santa journal for my project.
I inked the Jolly Santa Rubber Stamp with Wicked Black Ink and stamp onto a piece of speckled cardstock from the Paper House Color Washed Paper Pad.
I inked an Acrylic Block with Ice Jade and Aquamarine Chalk Inks, loaded a paint brush with water and paint the holly leaves with Ice Jade ink. Next I added shading to the holly leaves with the Aquamarine Chalk Ink. I cleaned the acrylic block and inked with Arctic Deep and Sea Crystal Chalk Inks and painted Santa's eyes with both inks. I also added Pink Sky Chalk Ink to the acrylic block and paint Santa's cheeks.
I applied Clear Glitter Glue randomly to Santa's beard and holly leaves and finished by adding mini light green gems to the Santa image.
I cut a 6"x9" piece of stripped cardstock (Paper House Color washed Paper Pad) and fold into to create a 4 1/2"x6" cover for the journal. I also cut five pieces of patterned cardstock in various sizes to fit the inside journal cover and folded those in half was well.
I measured 2 inches down on each end of the spine of the cover and mark with a pencil, poked a hole with the Tool 'n One on each marked spot. I centered the pages inside the journal cover, poke holes in each page. I threaded a Needle with Twine and sew all pages inside and tied the twine off on the inside of the journal.
Next cut 2 1/4"x6" piece of patterned cardstock and adhere to the cover along with the Santa image. Cut a gold piece of cardstock 3 5/8"x 1/2" and a patterned piece of cardstock 1 1/4"x3". Cut the end of the 1 1/4"x3" at an angle to create a banner. Adhere both to the bottom corner of the cover. I cut a Seal (Hipster 1 Diecuts) from red cardstock. Next I cut the "d", "e" and "c" letter stickers down and add to the seal diecut.
I inked the Santa stamp again with Wicked Black ink and stamp onto a piece of red cardstock (Color Washed Paper Pad). Only the Santa hat and berries will be needed. Next I fussy cut Santa, hat and berry images out and adhered the hat and berries to the Santa image.
I cut a 6"x9" piece of stripped cardstock (Paper House Color washed Paper Pad) and fold into to create a 4 1/2"x6" cover for the journal. I also cut five pieces of patterned cardstock in various sizes to fit the inside journal cover and folded those in half was well.
I measured 2 inches down on each end of the spine of the cover and mark with a pencil, poked a hole with the Tool 'n One on each marked spot. I centered the pages inside the journal cover, poke holes in each page. I threaded a Needle with Twine and sew all pages inside and tied the twine off on the inside of the journal.
Next cut 2 1/4"x6" piece of patterned cardstock and adhere to the cover along with the Santa image. Cut a gold piece of cardstock 3 5/8"x 1/2" and a patterned piece of cardstock 1 1/4"x3". Cut the end of the 1 1/4"x3" at an angle to create a banner. Adhere both to the bottom corner of the cover. I cut a Seal (Hipster 1 Diecuts) from red cardstock. Next I cut the "d", "e" and "c" letter stickers down and add to the seal diecut.
There you have it! This little journal can be used to take notes, as a planner or photos can be added to it!
Labels:
Beacon Adhesives,
Cardstock,
Chalk Ink,
Christmas,
Clearsnap,
December Daily,
DIY,
Fussy cutting,
Gems,
Glitter,
handmade,
Journal,
Michael's,
Paper House,
Rubber Stamp,
Santa,
Scrapbook paper,
Spellbinder
Saturday, December 10, 2016
Tsunami Rose Designs: Santa Traveler's Notebook
Hi everyone! I am here to share my project this month for Tsunami Rose Designs! I went with another traveler's notebook since it looks like I am hooked on these. :-D
I started with a notebook divider that I had purchased from the Target Dollar Spot which I cut, rounded the corners and folded to a 7 1/2"x4" cover for my notebook.
I cut 10 pages slightly smaller than the cover and punched holes in the spine and stitched together.
The cover I used a variety of scraps of cardstock, gold trim, a doily and a snowflake diecut along with the Santa printable to create a fun and whimsical feel. I also and a few red gems to the holly leaves and Stickles to Santa's bread to finish off my traveler's notebook.
It is one FAT little traveler's notebook and I so love how it turned out! As always if you have questions please let me know.
I started with a notebook divider that I had purchased from the Target Dollar Spot which I cut, rounded the corners and folded to a 7 1/2"x4" cover for my notebook.
I cut 10 pages slightly smaller than the cover and punched holes in the spine and stitched together.
I used the following Tsunami Rose Designs collections: Clipart Christmas - Printable Ephemera Set # 10 Christmas #1 and Christmas Clipart - Printable Ephemera Set # 11 Christmas - # 2. Each collection has 30 pages for a total of 60 pages of vintage Christmas fun! And the best part is they are only $2.50 per collection!
I printed and cut out a variety of printables from both collections.
Which I adhered to the pages, added pockets and tuck spots to hold journaling cards.
I thought it would be fun to use snowflake diecuts and add those to the doilies.
The cover I used a variety of scraps of cardstock, gold trim, a doily and a snowflake diecut along with the Santa printable to create a fun and whimsical feel. I also and a few red gems to the holly leaves and Stickles to Santa's bread to finish off my traveler's notebook.
Be sure to hop over to the Tsunami Rose Designs etsy shop and pick up these printables or if you are looking for a something different there is several themes available and the best part they are only $2.50! If you are needing inspiration stop by Tsunami Rose Designs blog and see what the talented design team has created and join the Tsunami Rose Design Fan Group on Facebook too!
Thanks for stopping by, hope your Saturday is awesome and enjoy creating!
Saturday, December 19, 2015
Crafty Card Gallery: Vintage Inspired Santa Tag
Hi everyone! I am here to share a very quick project for Crafty Card Gallery blog and this month's theme is Christmas. I know this is not a card but since I was needing a tag for my journal I thought I would share anyways. :-)
For more info and photos please check out my blog post HERE.
Thanks for stopping by, hope your Saturday is awesome and enjoy creating!
Labels:
Chalk,
Christmas,
Crafty Card Gallery,
Fiber,
Fussy cutting,
Ink,
Ribbon,
ric rac,
Rubber Stamp,
Santa,
Stickles,
Tag,
Vintage
Wednesday, December 2, 2015
Robin's Nest: Santa Gift Box
Hi everyone! I have one more project for the year to share for the Robin's Nest as a guest designer. For more photos and info on how I altered this maglite box into the gift box you see below you can find my post HERE.
Thanks for stopping by, hope your Wednesday is awesome and enjoy creating!
Wednesday, October 28, 2015
Robin's Nest: Merry
Hi everyone! I'm sharing a card over at the Chattering Robin's blog today. I created this Christmas card using scraps of Robin's Nest cardstock I had laying around. Christmas is right around the corner...like eight weeks away...and for the next few weeks I will be sharing a quick Christmas project on the Robin's Nest to inspire you all. :-)
You can find more photos and info about this card here.
Thanks for stopping by, hope your Wednesday is awesome and enjoy creating!
You can find more photos and info about this card here.
Labels:
Card,
Cardstock,
Chalk Ink,
Chalk Pastels,
Christmas,
Dew Drops,
Journaling Card,
Paper Doily,
Paper Wings Productions,
Robin's Nest,
Rubber Stamp,
Santa,
Scrapbook paper,
Sequins,
Stickles,
Thread
Saturday, December 20, 2014
Dragons Lair Den: Jolly Ole St Nick Journal
Hi everyone! It's me and I'm here to share my last post with Dragons Lair Den. I am thankful for the time I have been on the design team and being able to share a little bit of my take on DLD printables.
I created this mini Santa journal from a file folder which I cutdown and the finished size is a 3 1/2"x5" and that measures from the "creases" or three folds in the file folder.
I cut twenty sheets of notebook paper to fit the inside of the journal. Once folded in half I sewed the pages and tied off on the outside of the spine. I added fiber and ribbon also to make it more festive.
From the same Victorian Christmas Collection-Card Papers I printed off a burgundy sheet and cut it down to make an inside pocket. I added from the Vintage Santa Card Kit a label and flower to finish it off.
There you have it a simple little journal that can be used to jot down notes, keep up with receipts or whatever else you can think of. :-) Please be sure to check out the Dragons Lair Den for these printables and more. If you have any questions please let me know.
I created this mini Santa journal from a file folder which I cutdown and the finished size is a 3 1/2"x5" and that measures from the "creases" or three folds in the file folder.
I inked the spine with a green ink, let dry and then measured and marked four small holes at 1" intervals down the spine. I used a very thick needle to punch each hole.
I printed off the sage green sheet from the Victorian Christmas Collection-Card Papers and cut two 3 1/2"x5" pieces to fit the front and the back of the journal. I used the Christmas Merriment embossing folder and embossed both pieces before adhering to the journal. Next I printed out the Vintage Santa Card Kit and cut one of the Santa's out, inked the edges and then used pop dots to raise the image. I finished off the front with baker's twine, button, sequins, dew drops, tulle and a metal star. I also applied Stickles to the Santa's beard and hair.
I cut twenty sheets of notebook paper to fit the inside of the journal. Once folded in half I sewed the pages and tied off on the outside of the spine. I added fiber and ribbon also to make it more festive.
From the same Victorian Christmas Collection-Card Papers I printed off a burgundy sheet and cut it down to make an inside pocket. I added from the Vintage Santa Card Kit a label and flower to finish it off.
There you have it a simple little journal that can be used to jot down notes, keep up with receipts or whatever else you can think of. :-) Please be sure to check out the Dragons Lair Den for these printables and more. If you have any questions please let me know.
Supplies Used:
Other Supplies Used: Baker's Twine, Sequins, Button, File Folder, Metal Star, Stickles, Notebook Paper, Tulle
Thanks for stopping by, hope your Saturday is awesome and enjoy creating!
Subscribe to:
Posts (Atom)