Wednesday, May 8, 2019

Butterfly House Gift Box

Hi everyone! I am back this week with a gift idea for Mother's Day! I created this little gift box for ClearSnap to be shown in their booth at Creativation this past January and I am finally getting around to sharing this fun piece.


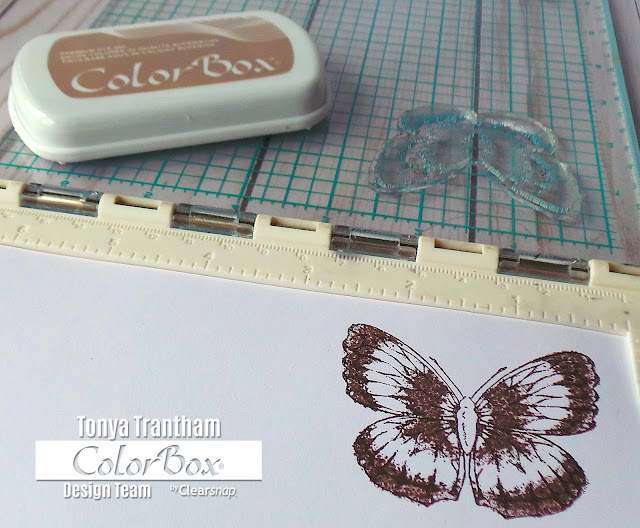
I started by placing the outline of the Butterfly stamp from the Butterfly Clear Stamps onto the Acrylic Block/Precision Press/MISTI Stamping Tool, inked with Leather Premium Dye Ink and stamped onto a piece of White Cardstock.


I placed the "filled in" image of the butterfly stamp onto the Acrylic Block/Precision Press...the precision press is no longer available but since creating this project I now own a MISTI Stamping Tool which I love. I made sure to line up the stamp with the stamped butterfly cardstock image after inking the stamp with Sandstone Premium Dye Ink and stamped on top of the stamped butterfly image.


I inked three Art Daubers with the following Premium Dye Inks: Coral, Dandelion and Black. I inked a majority of the butterfly image with Coral Premium Dye Ink and the inner and outer edges of the butterfly wings are inked with Dandelion Premium Dye Ink. The butterfly body  was inked with Black Premium Dye Ink. I fussy cut the butterfly image out.


I put a 2"x3" box together. The second box I cut the lid/flap off and adhere the 3"x3" piece to the smaller folded flap of box. 


Next I glued the other smaller folded flap to the inside of the box. 


The smaller flap I glued to the other side of the larger flap. 


This creates the roof for the butterfly house.


I cut four pieces of patterned cardstock 2"x3" and inked an art dauber with Leather Premium Dye Ink and inked all edges of cardstock before adhering to the base of the 2"x3" box. I measured and mark in 1" increments on both sides of the roof and cut four 1 1/2"x3" and one 3"x3" brown cardstock and ink an art dauber with Leather Premium Dye Ink. 


I inked edges of all pieces of cardstocks. On the marked places on the roof, I started at the bottom of the roof and  work upwards by adding the 1 1/2"x3: pieces of cardstock. Before adding adhesive to the 3"x3" piece of cardstock I folded in half to create a 1 1/2"x3" roof peak. Then I adhered to the peak of the roof.


I inked and stamp the "Be Grateful" and "For Small Wonders" stamps from the Butterfly Clear Stamps with Leather Premium Dye Ink and stamped onto a piece of cardstock. I cut both to 1 1/2"x2 1/2" plus one plain piece of cardstock the same size.


 I inked an art dauber with Leather Premium Dye Ink and ink all edges of cardstock. I then adhered the sentiments to each side of the house. The plain cardstock I adhered to the backside of the house. I punched two mini butterflies from white cardstock and inked both butterflies with Dandelion Premium Dye Ink using an art dauber. I adhered mini butterflies to each side of the house and added Black Gems to the center of each butterfly.


Next I punched from white cardstock a decorative punch (any punch/diecut will work as a long as it fits the front of the base of the box) and inked an art dauber with Rose Premium Dye Ink and ink the edges of the punch. I glued to the front of the base of the box and adhered the stamped butterfly to the center of the base of the box and add black gems to the body.


I placed a piece of white cardstock on top of the Flower Journaling Card Diecut and place both between two cutting plates and run through the Diecut Machine.


I loaded an art dauber with Rose Premium Dye Ink and inked flower diecuts, shaped and adhered flowers to each side of the roof. 


I added leaf sprigs, pearl sprays and twine/cording to flowers. 


I added a mix of gold gems and sequins to the center of each flower. Now all you have to do is add a small gift such as candy or jewelry inside and it is ready to give as a gift.


SUPPLIES:

ColorBox: Butterfly Clear Stamps 
ColorBox: Leather Premium Dye Ink
ColorBox: Sandstone Premium Dye Ink
ColorBox: Coral Premium Dye Ink 
ColorBox: Dandelion Premium Dye Ink 
ColorBox: Wheat Premium Dye Ink
ColorBox: Black Premium Dye Ink 
ColorBox: Rose Premium Dye Ink
ColorBox: Art Daubers
Black Gems
Gold Gems
Sequins
Twine/Cording
Acrylic Block
MISTI Stamping Tool
White Cardstock
Beacon Adhesive: Zip Dry Adhesive
Leaves Punch
Mini Butterfly Punch
Scissors
Paper Cutter
2"x3" Kraft Box (2)
Various Patterned Cardstock
Pearl Spray
Sizzix/Eileen Hull: Journaling Cards, Flower and Leaves Journaling Card Diecut
Diecut Machine
Decorative Punch

(Products listed above are Affiliated Links for your convenience)


Thanks for stopping by, hope your Wednesday is wonderful and enjoy creating!


Saturday, May 4, 2019

Floral Wreath Hello Card

Hi everyone! I am back this month with a quick card I created for Momenta.


I started by cutting a piece of white cardstock to fit inside the Thanks Floral Wreath Cut and Embossing Folder with I ran through a Diecut Machine. I inked an Art Dauber with Mint Dyestress Blendable Dye Ink and inked over the embossed wreath.


I cut a mat from the Peony Paper Pad to back the embossed wreath. From the same paper pad I fussy cut a flower and leaves from one of the papers. The Metallic Paper Pad I cut  the hello sentiment using the hello diecut from the Thanks Floral Wreath Cut and Embossing Folder and Diecuts before running through the diecut machine I backed the cardstock with an Adhesive Sheet. I adhered the flower to the corner of the wreath and I peeled the backing off the hello sentiment before adding to the center of the wreath.


I added clear glitter glue to the center of the flower and leaves. I also made several messing bows from thread.


I adhered the messy bows underneath the flower and added sequins to the front of the card.


I cut a piece of cardstock from the Peony Paper Pad  6"x11" and folded in half. I adhered the 'hello" wreath to the front of the card base. There you have it a card made in less than an hour. As always if you have questions about this project please let me know and be sure to check out Momenta for more project ideas.


SUPPLIES

Momenta: Thanks Floral Wreath Cut and Embossing Folder and Diecuts
Momenta: Peony Paper Pad
Momenta: Metallic Paper Pad
ColorBox: Art Dauber 
ColorBox: Mint Dyestress Blendable Dye Ink
Diecut Machine
Sizzix: Adhesive Sheet
Sequins
Thread
Scissors
Paper Cutter
Clear Glitter Glue

(Products listed above are Affiliated Links for your convenience)


Thanks for stopping by, hope your Saturday is wonderful and enjoy creating!


Friday, April 19, 2019

Mandala Flower Gift Box

Hi everyone! I wanted to share a semi quick project with you all today! I have several of these kraft boxes laying around and I thought I would create a gift box for Mother's Day.


I started by inking the Mandala Clover Wood Stamp with Wicked Black Archival Dye Ink and stamped onto a piece of Watercolor Paper. I inked and stamped four times total. I fussy cut each stamped image out and cut the "stem" off each stamped image.


I inked a glass tray with following inks: CabernetMulberry and Aster Dyestress Blendable Inks and added water to each ink. I placed the four stamped images into the ink mixture and once each image was completely covered in ink I removed and let dry.


I inked the Leafy Border Jumbo Rollagraph (I couldn't find the rollagragh but found the Leafy Border Mat which is the same thing but not the roller) with Wicked Black Archival Dye Ink and roll onto a piece of watercolor paper. I fussy cut two stamped leaves out. I inked a glass tray with the following inks: Inchworm and Moss Dyestress Blendable Dye Inks. I added water to each ink and placed both stamped leaves into ink mixture and once each image is completely covered in ink remove. While the leaf images are still damp I shaped each leave.


I shaped each Mandala Clover "flower" image with a stylus and adhered each flower on top of each other and added a button and a gem to the center of flower. I adhered the leaves to the back of flower.


I adhered a paper doily to top/lid of box and added the flower with leaves on top of the doily.


I looped several loops of thread, added lace, a lace bow and glued underneath the flower. 


I finished the box with pearl sprays and two pearl top pins. As always if you have any questions about this project please let me know.


I would also like to submit this project for the following challenge:

Word Art Wednesday Anything Goes: #382-#383


SUPPLIES USED:

ColorBox: Leafy Border Jumbo Rollagraph (Leafy Border Mat)
Beacon Adhesive: Zip Dry Adhesive
Button
Gem
Lace 
Thread
Pearl Spray
Pearl Top Pins
Glass Tray
Box
Doily 

(Products listed above are Affiliated Links for your convenience)


Thanks for stopping by, hope your Friday is wonderful and enjoy creating!


Thursday, April 18, 2019

Spring Flowers Medallion

Hi everyone! I'm back today to share my project I created for Momenta! I wanted to create something floral that I could display on my fireplace mantel with all of my other knick knacks and since I had never created a large medallion I thought the Peony Paper Pad would be perfect for this project.


 I started by cutting out six  medallion"panels" from the Large Medallion 3D Diecut. But before running them through the Diecut Machine I applied Adhesive Sheets to the Chipboard  before laying the floral cardstock on top of the chipboard.


I adhered each section to the end of each medallion "panel".


Then I glued the ends together to create a circle.


Then the worse thing happened when I pushed it down to create the medallion the paper ripped and no it wasn't a small rip it was big. 😞 I tried to fix it with a hot glue gun and it wouldn't hold so I used my trusty bottle of Zip Dry Adhesive and it held the center together. I was very determined to make this project work no matter what. A side note the next one I make I will add two more panels for a total of eight instead of six.


I decided to add two big banners to cover the rip of the medallion. I picked the cardstock for the banners from the Metallic Ink Paper Pad. I cut a "v" in the end of both banners before adhering on top of the medallion.


From my own personal doily stash I adhered a 5 1/2" mint green doily on top of the banners. The second doily is from the 4" Watercolor Doily which I glued off center of the other the larger doily.


I picked a floral cardstock from the Peony Paper Pad and fussy cut several of the flowers and leaves out and then adhered to the doilies. I also added a cording bow under the lower collection of flowers on the medallion.


Now it is ready for the mantel along with all my other spring decorations.  Need more inspiration? You can find Momenta's blog HERE. As always if you have any questions about this project please let me know.


SUPPLIES USED:
Momenta: Peony Paper Pad
6" Mint Green Doily
Beacon Adhesive: Zip Dry Adhesive
SIzzix/Brenda Walton: Large Medallion 3D Diecut
Cording

(Products listed above are Affiliated Links for your convenience)


 Thanks for stopping by, hope your Thursday is wonderful and enjoy creating!