Showing posts with label Floral. Show all posts

Monday, August 18, 2025

How to Upcycle a Phone Box using Eileen Hull Diecuts

 Hi everyone! I want to share a sneak peek of a phone box I up cycled into a gift using Eileen Hull diecuts. You can find all the details HERE.


Thanks for stopping by, I hope your Monday is great and enjoy creating!


Monday, January 13, 2025

How to Create a Friendship Frame

 Hi everyone! I want to share a sneak peek of a frame I created using the Charms Thinlits along with a few other dies all by Eileen Hull! You can find the complete blog post HERE.


Thanks for stopping by, hope your Monday is great and enjoy creating!


Monday, November 18, 2024

Rose Parfum Mini Album

 Hi everyone! I want to share a sneak peek on my latest album I created. You can find the complete post HERE.


Thanks for stopping by, hope your Monday is awesome and enjoy creating!


Wednesday, July 24, 2024

Flowers and Lace Notebook

 Hi everyone! I want to share a sneak peek of a journal I created using the Notebook Diecut and the Painterly Blooms and Background Thinlits by Eileen Hull. For the how to's you can find the complete post HERE.


Thanks for stopping by, hope your Wednesday is wonderful and enjoy creating!


Thursday, July 11, 2024

Lattice Notebook DIY

 Hi everyone! I wanted to share a sneak peek of I project I created using the new Painterly Blooms and Background Thinlits, Watercolor Flowers and Lattice Stencils and the re-release of the Notebook Diecut, all by Eileen Hull. For the how to's you can find the link HERE


Thanks for stopping by, hope your Thursday is awesome and enjoy creating!


Friday, June 21, 2024

Violet Stacking Drawers

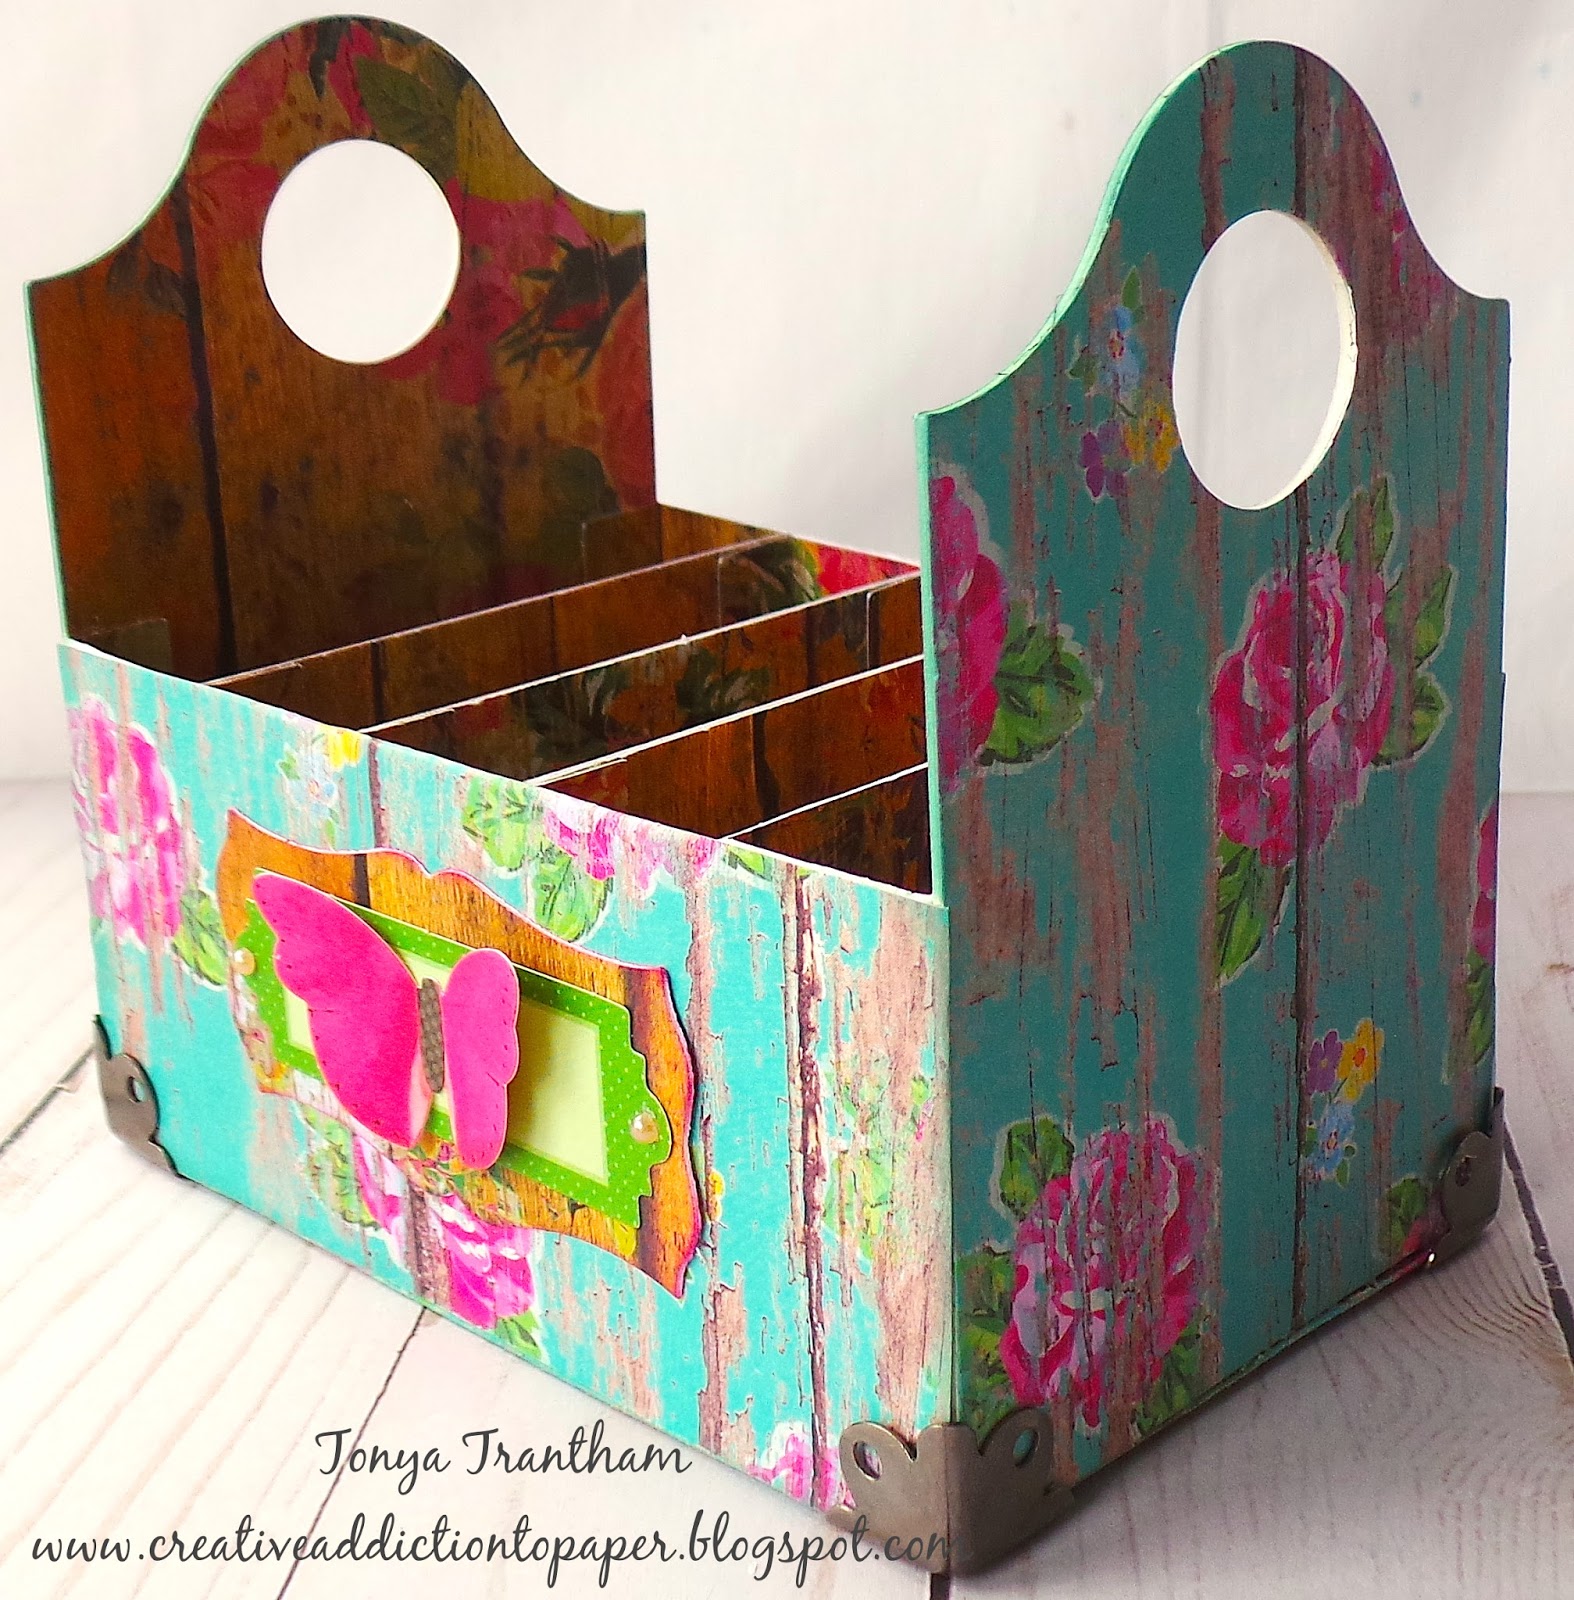
 Hi everyone! I want to share a sneak peek of a project I created using the Stacking Drawer Diecut and a few other dies and stencils by Eileen Hull. You can find the full post HERE


Thanks for stopping by, hope your Friday is awesome and enjoy creating!


Thursday, March 14, 2024

Pink and White Floral Storage Box

 Hi everyone! I wanted to pop in and share that I have a new blog post live. I share how I used the new Storage Box Diecut by Eileen Hull to create a pink and white floral gift box. You can find the post HERE


Thanks for stopping by, hope your Thursday is awesome and enjoy creating!


Tuesday, January 16, 2024

Rouge Floral Cantilever Sewing Box

 Hi everyone! I want to share a sneak peek of my project that I created for Eileen Hull. If you would like more details I have the how to's and more photos on my other blog which can be found HERE


Thanks for stopping by, hope your Tuesday is awesome and enjoy creating!


Monday, November 13, 2023

How to Make a Chrysanthemum Slotted Box

 Hi everyone! I have another project for Eileen Hull this month and I created an Autumn like box using the Slotted Treat Box. You can find the how to's over on my main blog HERE


Thanks for stopping by, hope your Monday is wonderful and enjoy creating!


Thursday, June 13, 2019

Summer Floral Altered Jumbo Paperclip

Hi everyone! I'm back today with a project I created for Momenta! I created this easy bookmark with several bits and pieces I had leftover from my past Momenta projects.


I started by folding a 3 1/4"x8" piece of lilac/purple and gold polka dot cardstock in half from the Watercolor Metallic Paper Pad and cutting a "v" in the end of both before sliding one end of the cardstock around a jumbo paperclip. I adhered both ends together  and added a doily from the 2" Watercolor Doily Collection.


I had several floral scraps leftover from the Peony Paper Pad and part of a diecut leftover from the Floral Cutting Template Diecut. I fussy cut a flower and several leaves out from the leftover scraps. I shaped the leaves before adhering to the backside of the flower. Before adhering the diecut to what I had cut out I inked the leaves with green ink.


I added foam pop dots to the back of the floral mix and placed on the bookmark. I glued sequins and gems to the flowers and leaves and I placed green thread and pearl sprays to the corner. Also from the same leftover diecut I cut out the butterfly and added pink ink to the wings before adhering to the bookmark.


This project was under an hour to complete and would be perfect to give as an add-on gift with a good book. If you need more inspiration go to Momenta which you can find HERE. Also if you have any questions about this project please let me know.


SUPPLIES

Momenta: Peony Paper Pad
Momenta: Intricate Floral Cutting Template Diecut
Beacon Adhesive: Zip Dry Adhesive
Jumbo Paperclip 
Sequins
Pearl Sprays
Gems
Green Thread
Green and Pink Ink

(Products listed above are Affiliated Links for your convenience)


Thanks for stopping by, hope your Thursday is wonderful and enjoy creating!


Thursday, April 18, 2019

Spring Flowers Medallion

Hi everyone! I'm back today to share my project I created for Momenta! I wanted to create something floral that I could display on my fireplace mantel with all of my other knick knacks and since I had never created a large medallion I thought the Peony Paper Pad would be perfect for this project.


 I started by cutting out six  medallion"panels" from the Large Medallion 3D Diecut. But before running them through the Diecut Machine I applied Adhesive Sheets to the Chipboard  before laying the floral cardstock on top of the chipboard.


I adhered each section to the end of each medallion "panel".


Then I glued the ends together to create a circle.


Then the worse thing happened when I pushed it down to create the medallion the paper ripped and no it wasn't a small rip it was big. 😞 I tried to fix it with a hot glue gun and it wouldn't hold so I used my trusty bottle of Zip Dry Adhesive and it held the center together. I was very determined to make this project work no matter what. A side note the next one I make I will add two more panels for a total of eight instead of six.


I decided to add two big banners to cover the rip of the medallion. I picked the cardstock for the banners from the Metallic Ink Paper Pad. I cut a "v" in the end of both banners before adhering on top of the medallion.


From my own personal doily stash I adhered a 5 1/2" mint green doily on top of the banners. The second doily is from the 4" Watercolor Doily which I glued off center of the other the larger doily.


I picked a floral cardstock from the Peony Paper Pad and fussy cut several of the flowers and leaves out and then adhered to the doilies. I also added a cording bow under the lower collection of flowers on the medallion.


Now it is ready for the mantel along with all my other spring decorations.  Need more inspiration? You can find Momenta's blog HERE. As always if you have any questions about this project please let me know.


SUPPLIES USED:
Momenta: Peony Paper Pad
6" Mint Green Doily
Beacon Adhesive: Zip Dry Adhesive
SIzzix/Brenda Walton: Large Medallion 3D Diecut
Cording

(Products listed above are Affiliated Links for your convenience)


 Thanks for stopping by, hope your Thursday is wonderful and enjoy creating!


Tuesday, March 27, 2018

Vintage Floral Caddy Organizer

Hi everyone! This has been one busy month and I'm just now finishing and able to share my project this month for Eileen Hull's Inspiration Team! The team has been sharing some creative organizing tutorials using Eileen's diecuts. You can find the past posts for the month HERE, HERE and HERE.


For my project I decided I wanted to create something that could hold all the little booklets of journaling cards that I had accumulated. I added Adhesive Sheets to Mat Board and applied patterned cardstock to the mat board prior to cutting five pockets and two sides from Caddy Bag Diecut.


I adhered all the pockets to each other and the last pocket that would be glued to the side I "flipped" so it would mirror the other side. I covered a piece of mat board with patterned cardstock to fit underneath the bottom of the caddy. This makes it more sturdy.


I covered both sides of the pockets with patterned cardstock, added some decorative diecuts and box corners and it's finished!


I've added some of my journaling cards, couple of pencils and jumbo paper clips and I am ready to create! As always if you have questions about this projects please let me know.


I would also like to submit this project for the following challenges:
Word Art Wednesday: Challenge #326-#327


 Thanks for stopping by, hope your Tuesday is awesome and enjoy creating!