Showing posts with label Stamps. Show all posts

Thursday, June 19, 2025

Hand Sewn Strawberry Card

 Hi everyone! I want to share a sneak peek of a card I created using the Felt Berry Blossom Etched Dies by Nichol Spohr and Spellbinders. You can find the blog post HERE.


Thanks for stopping by, I hope your Thursday is great and enjoy creating!


Wednesday, June 18, 2025

Tried and True Friends Tag

 Hi everyone! I want to share a sneak peek of a tag I created using the Color Wheel Stencils and a few other dies and stamps all by Eileen Hull. You can find the how to's HERE.


Thanks for stopping by, I hope your Wednesday is awesome and enjoy creating!


Wednesday, May 14, 2025

The Book of Swatches Journal

 Hi everyone! I want to share a sneak peek of a journal I created. I used Eileen Hull's Handbound Journal Diecut, Swatch Card Stamp Set along with a few other dies all by Eileen Hull. For more photos and the how to's you can find the post HERE.


Thanks for stopping by, I hope your Wednesday is wonderful and enjoy creating!


Thursday, May 1, 2025

Eileen Hull's Newest Crafting Essentials Release

 Hi everyone! May is here and Eileen Hull has a new release! For all the details you can find the post HERE. I also share sneak peeks of projects I will be blogging about in the upcoming months. 


Thanks for stopping by, hope your Thursday is great and enjoy creating!


Saturday, November 18, 2023

Emerald Creek Extra Large Coffee Tag

Hi there! I'm excited to share that I am a guest designer for Emerald Creek today. For the how to's of how I created this tag you can find the post HERE


Thanks for stopping by, hope your Saturday is wonderful and enjoy creating!


Tuesday, May 26, 2020

Thinking of You Floral Card

Hi everyone! I'm over the i-crafter blog today with a semi quick card using Happy Birthday Wiper Insert DiecutsScattered Thoughts Stamps and the Doily Diecut. For the how to's of this card you can find the post HERE.


Supplies Used

i-crafter: Doily Diecut
Various Patterned Cardstocks
Black and Hot Pink Inks 
Flatback Pearls
Beacon Adhesive: Zip Dry Adhesive

(Products listed above are Affiliated Links for your convenience)

DISCLAIMERS
This blog is compensated to provide opinion on products, services, websites, and various other topics. Even though the owner(s) of this blog receives compensation for our posts or advertisements. I always give my honest opinions, findings, beliefs, or experiences on those topics or products. The views and opinions expressed on this blog are purely my own. Any product claim, statistic, quote or other representation about a product or service should be verified with each manufacturer, provider, or party in question.This blog contains affiliate links, clicking and shopping through these links helps to support and run Tonya Trantham Designs - Creative Addiction to Paper Blog at no additional cost to you. Today's features are i-crafter and Scrapbook.com Products. 


Thanks for stopping by, hope your Tuesday is wonderful and enjoy creating!


Tuesday, November 26, 2019

Plan with me Thanksgiving Pages

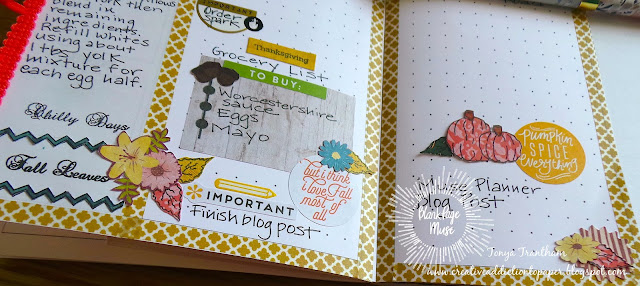
Hi everyone! Today I am over on Blank Page Muse blog sharing how I created these planner pages using Pam Bray's Planner Stamps. You can find the blog post HERE.
Also if you aren't following Blank Page Muse on their other social medias you can find them at:


Supplies

Blank Page Muse/Pam Bray: Everyday Planner Clear Stamps
White Sheet Paper
Washi Tape
Patterned Cardstock
 Happy Planner and Momenta Planner Stickers
Seal Punch
1407 B6 Planner Notebook 

(Products listed above are Affiliated Links for your convenience)

DISCLAIMERS

This blog is compensated to provide opinion on products, services, websites, and various other topics. Even though the owner(s) of this blog receives compensation for our posts or advertisements. I always give my honest opinions, findings, beliefs, or experiences on those topics or products. The views and opinions expressed on this blog are purely my own. Any product claim, statistic, quote or other representation about a product or service should be verified with each manufacturer, provider, or party in question.This blog contains affiliate links, clicking and shopping through these links helps to support and run Tonya Trantham Designs - Creative Addiction to Paper Blog at no additional cost to you. Today's features are Blank Page Muse Products. 


Thanks for stopping by, hope your Tuesday is awesome and enjoy creating!


Tuesday, October 29, 2019

Before the Pen October Planner Pages Spread

Hi everyone! Today I am over on Blank Page Muse blog sharing my first blog post using stamps by Pam Bray! For all the details and more photos you can find the link to the blog post HERE. Also when ordering use my BPMuseTonya code for 15% off your whole purchase when shopping the Blank Page Muse Shop
Also if you need more inspiration click the following links below. 


Supplies

Blank Page Muse: Everyday Planner Stamps
The 1407 Planners: B6 Size Notebook
Watercolors/Inks
Beacon Adhesive: Zip Dry Adhesive 
Washi Tape
Circle, Mini Tag and Scalloped Circle Punches

(Products listed above are Affiliated Links for your convenience)

DISCLAIMERS
This blog is compensated to provide opinion on products, services, websites, and various other topics. Even though the owner(s) of this blog receives compensation for our posts or advertisements. I always give my honest opinions, findings, beliefs, or experiences on those topics or products. The views and opinions expressed on this blog are purely my own. Any product claim, statistic, quote or other representation about a product or service should be verified with each manufacturer, provider, or party in question.This blog contains affiliate links, clicking and shopping through these links helps to support and run Tonya Trantham Designs - Creative Addiction to Paper Blog at no additional cost to you. Today's features are Blank Page Muse and Scrapbook.com Products. 


Thanks for stopping by, hope your Tuesday is wonderful and enjoy creating!


Friday, August 16, 2019

Pull Yourself Together Card

Hi everyone! I am back with another quick and easy card I created! As I had mentioned in a previous blog post ColorBox closed their doors July 31st and I still have a few projects that I created using their product...I know I am slow getting them posted...sorry there is only so much of me to go around in a day but I am getting there. 😕


I started by inking a glass tray with the following Dyestress Blendable Dye Inks: Salmon and Bumble Bee inks, added water, loaded a paint brush and randomly added the ink mixture to the Tiny Dots Creative Card front and then I let dry. I placed the Swirl Dot Art Screen on top of card, inked an Art Dauber with Tomato Dyestress Blendable Dye Ink and rubbed over the art screen. Once I achieved the desired effect I was after I removed the art screen.


I placed the Scallop Square Cutting Template on top of a piece of Watercolor Paper, placed between cutting plates and run through the Diecut Machine.I inked the glass tray with Bumble Bee Dyestress Blendable Dye Ink, added water and placed the scallop square diecut in the ink mixture and once the diecut was completely covered I removed and let dry. I placed the Pull Yourself Together sentiment from the Buttercup Clear Stamps onto the MISTI Stamping Tool, inked with Wicked Black Archival Dye Ink and stamped onto the scallop square diecut. Next I inked an art dauber with Princess Dyestress Blendable Dye Ink and inked the edges of scallop square diecut and adhered to the card base. 


I placed a piece of watercolor paper on top of the Intricate Flowers Border Diecut, placed between cutting plates and run through the diecut machine. I inked art daubers with the following Dyestress Blendable Dye Inks: Fruit Punch, Princess and Inchworm and inked the intricate flowers border diecut and glued to the lower half of the card base. I inked the Mandala Heart Wood Stamp with Wicked Black Archival Dye Ink and stamped onto a piece of watercolor paper.Then inked a glass tray with Princess Dyestress Blendable Dye Ink, added water and painted the stamped Mandala Heart image and let dry. I fussy cut the heart image out with scissors, added Foam Pop Dots to the back and placed on the card. I then inked two art daubers with Tomato  and Posy Dyestress Blendable Dye Inks and inked the lower half of the heart image.


Next I placed the heart stamp from the Thankful Clear Stamps onto the MISTI Stamping Tool and inked with Posy Dyestress Blendable Dye Ink and stamped onto a piece of watercolor paper. I fussy cut the heart image out with scissors and adhered to the larger heart.I finished by adding tulle and thread behind the larger heart. As always if you have any questions about this project please let me know.


Supplies

ColorBox: Art Daubers
ColorBox: Mandala Heart Wood Stamp
ColorBox: Buttercup Clear Stamps 
Firefly: Cutting Templates-Scallop Square
Momenta: Cutting Templates-Intricate Flowers Border Diecut
Glass Tray
Tulle
Thread
Beacon Adhesive: Zip Dry Adhesive

(Products listed above are Affiliated Links for your convenience)


Thanks for stopping by, hope your Friday is awesome and enjoy creating!


Tuesday, June 11, 2019

Gears and Sprockets Dad Tag

Hi everyone! With Father's Day quickly approaching I want to share a manly tag I created using ColorBox and Eileen Hull's newest Blends 2 Inks! 


I inked a glass tray with Nutmeg and Golden Blends 2 Inks and added a small amount of water to each ink. I placed the tag in both ink mixtures and once completely covered I removed and let dry. I placed the tag in the Woodgrain Embossing Folder and place between cutting plates and run through the Diecut MachineI inked two Art Daubers with Nutmeg and Flagstone Blends 2 Inks and lightly ink over embossed area and edges of tag.


I inked the glass tray with Stop Blends 2 Ink, added water to the ink, loaded a paint brush with ink mixture and splatter tag. Next I inked the glass tray with Nutmeg Blends 2 Ink, added water to ink and added half of the Handwritten Creative Card to ink mixture. Once completely covered I removed and let dry. I placed the inked card on top of the Rectangle diecut and place between cutting plates and run through diecut machine. I adhered the diecut off center of tag.


Next I placed a piece of watercolor paper on top of three gear diecuts from the Sprightly Sprockets Diecuts and placed between cutting plates and run through diecut machine. I inked the glass tray with Nutmeg Blends 2 Ink, added water to ink and place gear diecuts in ink mixture. Once completely covered I removed and let dry. Next clean the glass tray and ink with Copper and Rose Gold Blends 2 Inks  I loaded two Art Daubers with inks and randomly ink all three gear diecuts and circle diecut from the center of one of the gear diecuts. I applied Opalescent Embossing Powder to all diecuts and set with a Heat ToolI inked all diecuts randomly with Top Boss Clear Embossing Stamp Pad and applied more Opalescent Embossing Powder to diecuts and set with heat tool.


I adhered the gear diecuts to tag and added four gold gems to sprocket gear diecut.


Next ink the letters "dad" with Wicked Black Archival Dye Ink and stamp onto the circle diecut. I cut three nine inch pieces of cording and tie off at the top of tag.


I punched a hole in the circle diecut and with wire snips I cut a small amount of 24GA Brown Bend Wire and thread through cording. I added circle diecut and twist to secure diecut. I curled the wire around pencil. I finished by adding three sequins and a gem to the corner of circle diecut. As always if you have any questions about this project please let me know.


SUPPLIES

ColorBox/Eileen Hull: Nutmeg Blends 2 Ink
ColorBox/Eileen Hull: Golden Blends 2 Ink
ColorBox/Eileen Hull: Stop Blends 2 Ink
ColorBox/Eileen Hull: Copper Blends 2 Ink
ColorBox/Eileen Hull: Flagstone Blends 2 Ink
ColorBox/Eileen Hull: Rose Gold Blends 2 Ink
ColorBox: Art Daubers
Park Lane: Woodgrain Embossing Folder
Glass Tray
Paint Brush
Beacon Adhesive: Zip Dry Adhesive
Spellbinders: Sprightly Sprockets Diecuts
Tag
Max Stamp Pegz: Lowercase Letters Set
Sequins
Gems
24 GA Vinyl Coated Bead Wire-Brown
Cording

(Products listed above are Affiliated Links for your convenience)


Thanks for stopping by, hope your Tuesday is wonderful and enjoy creating!


Tuesday, May 14, 2019

Daydream Paper Clip

Hi everyone! I want to share another project, a paper clip I altered, that was shown in ClearSnap's booth this past January at Creativation .


I placed the cloud stamp from the Butterfly Clear Stamps onto an Acrylic Block/Precision Press(retired) and inked with Leather Premium Dye Ink and I stamped randomly on one side of the folded piece of cardstock. I inked an Art Dauber with Bahama Premium Dye Ink and lightly ink edges of banner and the cloud images.


I cut the stamped clouds cardstock 8"x3 1/2" and fold in half, 4"x3 1/2". I cut a "v" in the end of cardstock to create a banner.


I placed the Daydream stamp from the Butterfly Clear Stamps onto an acrylic block/Precision Press(retired) and inked with Leather Premium Dye Ink and stamped onto a piece of cardstock. Next I cut and folded, inked the edges with Sandstone Premium Dye Ink using an art dauber. I cut two smaller banners from patterned cardstock and slide all stamped and patterned cardstocks around the jumbo paper clip and adhered together.


I punched out a mini butterfly from cardstock and inked an art dauber with Rose Premium Dye Ink and inked the mini butterfly, adhered to the "Daydream" banner and add a Black Gem to the body.


I placed the outline of the Butterfly stamp from the Butterfly Clear Stamps onto an Acrylic Block/Precision Press(retired) and inked the stamp with Leather Premium Dye Ink and stamped onto a piece of White CardstockNext I placed the "filled in" image of Butterfly stamp onto an acrylic block or Precision Press...be sure to line up the stamp with the stamped Butterfly cardstock image...ink the stamp with Sandstone Premium Dye Ink and stamp on top of the stamped butterfly image.


I inked three art daubers with the following Premium Dye Inks: RoseRaspberry and Dandelion and inked the majority of the wings with Rose Premium Dye Ink, ink a small portion of the wings, next to the brown, with Raspberry Premium Dye Ink and the inner and the outer portions of the wings with Dandelion Premium Dye Ink. I fussy cut the butterfly image out.


I adhered the butterfly to paper clip banner, added three Black Gems to the body and clear glitter glue to the dots on the butterfly. I looped several gold metallic and yellow threads and glue underneath the butterfly.


SUPPLIES

ColorBox: Art Daubers
4" Jumbo Paper Clip
Gold Metallic and Yellow Thread
Clear Glitter Glue
Various Patterned and White Cardstock
Beacon Adhesive: Zip Dry Adhesive
Acrylic Block/Precision Press(retired)/MISTI Stamping Tool
Mini Butterfly Punch

(Products listed above are Affiliated Links for your convenience)


Thanks for stopping by, hope your Tuesday is wonderful and enjoy creating!