Pages

Monday, January 25, 2016

Once Upon a Time There was a Fairy that Lived in a Vase

Hi everyone! I am back with my other vase I created using Eileen Hull's 3D vase diecut. As  with the other vase I cut it out from mat board and spritzed with Verdigris glimmer mist...one of my favorite Tattered Angels products! Once dry I glued the vase together.


The fairy image I found on the Land of Nod Studio blog. I printed, fussy cut the image out and added Stickles to the wings.


I added crinkled tissue inside of the vase and then adhered moss and the fairy image on top on the tissue paper.


The pansy/flower diecut is new from Eileen Hull...which hasn't come out yet so I don't have a link to that so stay tuned. :-) I actually watered down Sugar Plum Fairy (discontinued)  and Moss glimmer mists and painted the flower shapes on both side and let dry. 


Once the flower pieces were dry I shaped and put together. I added a button and Dew Drop to the center and adhered to the fairy along with pink tulle and sewing thread.


I added sequins and mini flat back pearls to finish off the vase. 


Here are my two vases along with past projects...snowman candy drawer and you can barely see the corner of the suitcase (pink and lime green) in Eileen Hull's booth at CHA. :-)
I hope you enjoyed this project and if you have any questions please let me know.


Thanks for stopping by, hope your Monday is awesome and enjoy creating! 


Sunday, January 24, 2016

Bloomin' Vase

Hi there! I hope everyone is warm and safe and had no problems with the "big" snow storm that came through. We only got over at inch of snow and our electricity didn't go out...YEAH!  I am getting around to sharing a few more projects that I created for CHA and the one today was in Eileen Hull's booth. The 3D vase diecut was a re-release diecut of Eileen's. I had actually won this diecut for one of her Art with Heart Challenges.
I cut it out of mat board and spritzed with Tattered Angels Dragonfly Glimmer Mist and let dry and then put together.


Donna who is on Eileen's inspiration team with me sent me these flowers since I didn't have the diecut yet. These flowers where cut with the Flower and Leaf Stitchlet thinlits Dies. I shaped the flowers and added buttons to the center of each one.


Next I stuffed some tissue paper down into the vase and adhered moss on top on the tissue and then added the flowers. Wa-laaa very simple project! :-)
If you have any questions about this project please let me know. Also be sure to check back on Monday for another take on the vase diecut. :-)


Thanks for stopping by, hope your Sunday is wonderful and enjoy creating!


Saturday, January 23, 2016

Canvas Banner of Love Banner

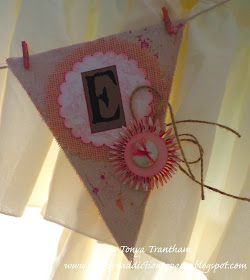
Hi everyone! I am back to share a banner I created for Canvas Corp's booth at CHA. I used a variety of canvas shapes as follows: Canvas Pennants, Pocket and Tag to create the bases for a love banner. I spattered and sprayed all of the shapes with the following glimmer mists and glam glitter paints: Cadillac Pink, Wedding Pink and Grandma's House.


I cut a scalloped circles from Lt Pink Burlap and Pink and Ivory Toile Cardstock to add to the various banner shapes.


I cut the letters LOVE from the Black on Kraft Alpa cardstock. and framed with some of the letters with Pink Lemonade Thickstock and a heart was cut from the Pink Lemonade for the center banner too.


I adhered a Vintage Brass Heart along with pink thread, button and dew drop to the corner of the heart.


On a couple of the banners I used White Mini Bags in a fun way to frame some of the letters along with Lace, thread and Jute.


The medallions for some of the banners are cut from Pink and Ivory Ribbon Stripe cardstock which I punched out and added Pink Lemonade Thickstock circles to the centers along with a button and some Jute.


When all the banners where finished I spaced and clipped with a Mini Lt. Pink Clothes Pin to Waxed Cotton White Cord. There you have it a simple Valentine's Day banner.


Here are a couple of photos that my friend Jennifer took of my banner being displayed in Canvas Corps booth.


If you have any questions about how this banner was made and put together please let me know.


Thanks for stopping by, hope your Saturday is wonderful and enjoy creating! 


Monday, January 18, 2016

Crafty Card Gallery: You are the Bee's Knees

Hi everyone! I am here to share a card for Crafty Card Gallery blog and this month's theme is CHA inspired. Since I had some of my projects in some of the booths at CHA and I had used digital images/vintage theme I chose to go that route with my card.
For more info and photos you can find my blog post HERE.


Thanks for stopping by, hope your Monday is awesome and enjoy creating!


Wednesday, January 13, 2016

Vintage Lady and a Rose

Hi everyone! I am here to share a project I created using Eileen Hull's Box Diecut and her new flower and leaf diecuts which I don't have a link to those yet since they haven't came out  but I will try and come back and add the links when they are released. :-)
I had actually decorated this box several months ago and the idea I had for it wasn't going to work out so I put it aside and "sat" on it.


The vintage woman printable I purchased from Eclectic Anthology's Massive Vintage Victorian Graphics and Clip Art Bundle. I sized the image down, printed off and then fussy cut out...also the butterfly printable is from The Graphic Fairy.


I filled the inside of the box with tissue and then adhering the woman, tulle and moss in the box. The rose I spritzed with Wedding Pink Glimmer Mist, let dry, shaped and glued together before adhering to the moss and tulle in the box. Also I added a little bit of Stickles to the edges of the flower. 


The leaves I used a variety of chalk inks to both sides of the diecut and then I shaped with a stylus and added to the top of the box and to the rose. I adhered flat back pearls and lace to the box to finish it off. If you have any questions about this project please let me know.


Thanks for stopping by, hope your Wednesday is awesome and enjoy creating!


Monday, January 11, 2016

Toilet Paper Roll Birdhouse

Hi everyone! I am here to share a project I created for the Robin's Nest to use in their booth at CHA trade show. If you don't know what CHA is it stand for Craft and Hobby Association and it is a conference and trade show.


The theme of the Robin's Nest booth was birdhouses and for my birdhouse it started out as a lowly toilet paper roll. I cut a piece of Saffron Honey Cardstock to fit around the roll and I adhered the script/scroll of cardstock side up to the roll with Antique Mod Podge. Also I cut a scalloped circle from the same cardstock but used the backside. I inked the edges, cut a slit to the center of the circle and then adhered the two edges together to create a roof for the birdhouse which I glued to the top of the TP roll.


Next I cut and adhered a small square of Moss Green Glitter Cardstock to the bottom of the roll to create a base to glue moss, paper flowers and twigs. The flowers I added to the centers buttons and Dew Drops for a fun effect.


I punched a circle from the Smoky Chevron Cardstock, inked the edges and adhered in the middle of the swirly pattern on the roll. Next I cut a small piece of the Birch Tree Paper Straw off, inked all over and glued under the circle. Though this birdhouse looks hard to do it was really easy to put together.


This is a photo of the birdhouse at CHA and Rachel the owner of The Robin's Nest is holding it so my friend Jennifer can take a photo of it. That was one of many exciting moments of projects at CHA (meaning more blog posts to come ;-) ). If you do have any questions about this project please let me know.


 Thanks for stopping by, hope your Monday is wonderful and enjoy creating!


Saturday, January 9, 2016

Washi Tape Booklet

Hi everyone! I am here to share a quick project I created for the same swap where I altered the cigar box for Lisa. I wanted to make something to hold samples of washi tape and I thought Eileen Hull's Needle Book was the prefect solution. I cut a Needle Book from mat board, embossed with Floral Tapestry embossing folder and spritzed with Cadillac Pink Glimmer Mist. Once dry I added a piece of cardstock and a printable bird that I had laying around from a pervious project to the front. I punched small holes in the front and back covers and tied off thread in each hole. Also I added a brad to the front to cover the hole.


Inside I adhered a strip of cardstock to the inside covers. I used the packaging from a Sizzix diecut and cut it down slightly smaller that the book and then rounded the corners with my Paper Gator Corner Rounder. I carefully folded the plastic into to create a page and then punch two small holes in the fold. Before sewing the plastic into the book I picked some of my favorite rolls of washi tape wound them off onto the plastic and used a needle and thread and stitched it to the spine of the book.


I finished off with some lace on the cover and fiber on the spine. Here is a helpful hint if you do use packaging it can sometimes be tricky to work with especially when folding in half because it can crack in the middle. So be careful and if you know of a better solution please let me know. :-) Also if you do have any questions about this project please let me know.


Thanks for stopping by, hope your Saturday is awesome and enjoy creating!


Thursday, January 7, 2016

Pretty in Pink Altered Cigar Box

Hi everyone! I hope everyone had a wonderful holiday. Ours was great even if we had massive amounts of rain it was still nice to be able to spend it with family. :-)
After taking a tiny break from social media I am back to share a project I created for a swap I was in with my sweet friend Lisa on Swap-bot.


For this swap we agreed to alter a small cigar box and fill it with planner goodies.


Since one of Lisa's favorite colors is pink I went with a dusty colored cardstock from My Mind's Eye for the outside of the box. The image I found on Tammy Tutterow's site. I sized it down, printed and fussy cut out. I used a combination of buttons, dew drops, store bought and handmade flowers to decorate the lid.


The inside of the box I used the rest of the My Mind''s Eye cardstock and the vintage print cardstock is from a discontinued line from Canvas Corp. Also I forgot to mention that I painted the edges of the box with a cream colored paint (no need to paint the whole box since you won't be seeing that :-) ) and used Antique Mod Podge to adhere all cardstock to the box. Once dry I applied a coat over the whole box to seal it.


The fun part was adding all the goodies. I added journaling cards, sticky notes, shaped paper clips, washi tape and a 4" book ring so she can add her favorite washi tapes to so she can keep those close at hand. :-)


There you have it my first project of the year! :-) If you have any questions please let me know.


Thanks for stopping by, hope your Thursday is wonderful and enjoy creating!